Serves 4-6
Level of difficulty 4

Procedure:
Caponata filling
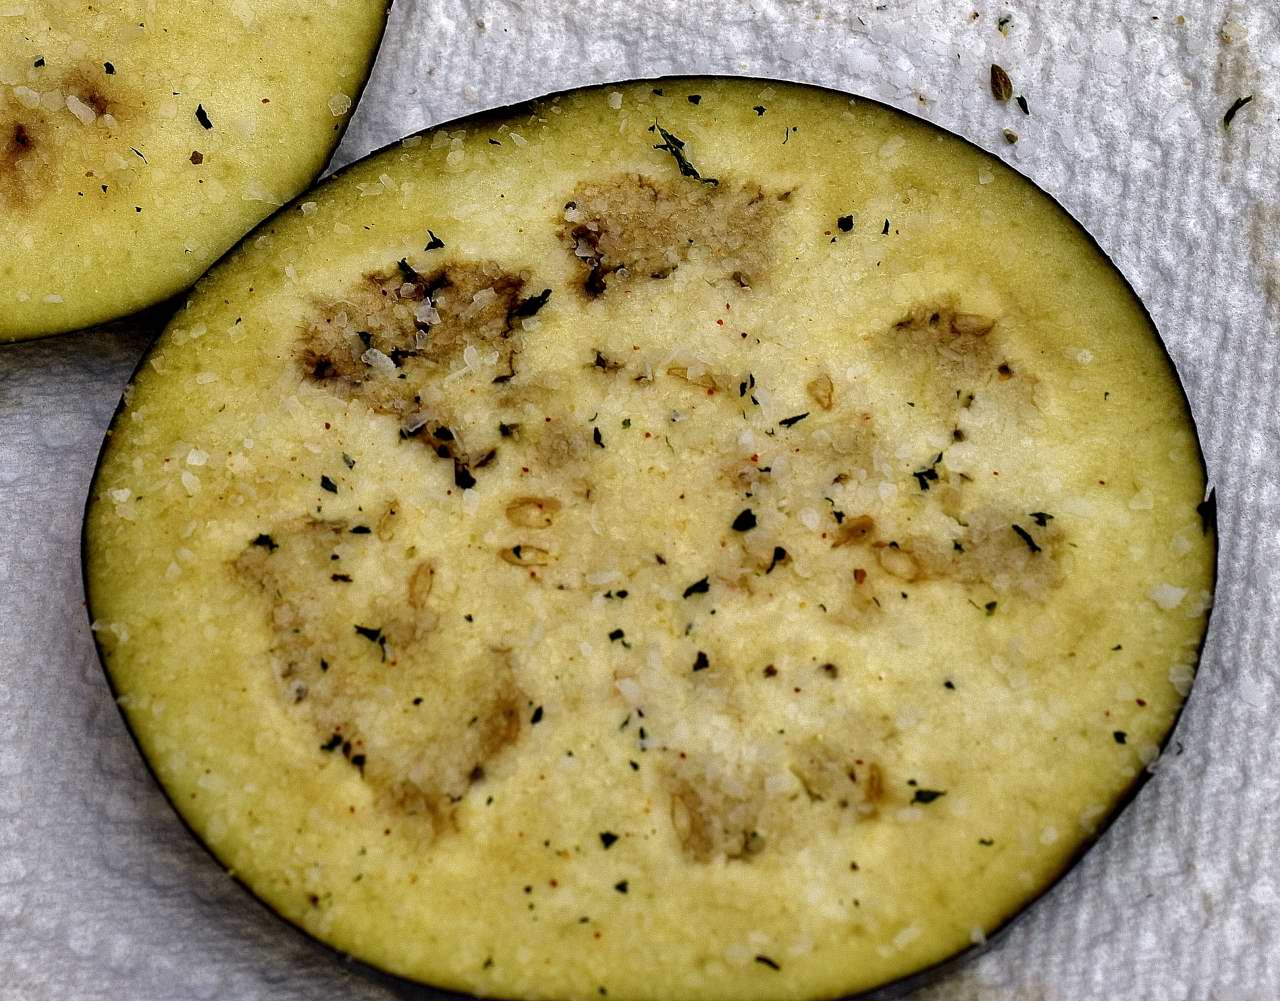
Slice the eggplant to 0.5″/1.25. cm. Put a paper towel on a plate and lay the sliced eggplant on top.

Sprinkle lightly with kosher salt and lay another paper towel on top. Set aside.
Peel the carrot and cut into fine dice. Put the carrots in a heat proof bowl or dish and bring 2 cups/0.5 liter water to a full boil. Pour the water over the carrots. Wait ten minutes and drain–return the carrots to the bowl.

Cut the bell pepper into flat pieces and lay on a heat proof surface. Use the propane torch to scorch the skin side only. Seal the peppers in a small Ziploc bag–this helps loosen the skin. While you wait for the peppers to cool, cut the Andouille sausage into fine dice, stage into its own bowl and refrigerate.
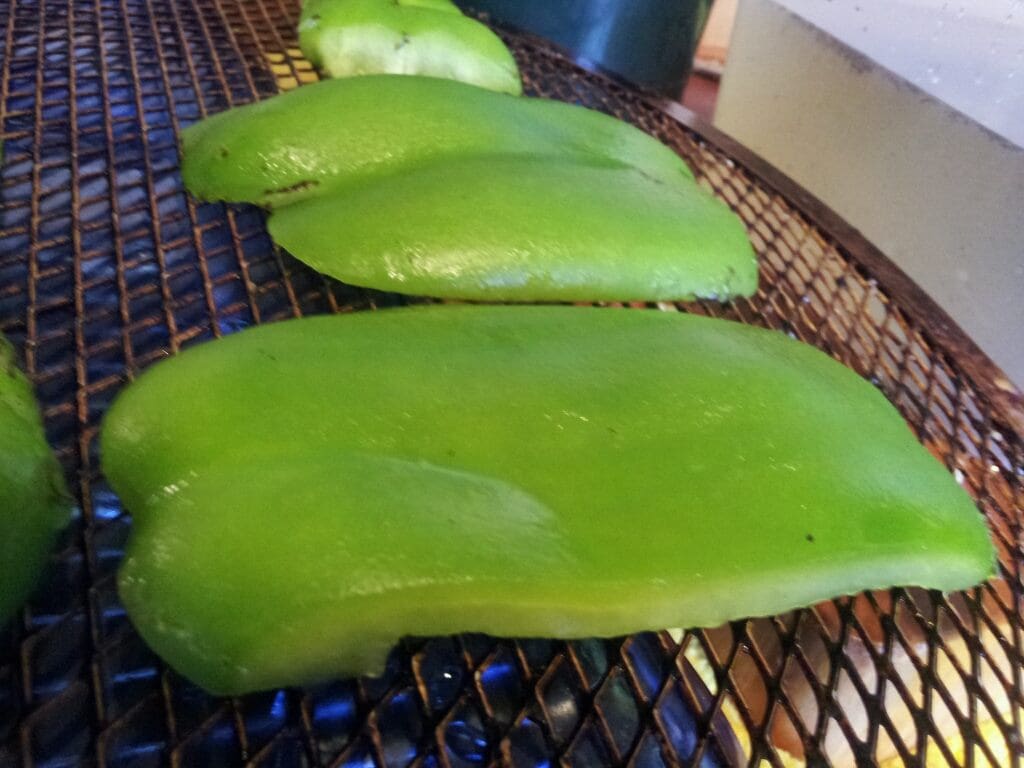
Submerge the peppers in cold water and rub with your fingers–most of the skin will come off. Remove from the water and rub with a paper towel to remove the rest. Cut the peppers into fine dice, the olives into fourths, and the green onions into razor thin slices; add to the bowl with the carrots. Add the capers, a pinch of salt and pepper and a few drops of olive oil. Toss lightly and refrigerate.

Remove the paper towel from the top of the eggplant and drizzle with just a few drops of oil (or use cooking spray/PAM). Heat the cast iron grill pan or skillet to 350 F/176 F. Dip a paper towel in vegetable oil and rub the surface of the pan (or spray). Grill the eggplant on one side until dark marks appear, about one minute. Do not dispose of the plate with the paper towel. Turn the eggplant over and cook for thirty seconds only. Remove the eggplant from the pan and return to the paper towel. Set aside to cool.
Cut the eggplant slices into sixths. Toss lightly with the rest of the vegetables. Return half of this vegetable mixture to the refrigerator. Stage the other half of the mixture into the Kitchenaid bowl (or a mixing bowl). Add the generic sausage and the Andouille. Mix for thirty seconds. This will give you approximately 12 oz/350 g of filling. Spread an 18″/50 cm sheet of plastic out on the work space.
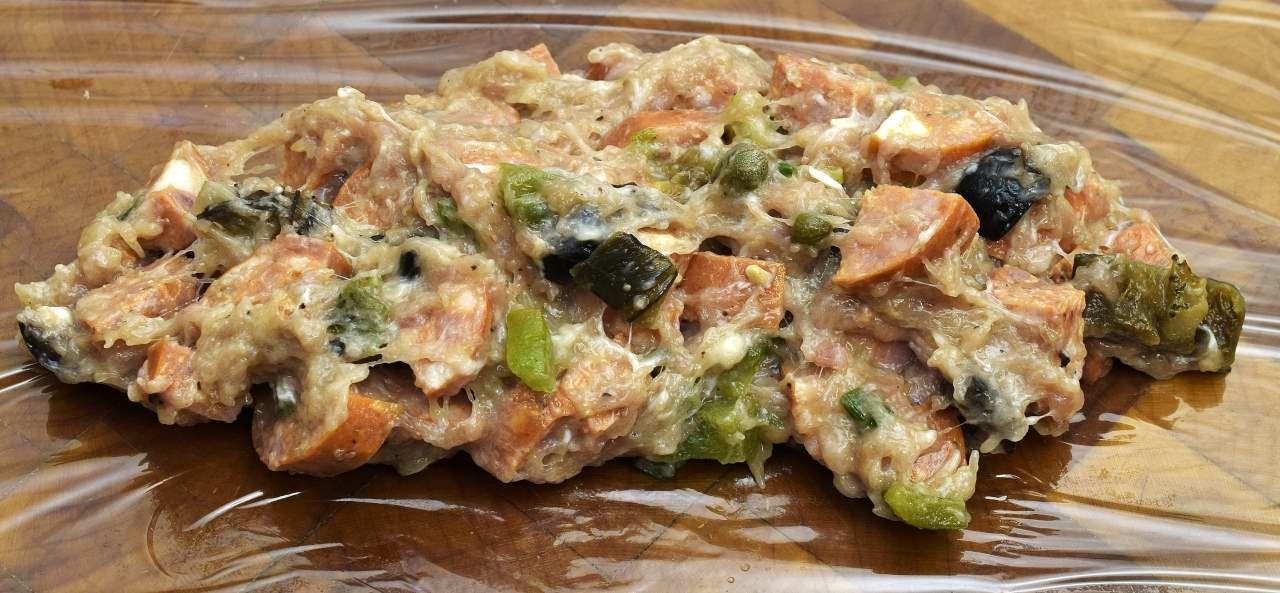
Stage half of the filling on to the plastic.
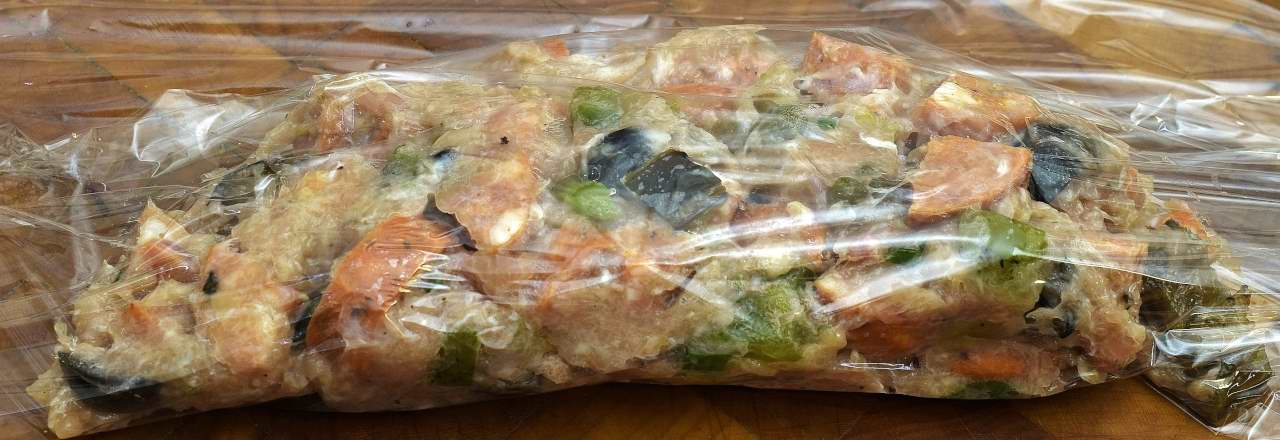
Fold one side of the plastic over and form into a roughly shaped log.
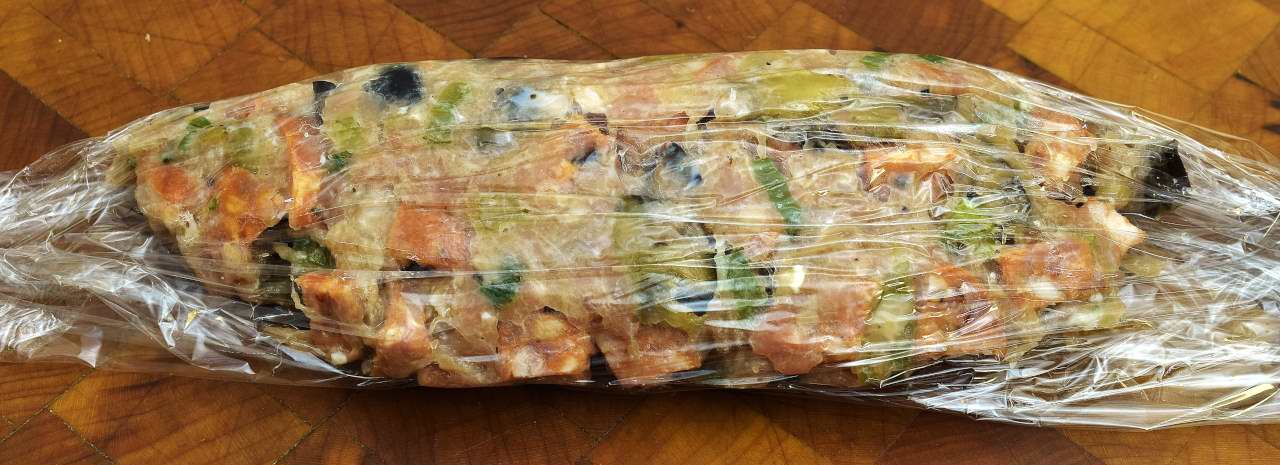
Finish rolling the first log up in the plastic–it should be approximately 8″/20 cm long.
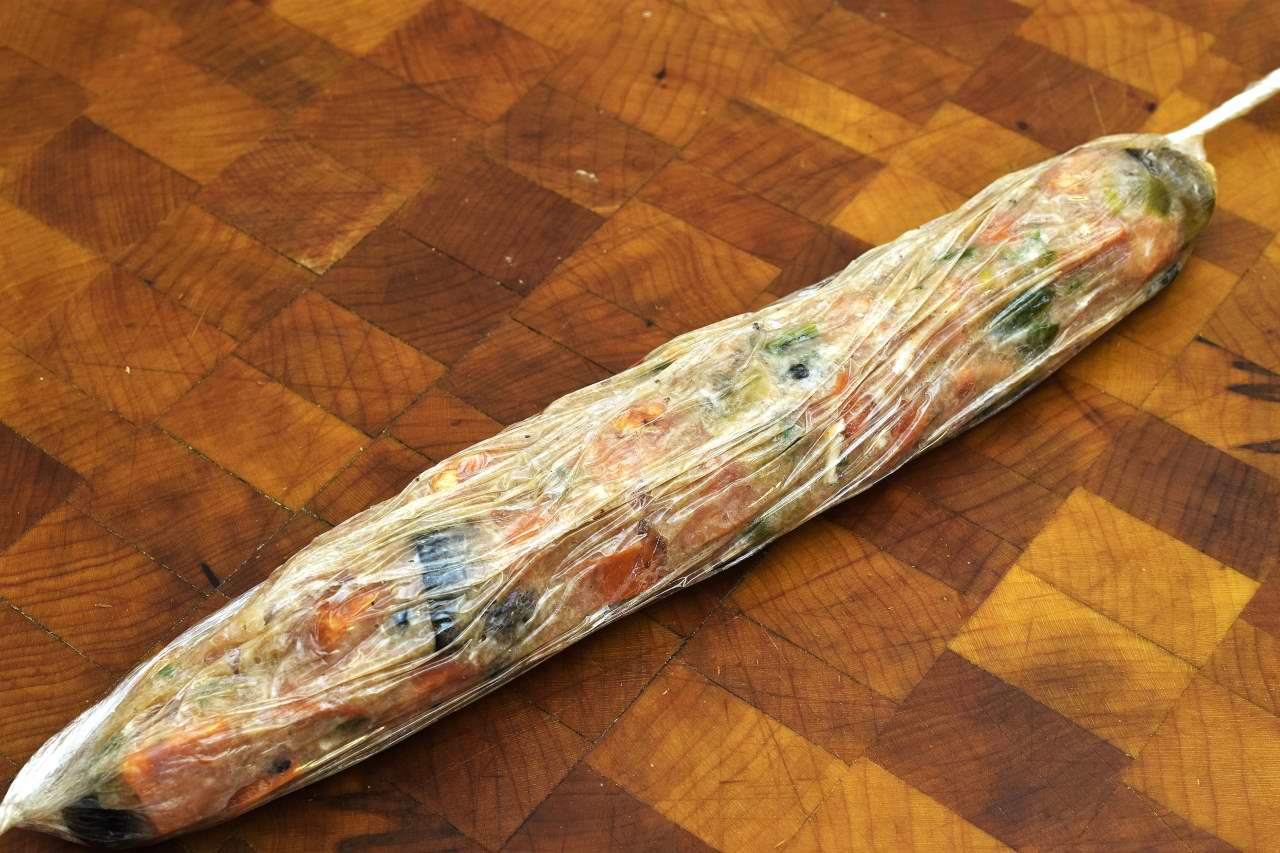
Twist the ends to complete forming the cylinder. Repeat the process with the other half of the sausage. For best results, put the logs on a plate or small cookie sheet and FREEZE until solid.
Shaping the chicken.
Lay a sheet of plastic wrap on a thick cutting board or steady work surface that will not vibrate from the impact of the meat mallet on the chicken. A quake-proof table or counter will reduce by half the time required to pound out the breasts.
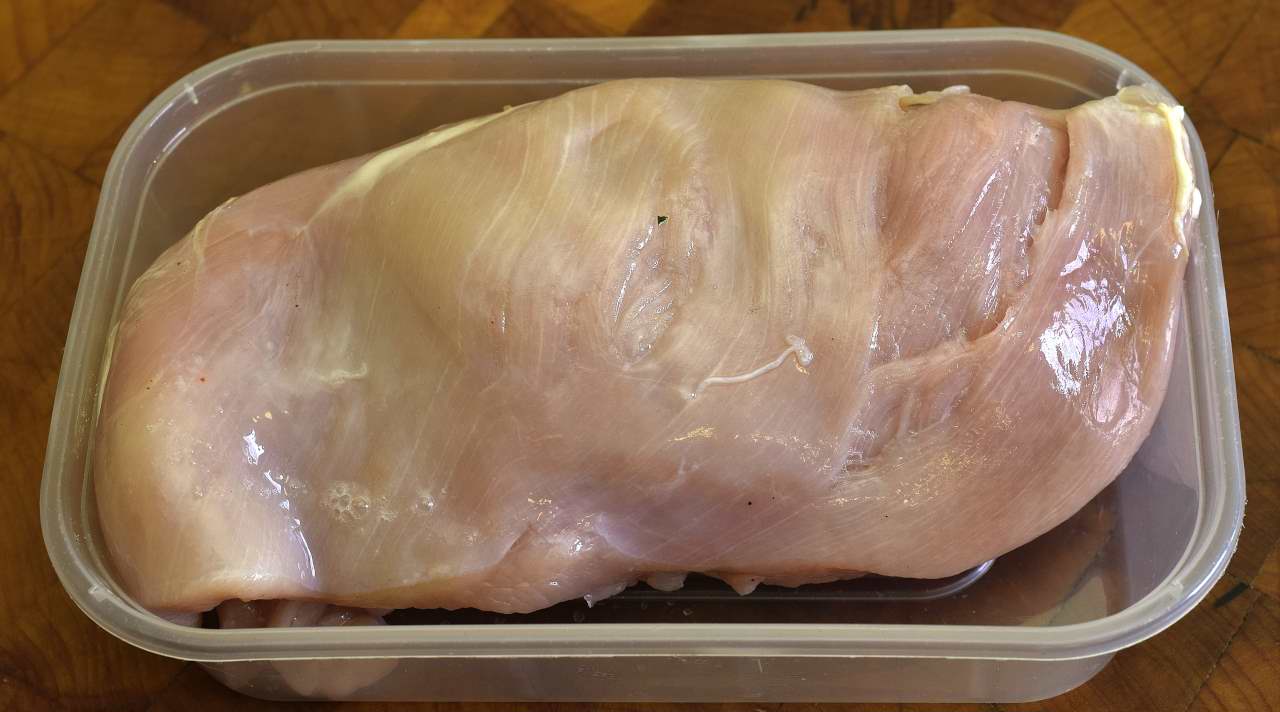
 Lay a boneless breast on the sheet of plastic, smooth side down.
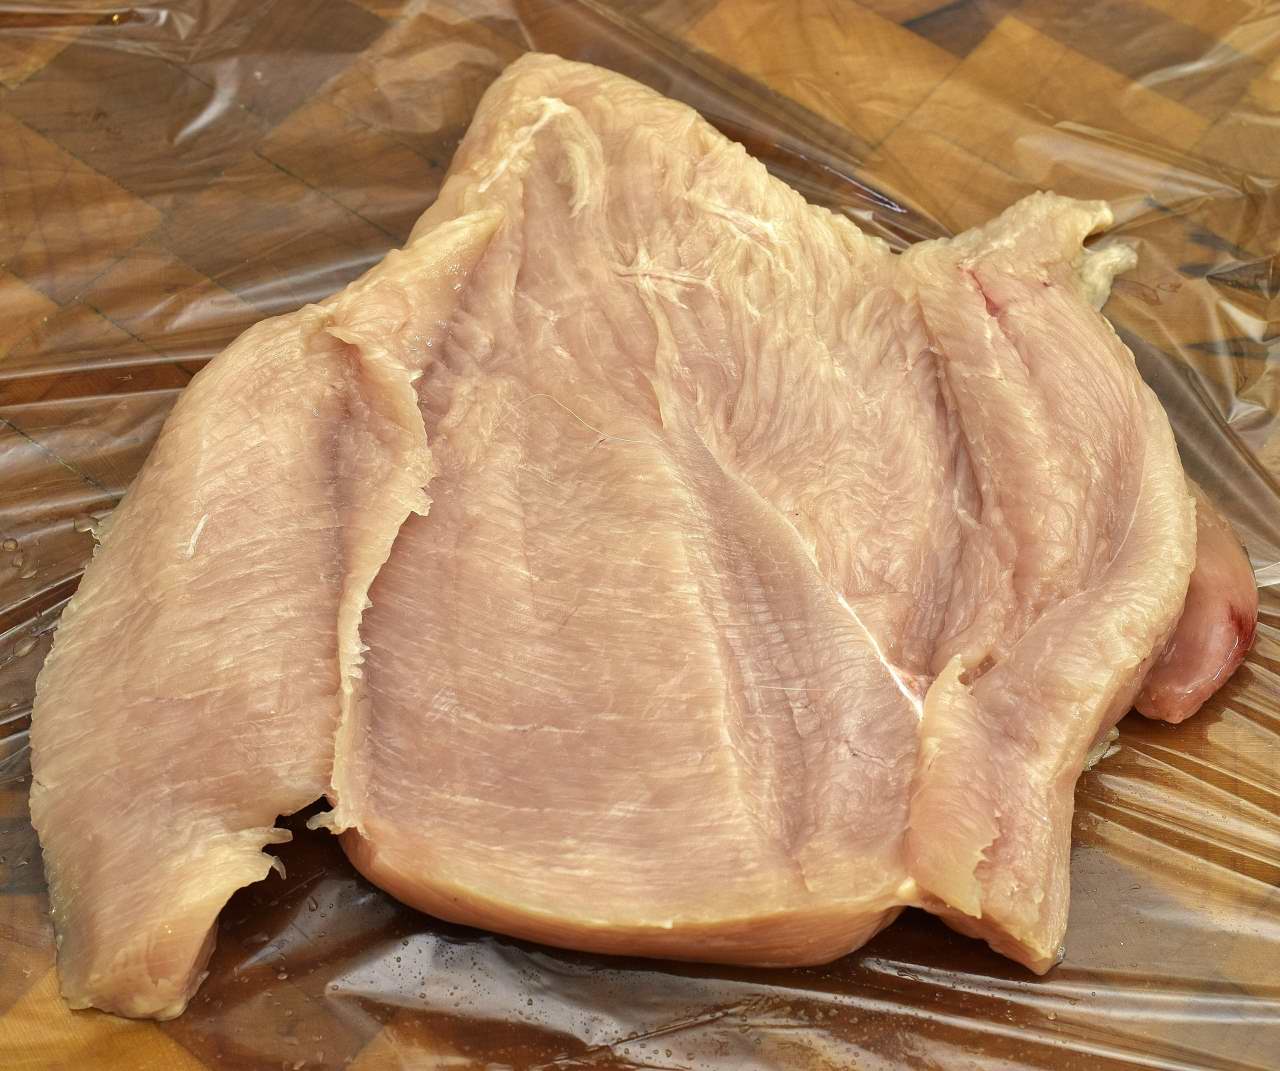
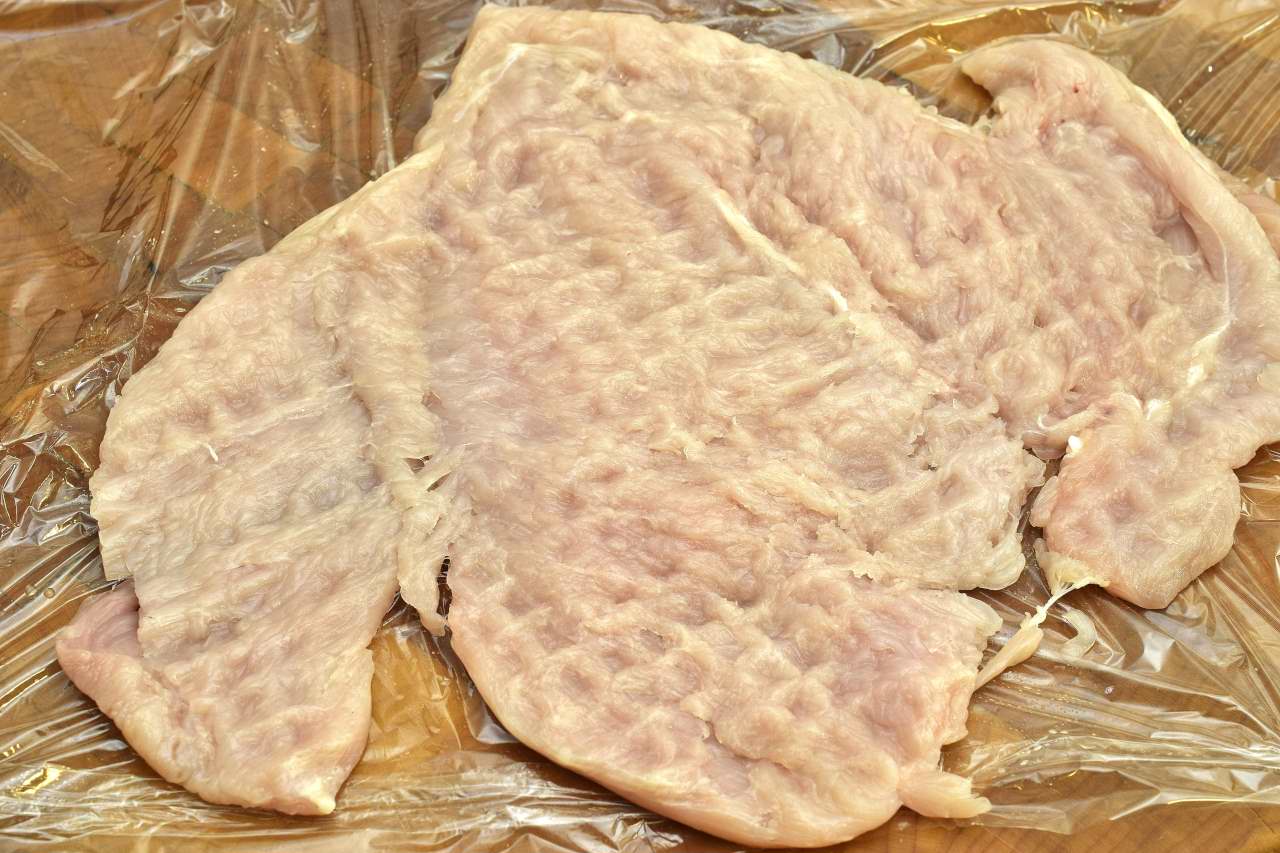
Starting in the middle, make lateral incisions to create a breast of uniform thickness. This makes it easier to pound it out without tearing the meat. Lay another sheet of plastic wrap on top. This prevents the mallet from sticking to and damaging the meat. It also protects your walls and apron from being splattered by tiny particles of chicken.

Use the meat mallet to flatten the chicken. How thin? Pound the chicken as thin as possible without compromising the structural integrity of the meat itself. You will know that it is too thin if it falls apart when you attempt to pick it up. Stop before it gets to that point!
Repeat the process with the rest of the plastic covered breasts and stack them up. Wash your hands well. By now the filling should be almost frozen. If not, stage the breasts into the refrigerator and take a little break. Check your messages, the score of the game, etc.
Preheat the sous vide bath to
135 F/58 C
Remove the top layer of plastic from one of the breasts.
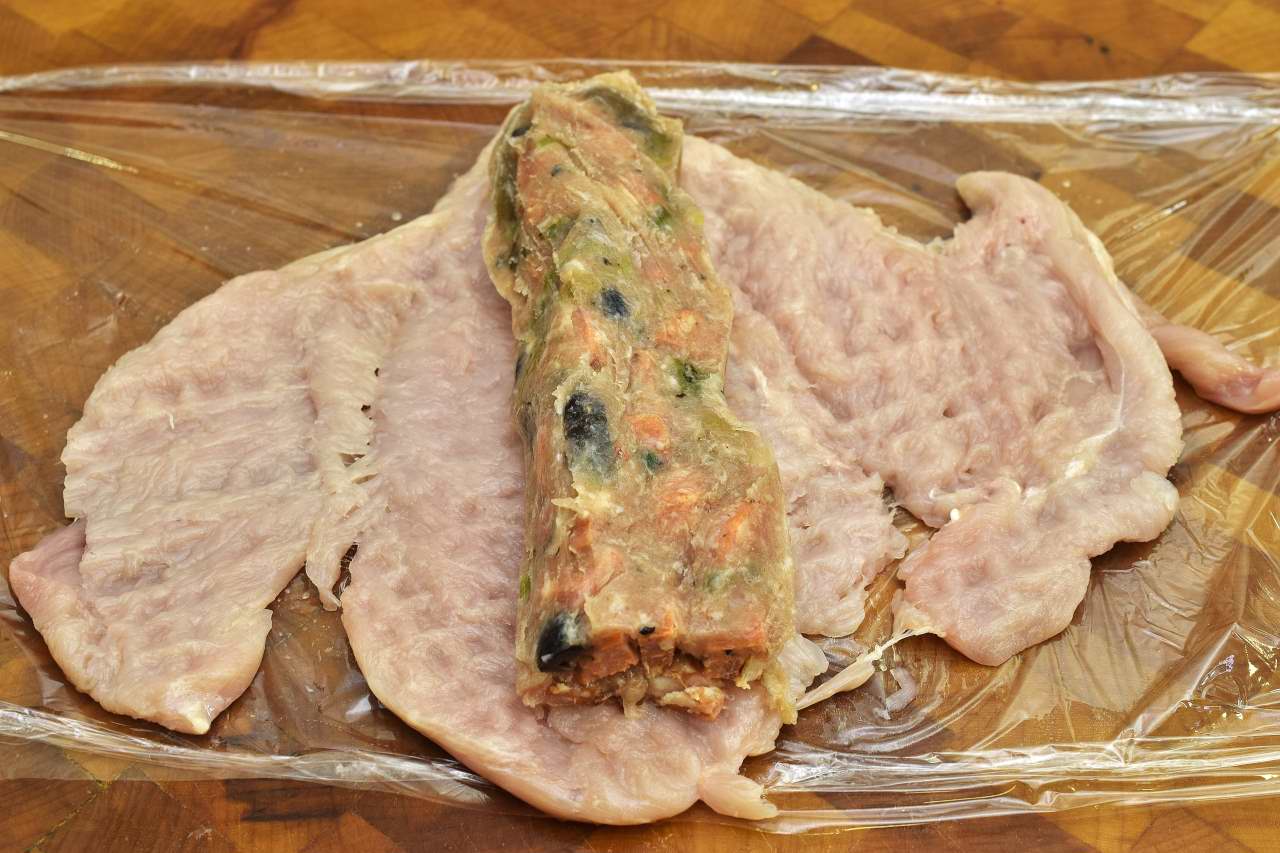
Sprinkle with about 0.5 teaspoons of kosher salt and a pinch of pepper. Remove the plastic from the frozen sausage log, cut it in half and center on the chicken breast.

Turn the breast 90 degrees and fold the bottom of the breast over the filling.
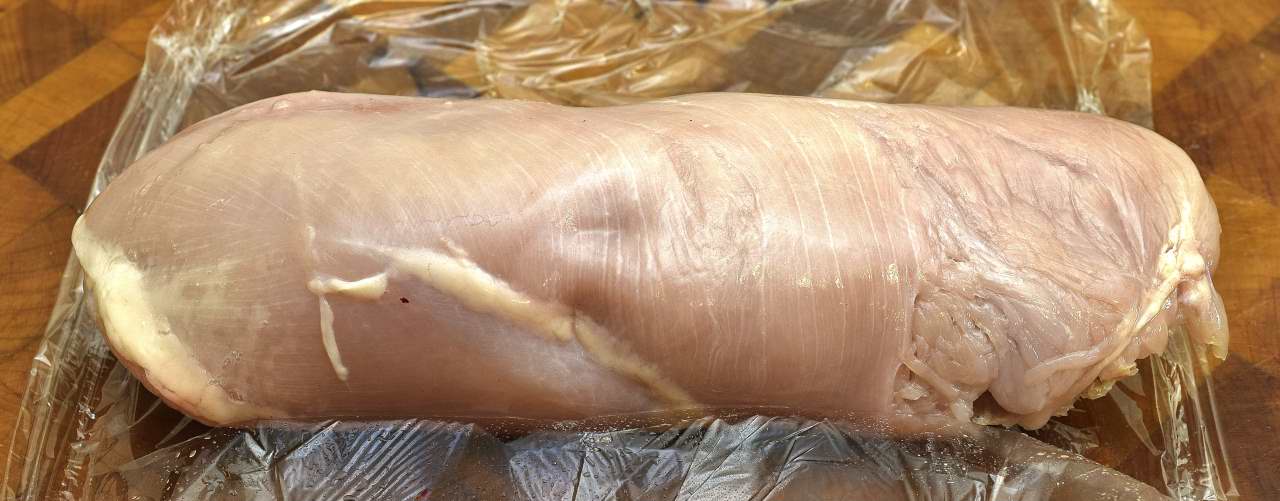
Continue rolling up the breast like a cigar or whatever. The seam should be on the bottom. Fold the plastic over the cylinder and roll it again. Twist the ends to secure the parcel. Carefully stage the log into a vacuum bag and seal. Store in the freezer while you prepare the rest of the breasts.
OR…
Place the chicken in a small tray before vacuuming. This really makes things easy and helps regulate the chicken’s shape. These 17 oz/500 ml trays are inexpensive and heat rated. They are available on line from the retailer named after a South American river. Click on the link HERE.
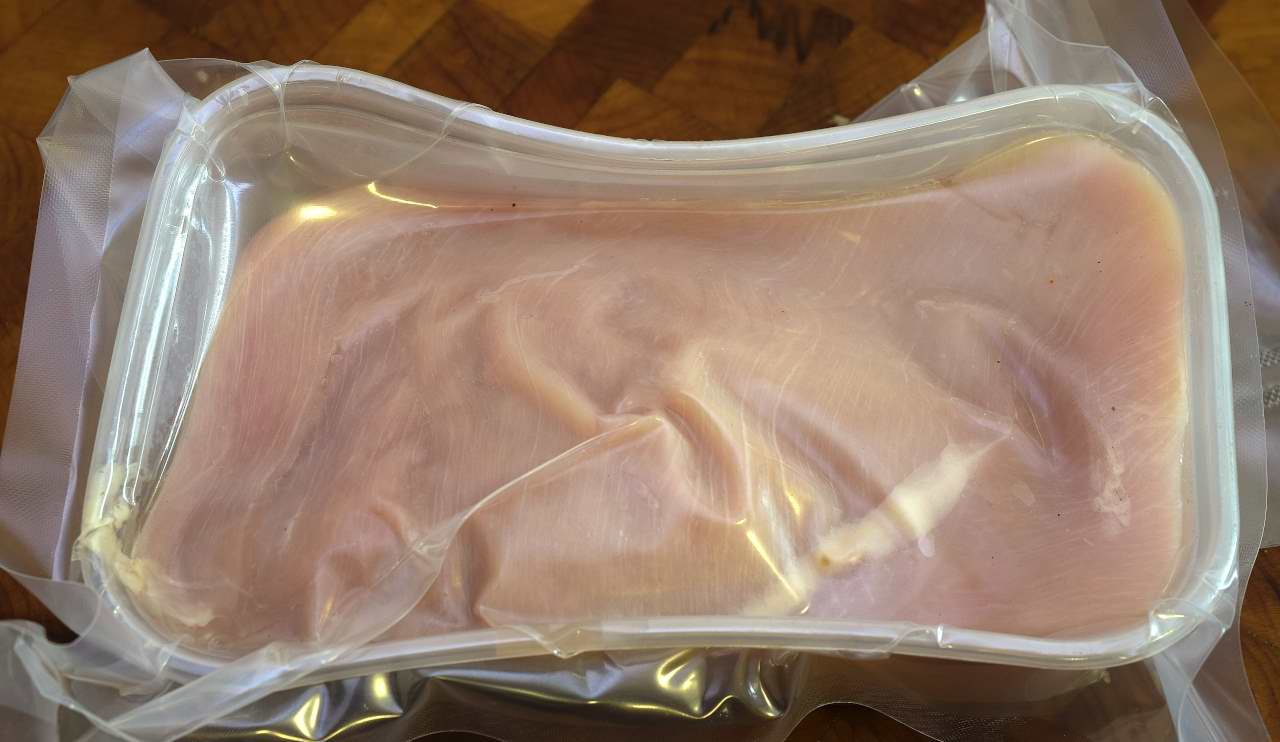
Put the tray with the chicken in a vacuum bag and seal. Repeat the process with the rest of the breasts.
Process the chicken for a minimum of 4 hours at 135 F/58 C.
Note: Let sous vide work for you!
It is not necessary to rush to service at exactly that moment when the chicken is “done.”. Once the four hours has elapsed, the stuffed chicken is fully pasteurized. If desired, you can lower the temperature in the bath to 130 F/54 C and hold the chicken there for at least another four hours without affecting the quality or safety of the chicken in any detectable way. You can also shock the sealed package in iced water until it achieves 70 F/21 C, refrigerate at 40 F/4 C and finish it up to a week later. I will explain how this is done as we proceed.
Warming up
Preheat your kitchen oven to
400 F/204 C.
Turn the hood fan on “high.” I recommend opening a draft window in the kitchen and elsewhere in the house if possible. It is better to do this in advance as opposed to groping for the latch after your kitchen has filled with smoke. Little things.
Remove the stuffed breasts from the bath and submerge in cold tap water for five minutes–this will make it easier to handle. Remove from the bag and pat dry. You may see a little filling “peeking out” from the chicken–this is the result of the pressure exerted by the vacuum. Some practitioners notice this and fear that the package will leak or come apart. It won’t, as long as the filling is designed to become more solid when cooked as opposed to less so. Cheese fillings, etc. tend to “drain out” during cooking, whether the seal is tight or not.
Packaging
Use a pastry brush to paint the chicken generously with the Dijon mustard.
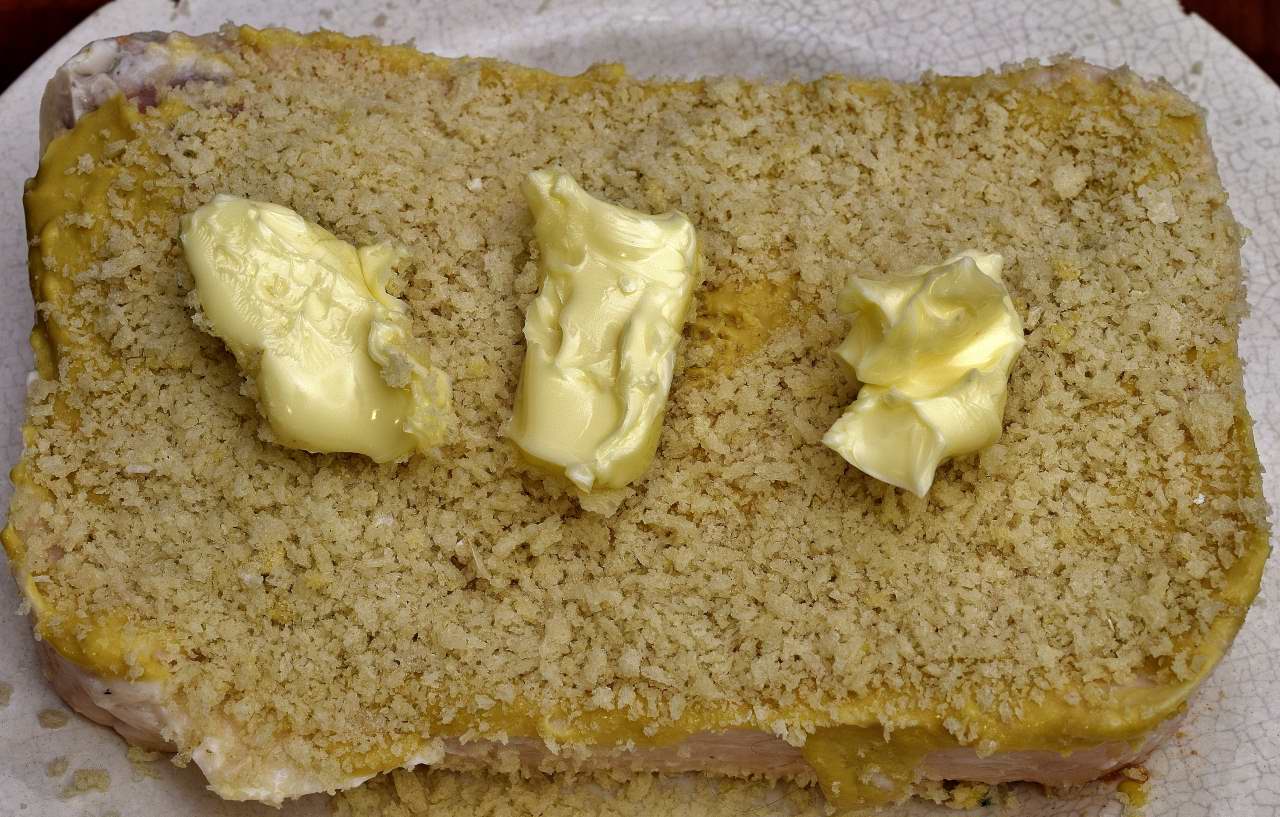
Sprinkle panko crumbs over the wet surface and pat down lightly. Repeat with the other breast. This method prevents your hands from getting wet. Dot or drizzle the topping with butter.
Crusting
Stage the chicken breasts into the 400 F/204 C oven.
For best results, do not open the oven for ten minutes. The chicken will not burn in such a short amount of time. Take that time to finish the caponata.
Caponata Agrodolce
Heat the skillet to 350 F/176 C. Add a few drops of oil and the rest of the vegetable mixture that you saved. Toss in the hot pan and squeeze the lemon into the mixture. Add the sugar and tomato paste and reduce the heat to low. Add a pat of butter and toss lightly.
Open the oven and examine the chicken. If the chicken was fresh out of the bag, it will take approximately five more minutes. If the chicken was shocked cold, it will take approximately ten more minutes. Since the chicken is already pasteurized, you need only concern yourself with the appearance of the crust. If desired, you can use the broiler function at the end to finalize the color–if you do this, do not close the door or attempt to multi-task. The browning process will proceed very quickly under these circumstances.
Note: If you chose to shock the chicken cold with the intention of serving it at a later date, you should use a probe thermometer to confirm that the internal temperature achieves at least 140 F/60 C–approximately 20-25 minutes, total.
Safety first
Use a dry towel or hot pad to remove the sheet pan from the oven. Turn off the oven and stage the plates in to the still hot oven. Use a metal spatula to remove the chicken from the pan and place on the work surface/cutting board. Remove the sheet pan to the “dish washing station.” The chicken is extremely hot at this point. Attempting to carve now could nullify all the effort you have put into your project so far. Relax. Wait five minutes while the chicken cools and the plates get hot. Little things.
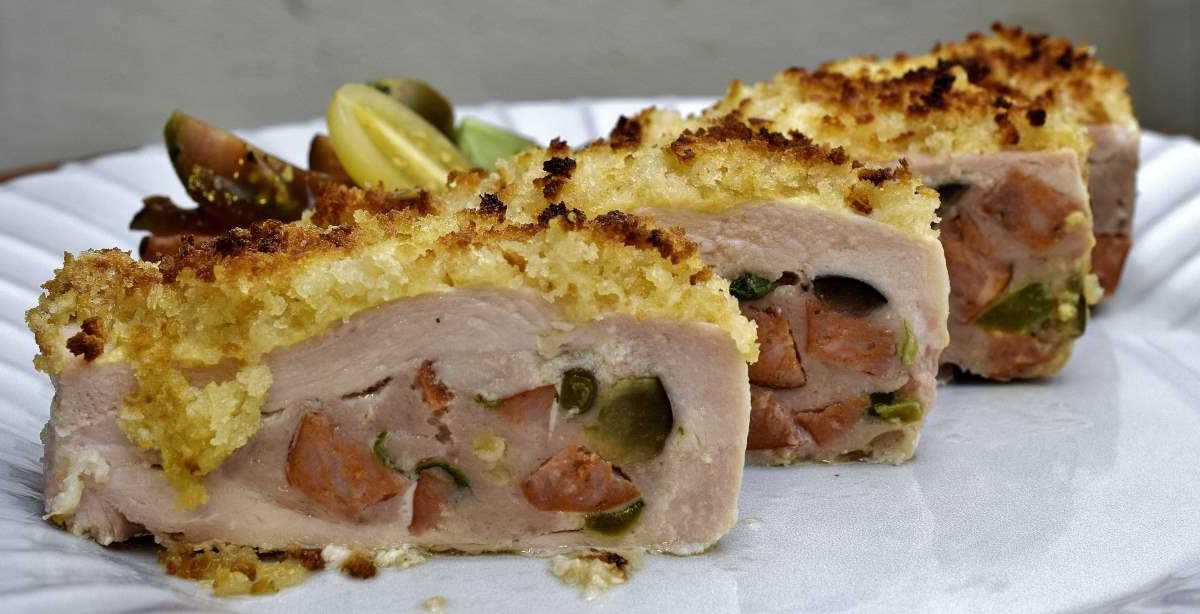
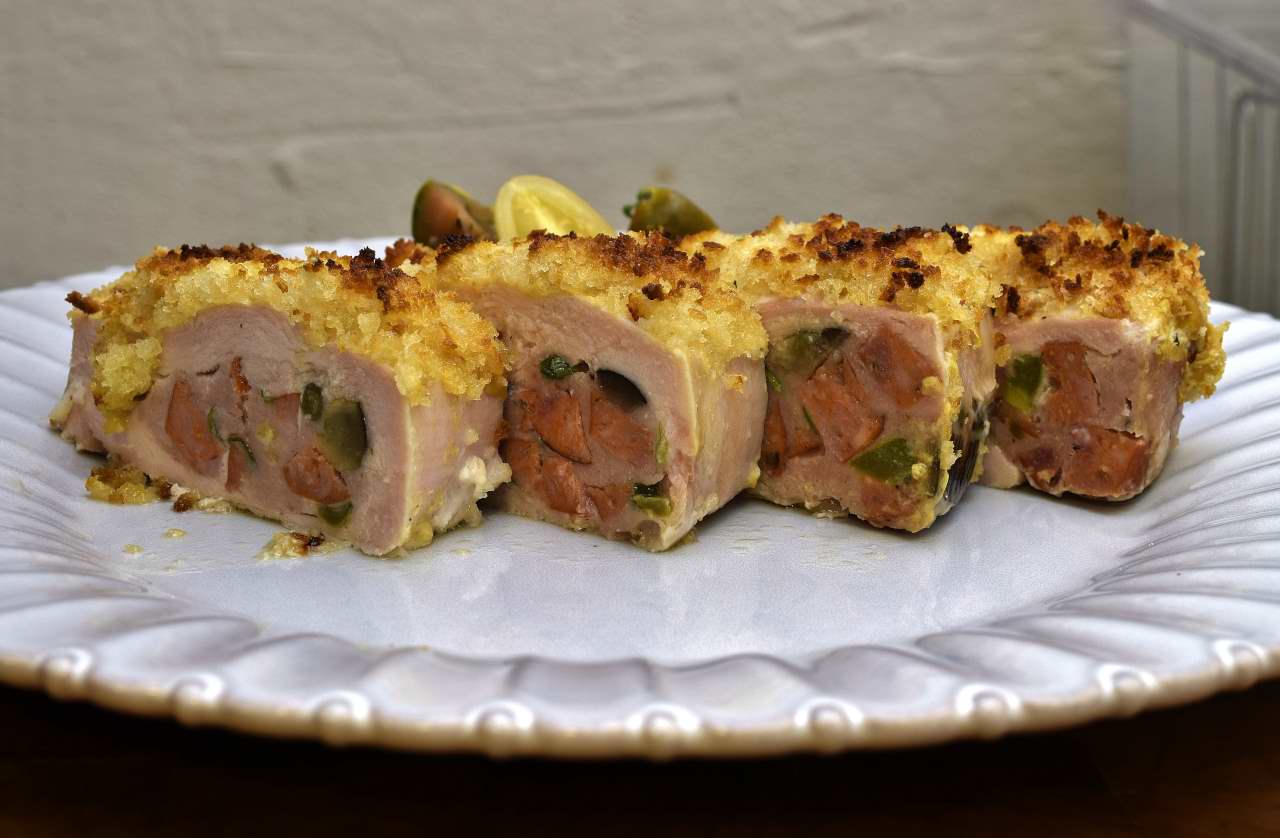
Service
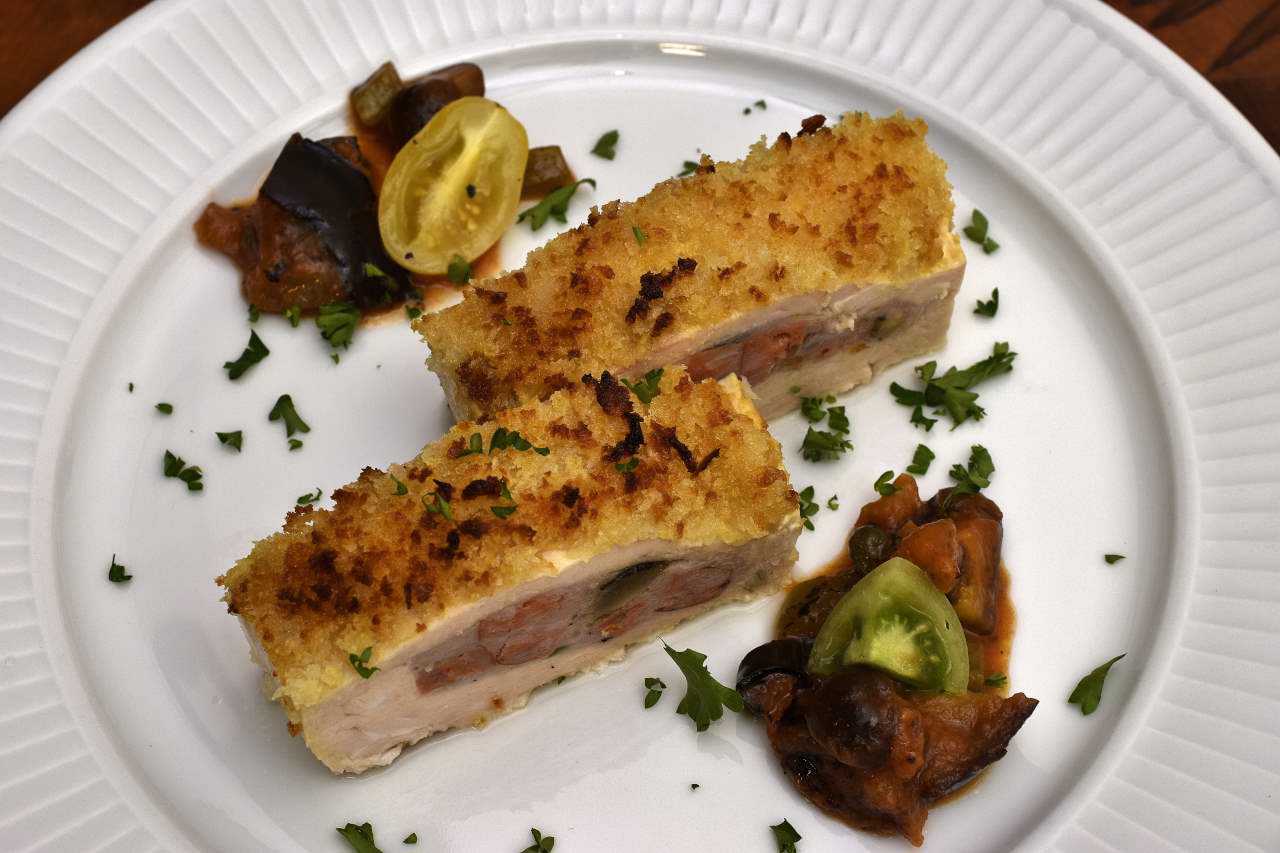
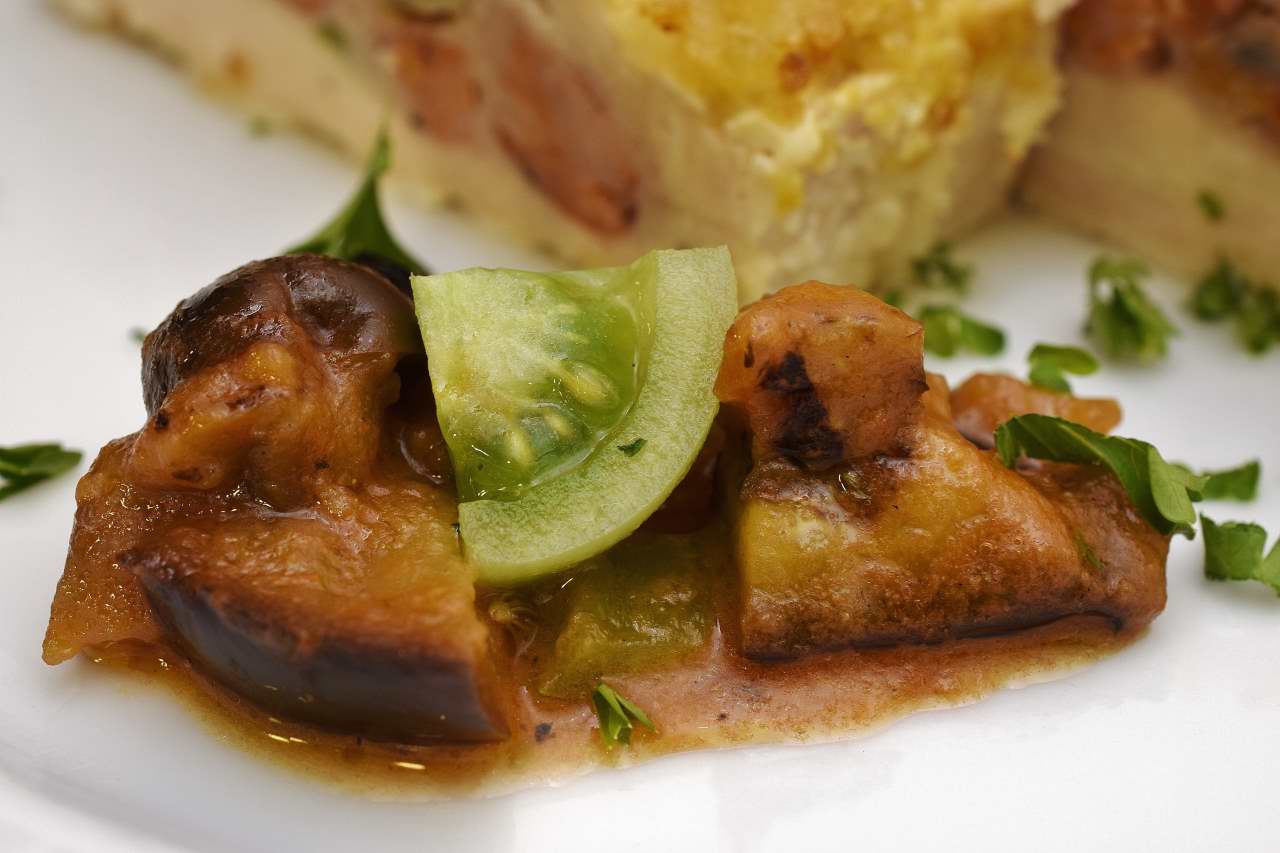
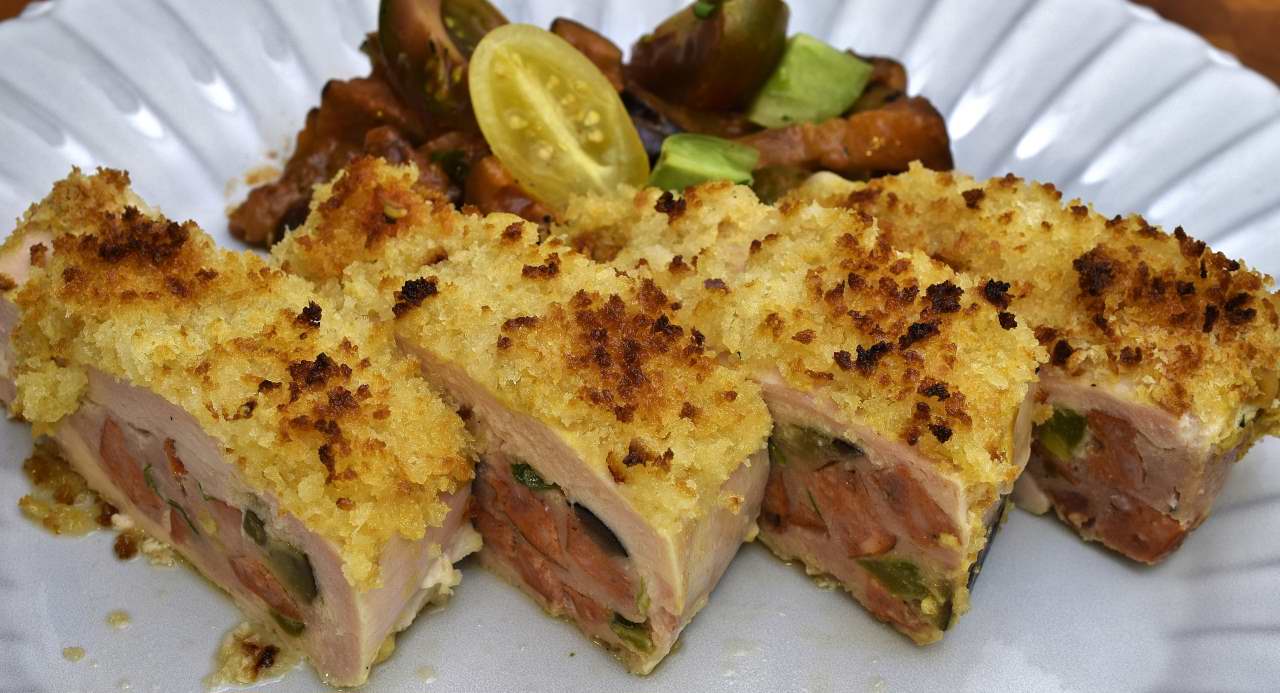
Use the heated caponata as garnish on the plate. Arrange the cherry tomatoes on top of the caponata.
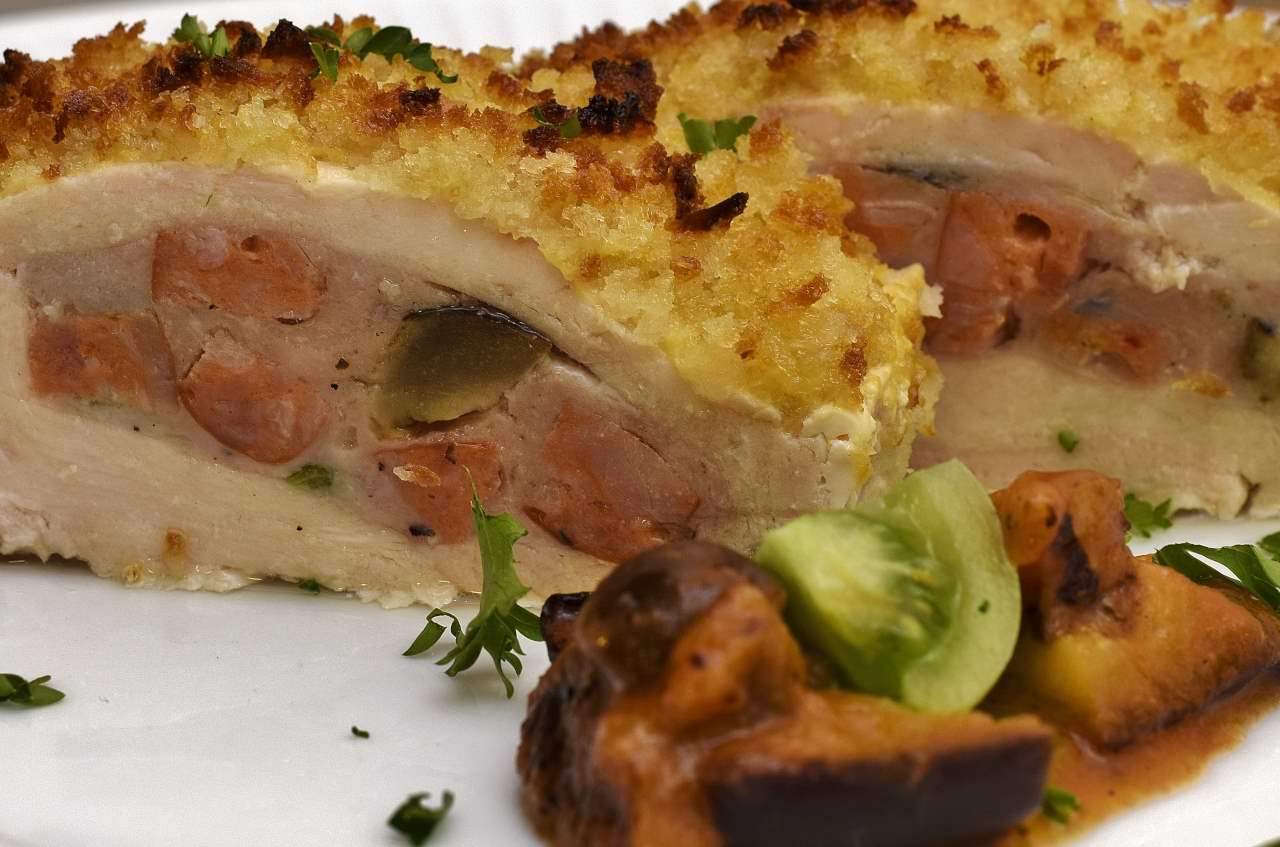
Carve the chicken breasts and stage onto the plates. Garnish with chopped parsley if desired. The carrots, Andouille and eggplant in the filling bring a little kick to the filling, but they also add a splash of color to differentiate your creation from other simple fillings.
Enjoy!
Norm King
Make sure you check out the stuffed legs/thighs too, linked HERE
