Serves 4
Level of difficulty 2.5

Click the link HERE to learn how to portion a whole pork loin for sous vide processing.
“Thinner”
In the traditional preparation, a mallet or rolling pin is implemented to tenderize the pork medallions. Even though sous vide will assure that the meat is tender in its own right, it will still need to be tapped out to adjust its thickness and density. This is part and parcel of the texture profile of any breaded cutlet. Thin slicing or pounding the pork before sous vide processing will not achieve the same effect.
Bread the cutlets, not your hands
Anyone who has ever attempted the “Anglaise treatment” knows that using flour, egg, and breadcrumbs in sequence can create a gigantic mess. It is impossible to keep a station tidy when your hands are coated with a sticky/crumbly substance seemingly devised for the sole purpose of tormenting novices.
Professional cooks do not always execute the process efficiently either. Lazy habits can result in an extended clean-up routine that always seems to require just one more bar towel than you have at your disposal. The most common guideline for this type of breading is to keep one hand dry and one hand wet. Even this is not as easy as it might sound. We need to find a way to keep BOTH hands dry. I believe we have stumbled upon a better mousetrap.
Procedure:
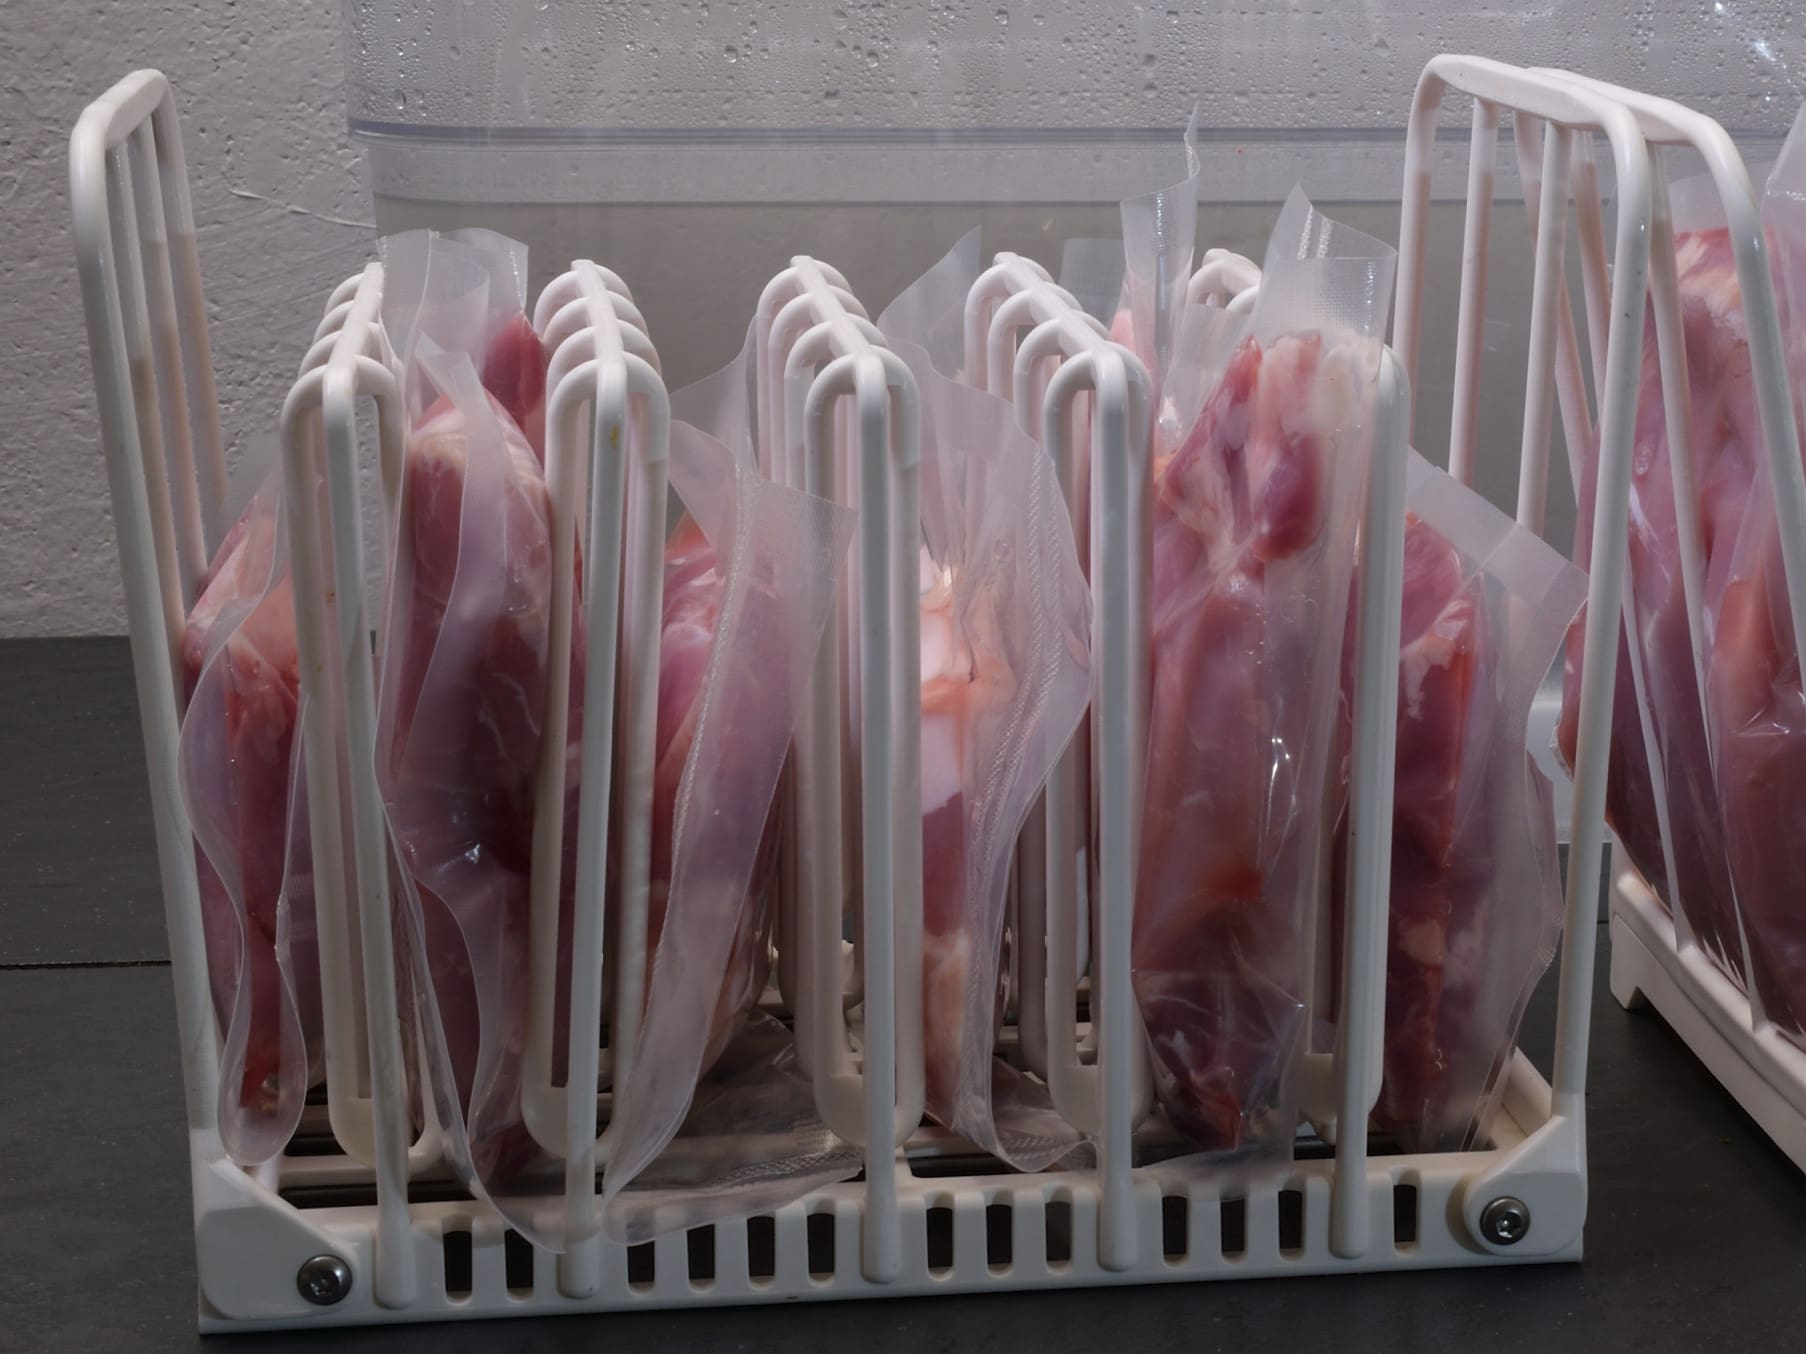
Seal each pork medallion individually in its own vacuum bag. Process in a bath that has been preheated to
131 F/55 C for four hours.
Shock the packages in iced water until they achieve 70 F/21 C–about 15 minutes. Refrigerate to 40 F/4 C before proceeding.
Sauce:
Put the sesame seeds in the blender, cover, and grind until fine. Add the Worcestershire sauce and the soy sauce. Continue blending so that the seeds puree completely. Add the orange juice, molasses, ketchup, brown sugar, garlic powder and ginger.
Most people do not keep Japanese Mirin wine in their pantry, and I wouldn’t go to the store just to get that. If you happen to have some, add it to the sauce. Transfer the sauce to the serving cups and set aside.
Stacked layers
Crack one egg in a small bowl and add 1 oz/30 ml water. Beat well with a fork. Set aside. Put a piece of parchment on a cutting board and put a paper towel on top of it.

Cut off the end of a bag but do not remove the medallion. Squeeze out any excess juices and lay the package on the paper towel.
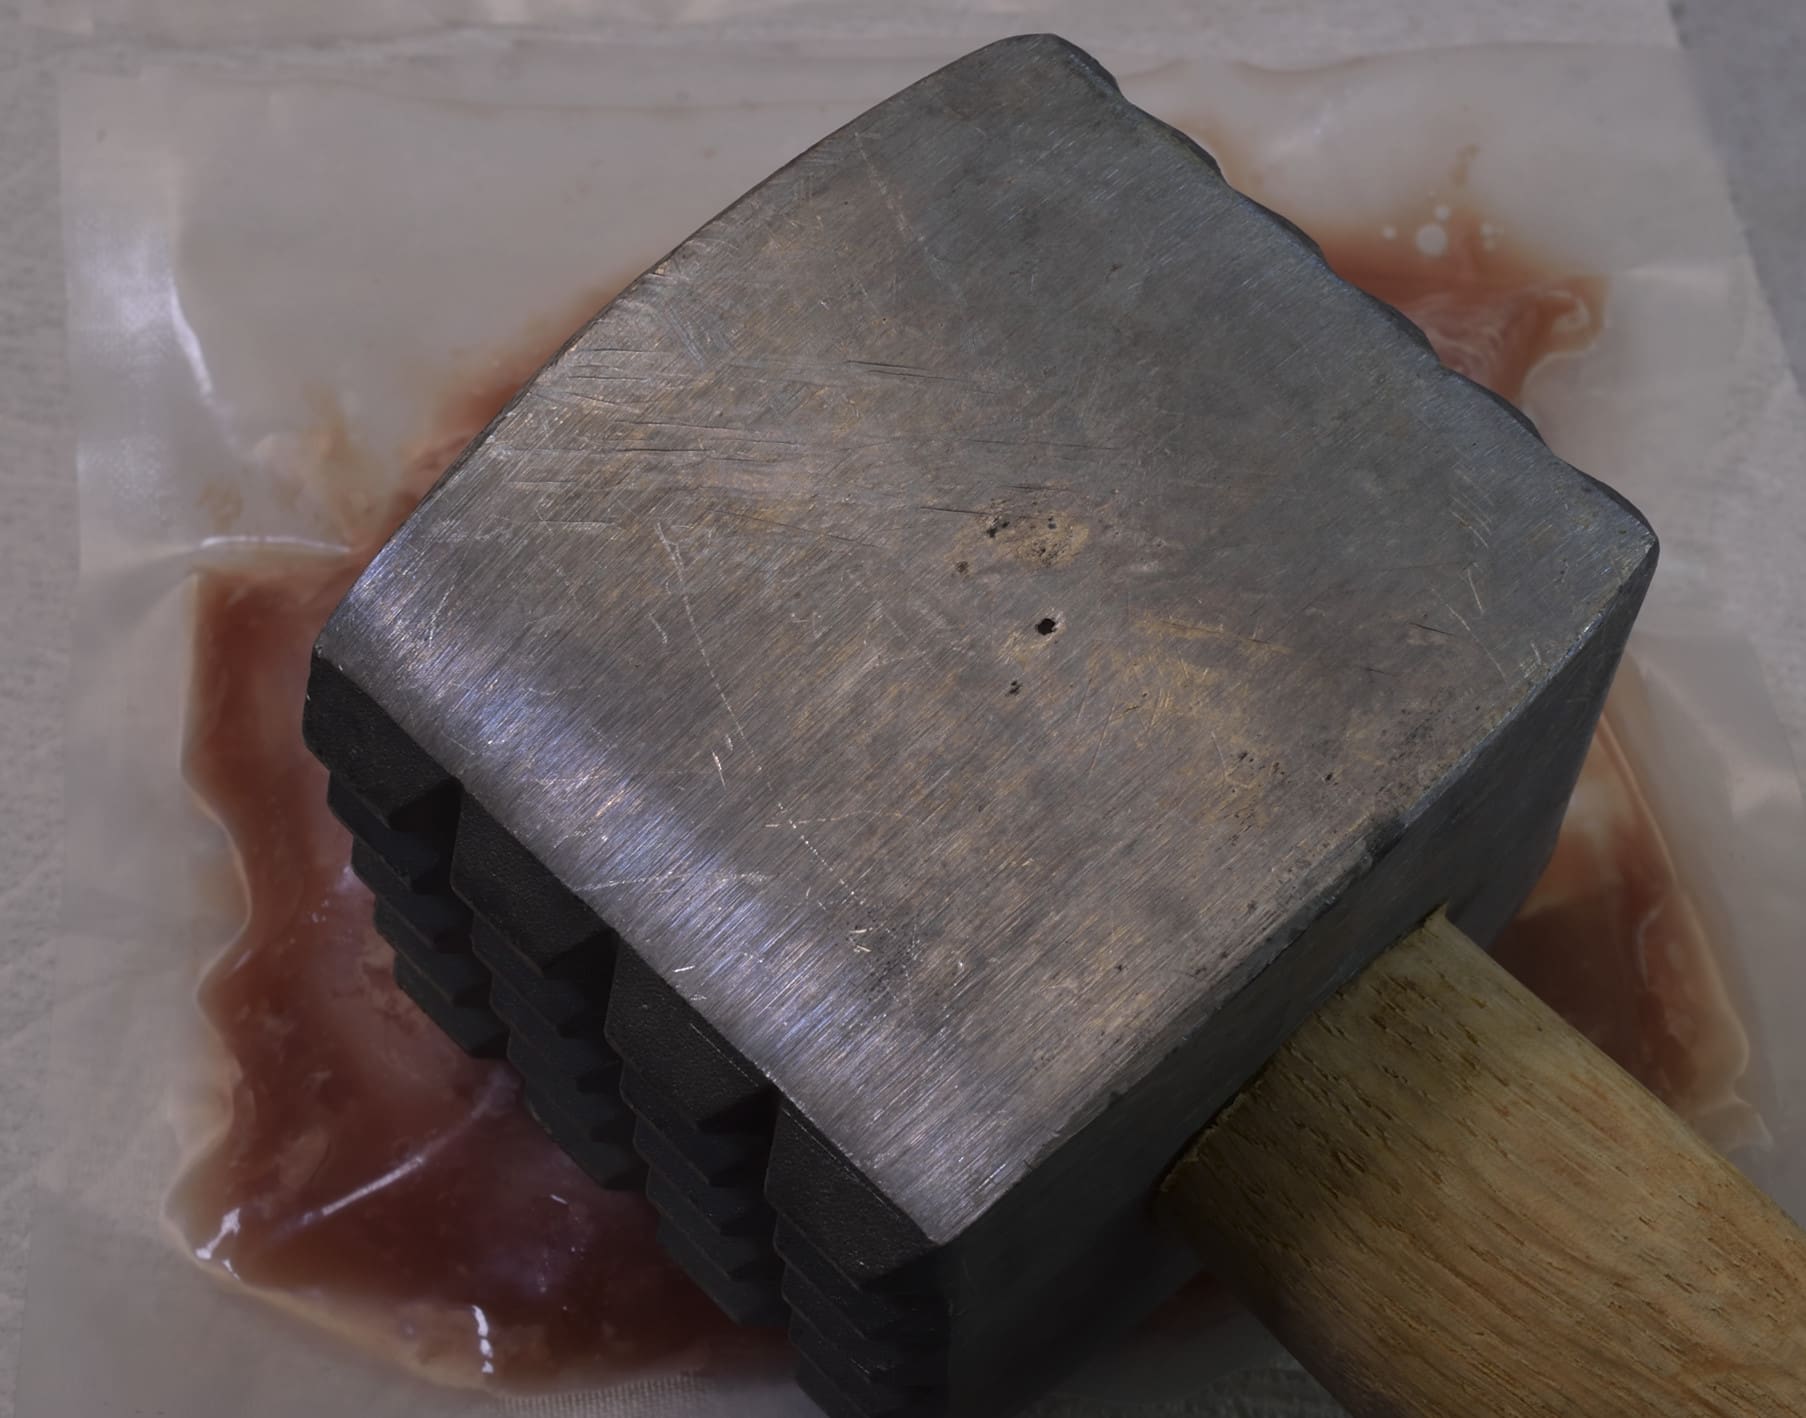
Start by tapping the package gently with the mallet or rolling pin. Note how the meat reacts to the impact so you can monitor just how much force is needed to achieve the desired thickness–as thin as possible with minimal tearing of the meat–a certain amount is inevitable.

The medallion weighs approximately 3 oz/90 g and the bag is 6″/6″, 175 mm/175 mm. This means that when the medallion is pounded out enough, it will completely fill the inside of the bag. Fold the paper towel over the package and set aside. Assuming you are doing more than one, repeat this process with the rest of the medallions

Shake or sift a thin layer of flour on the parchment.
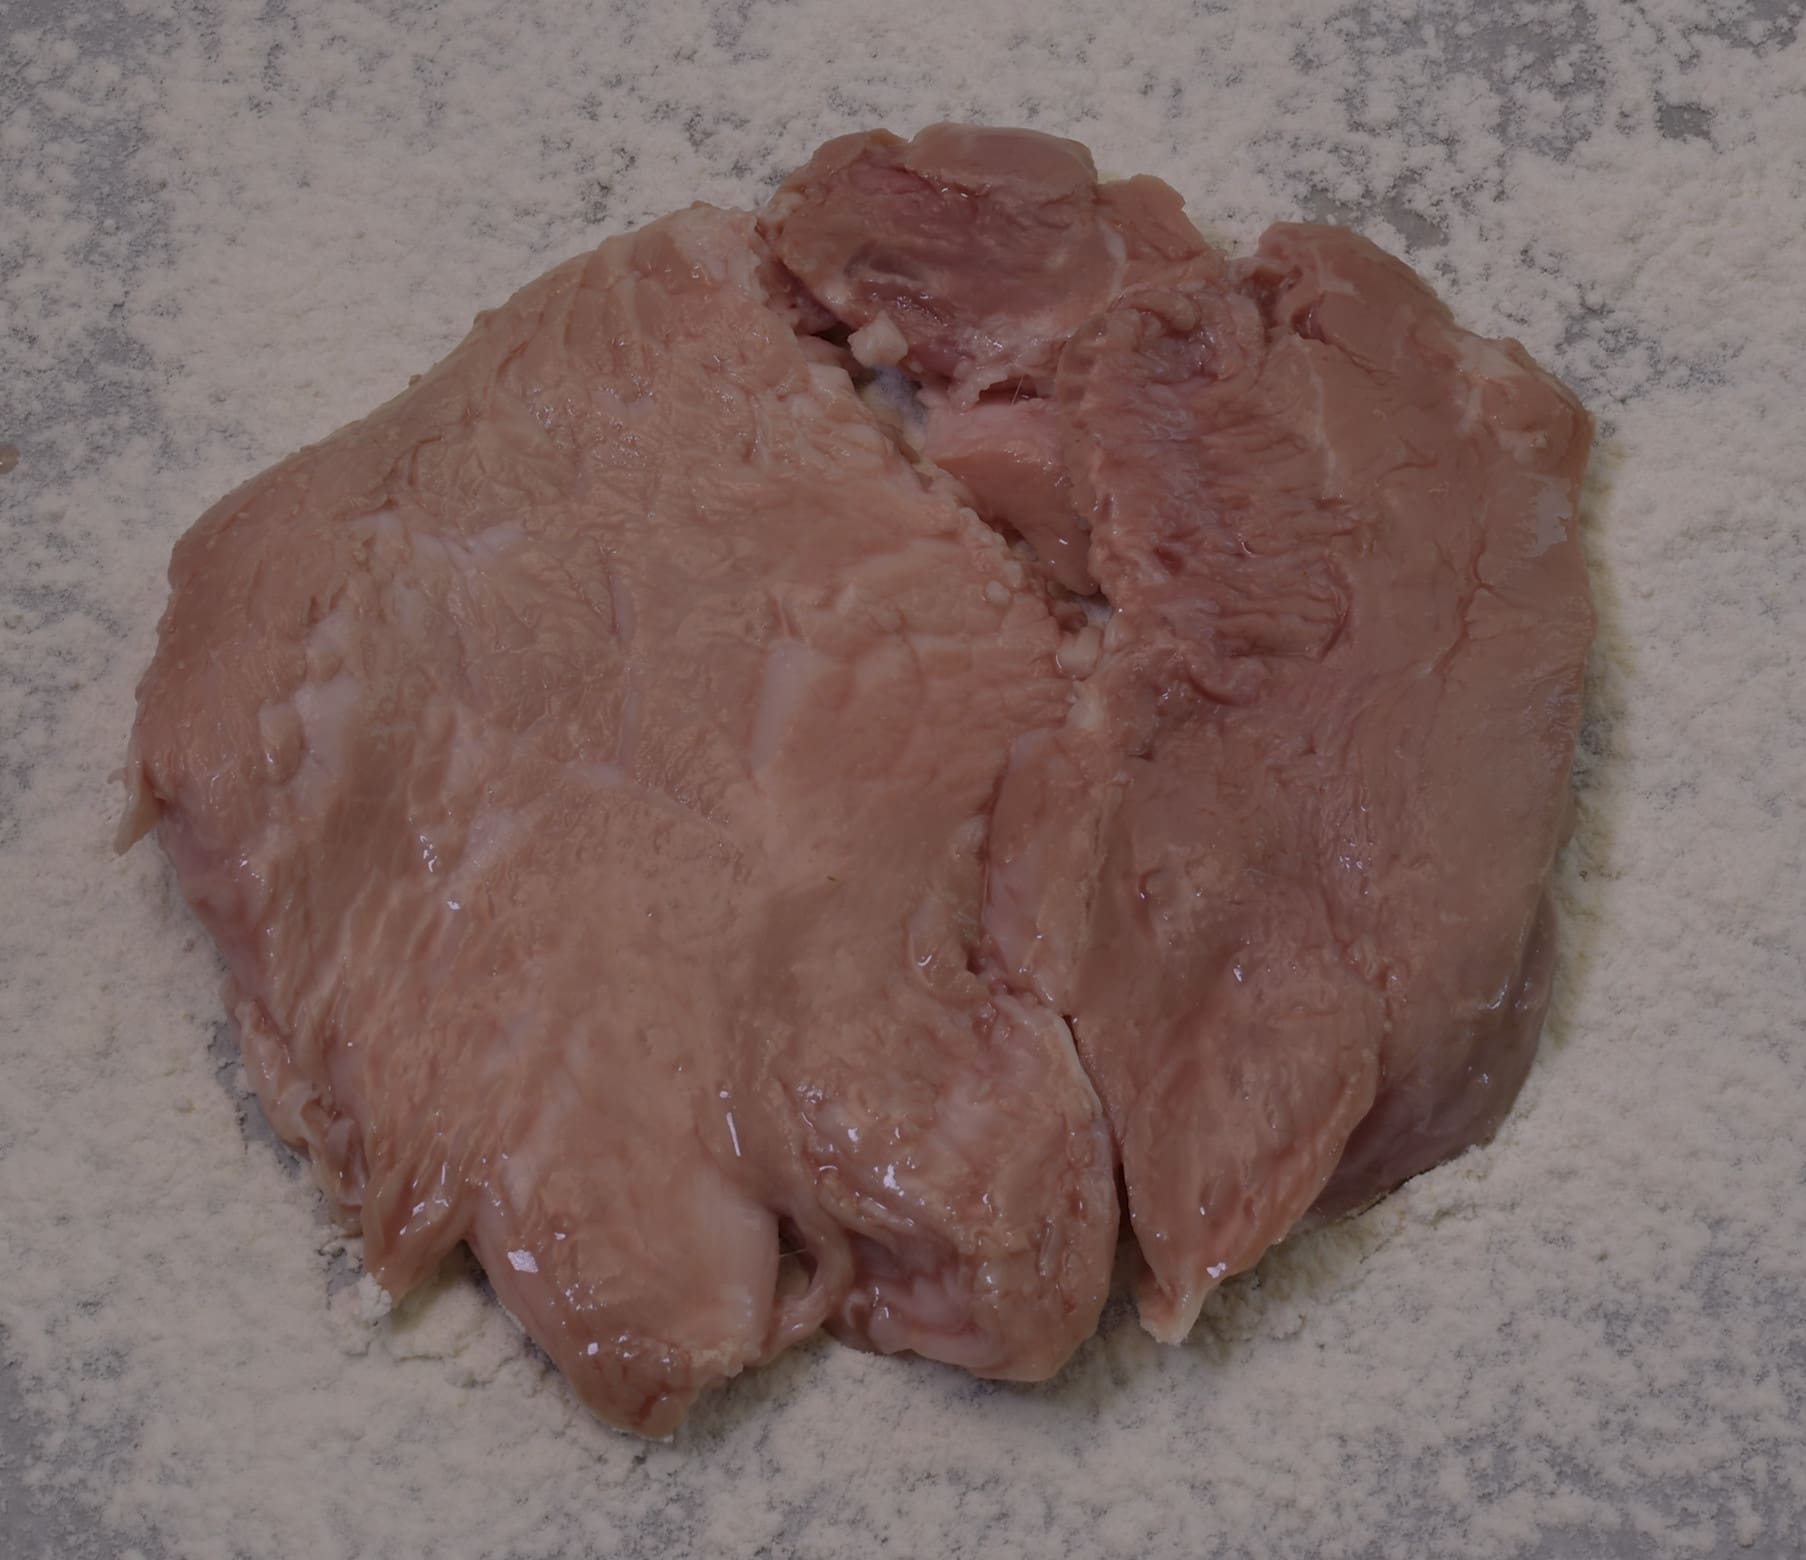
Finish opening the drained bag and stage the pounded out cutlet onto the flour. Discard the paper towel.
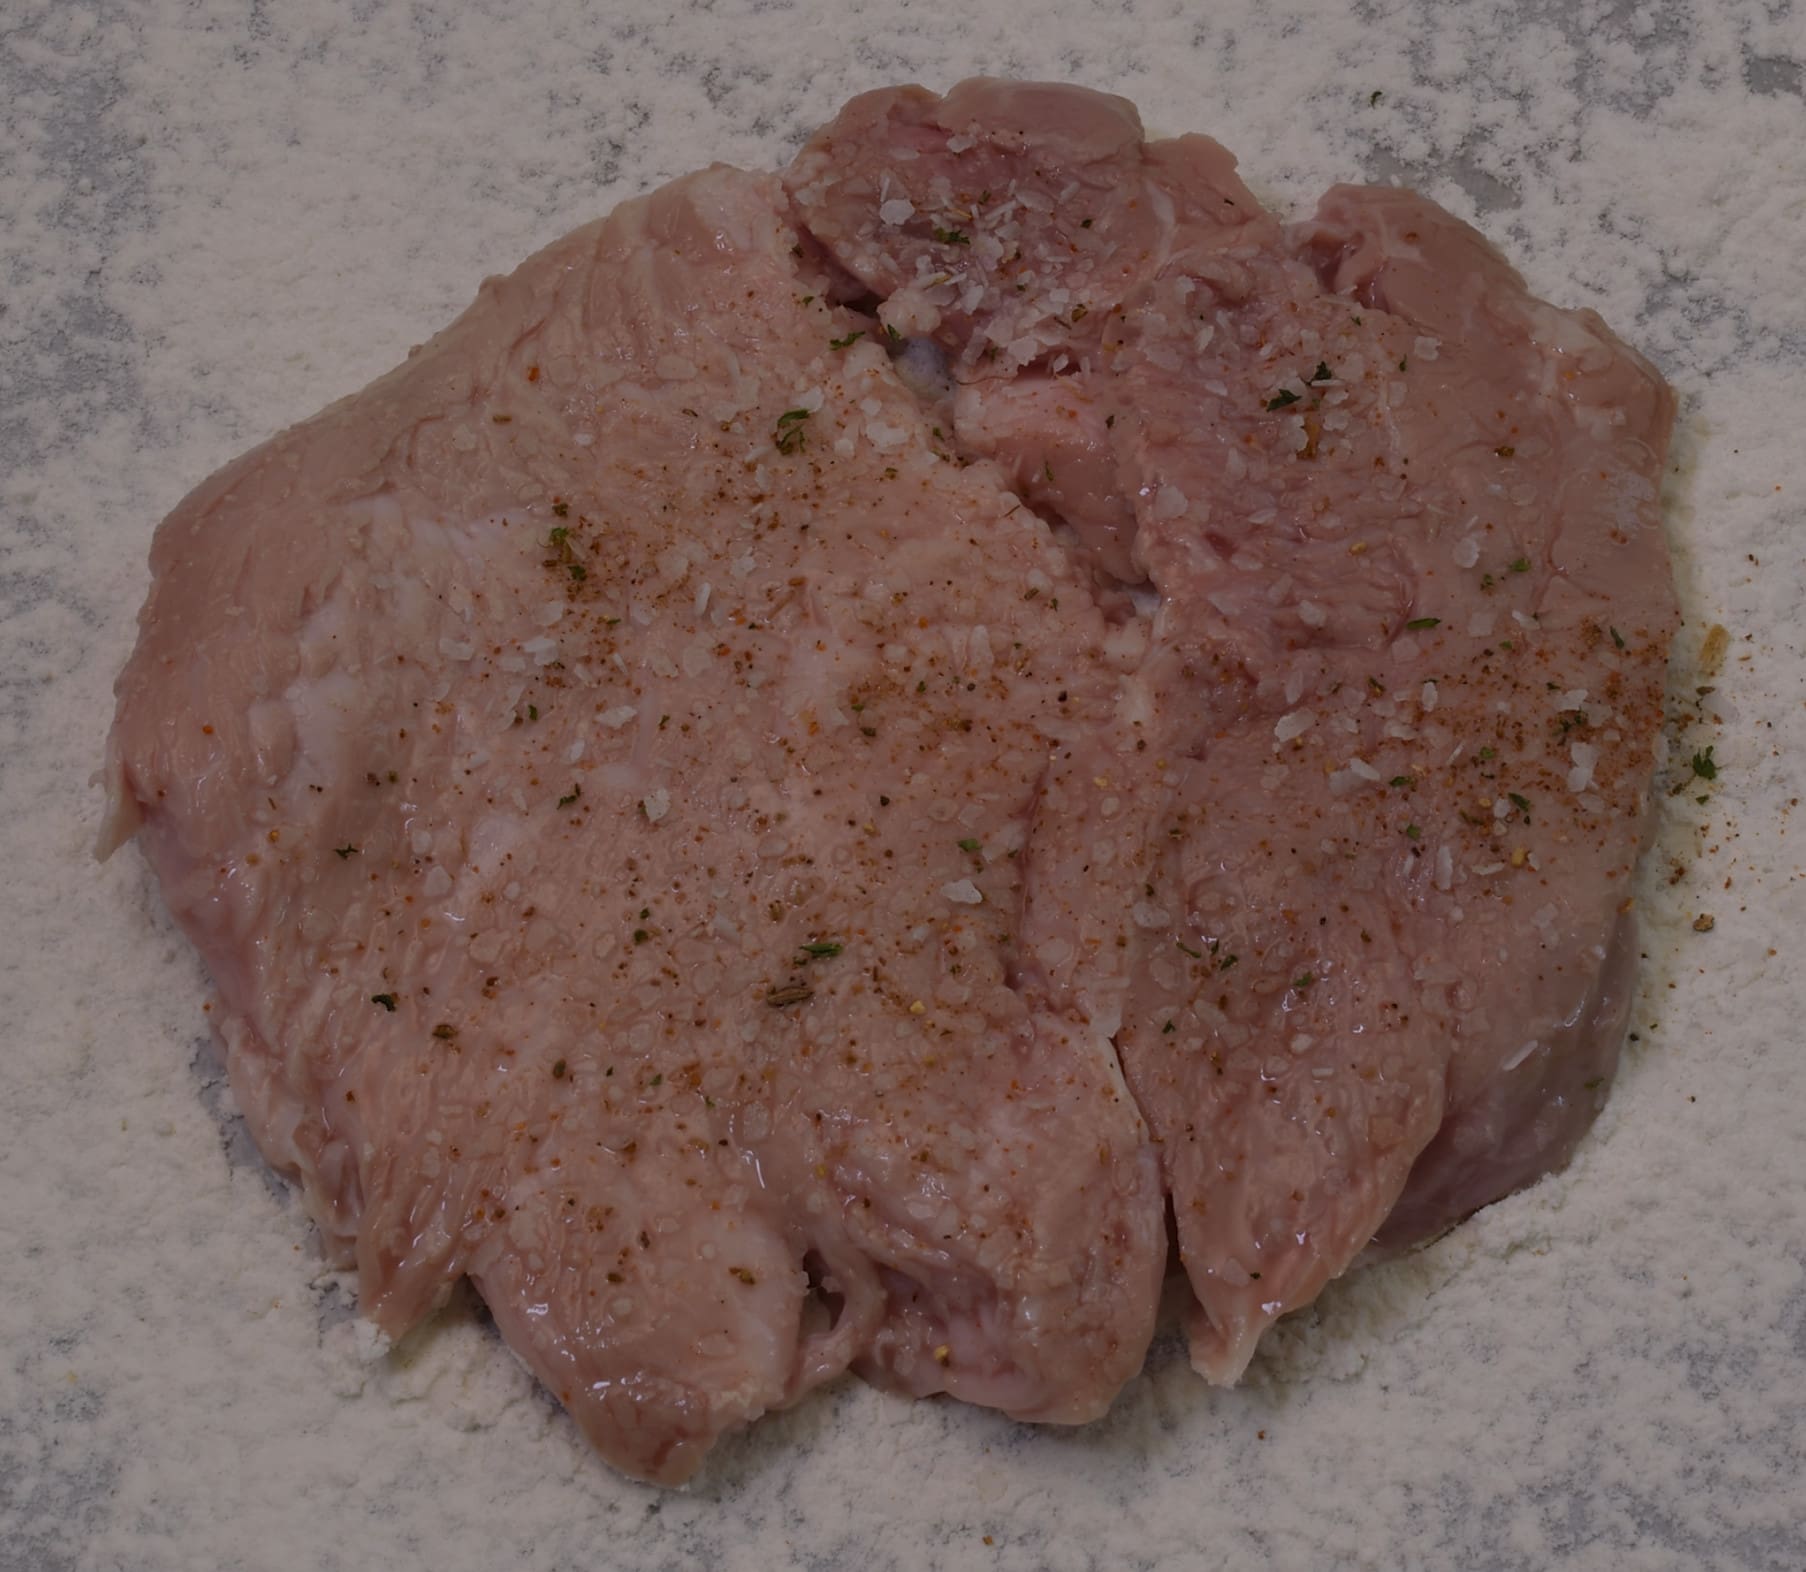
Sprinkle with a pinch of kosher salt and pepper.
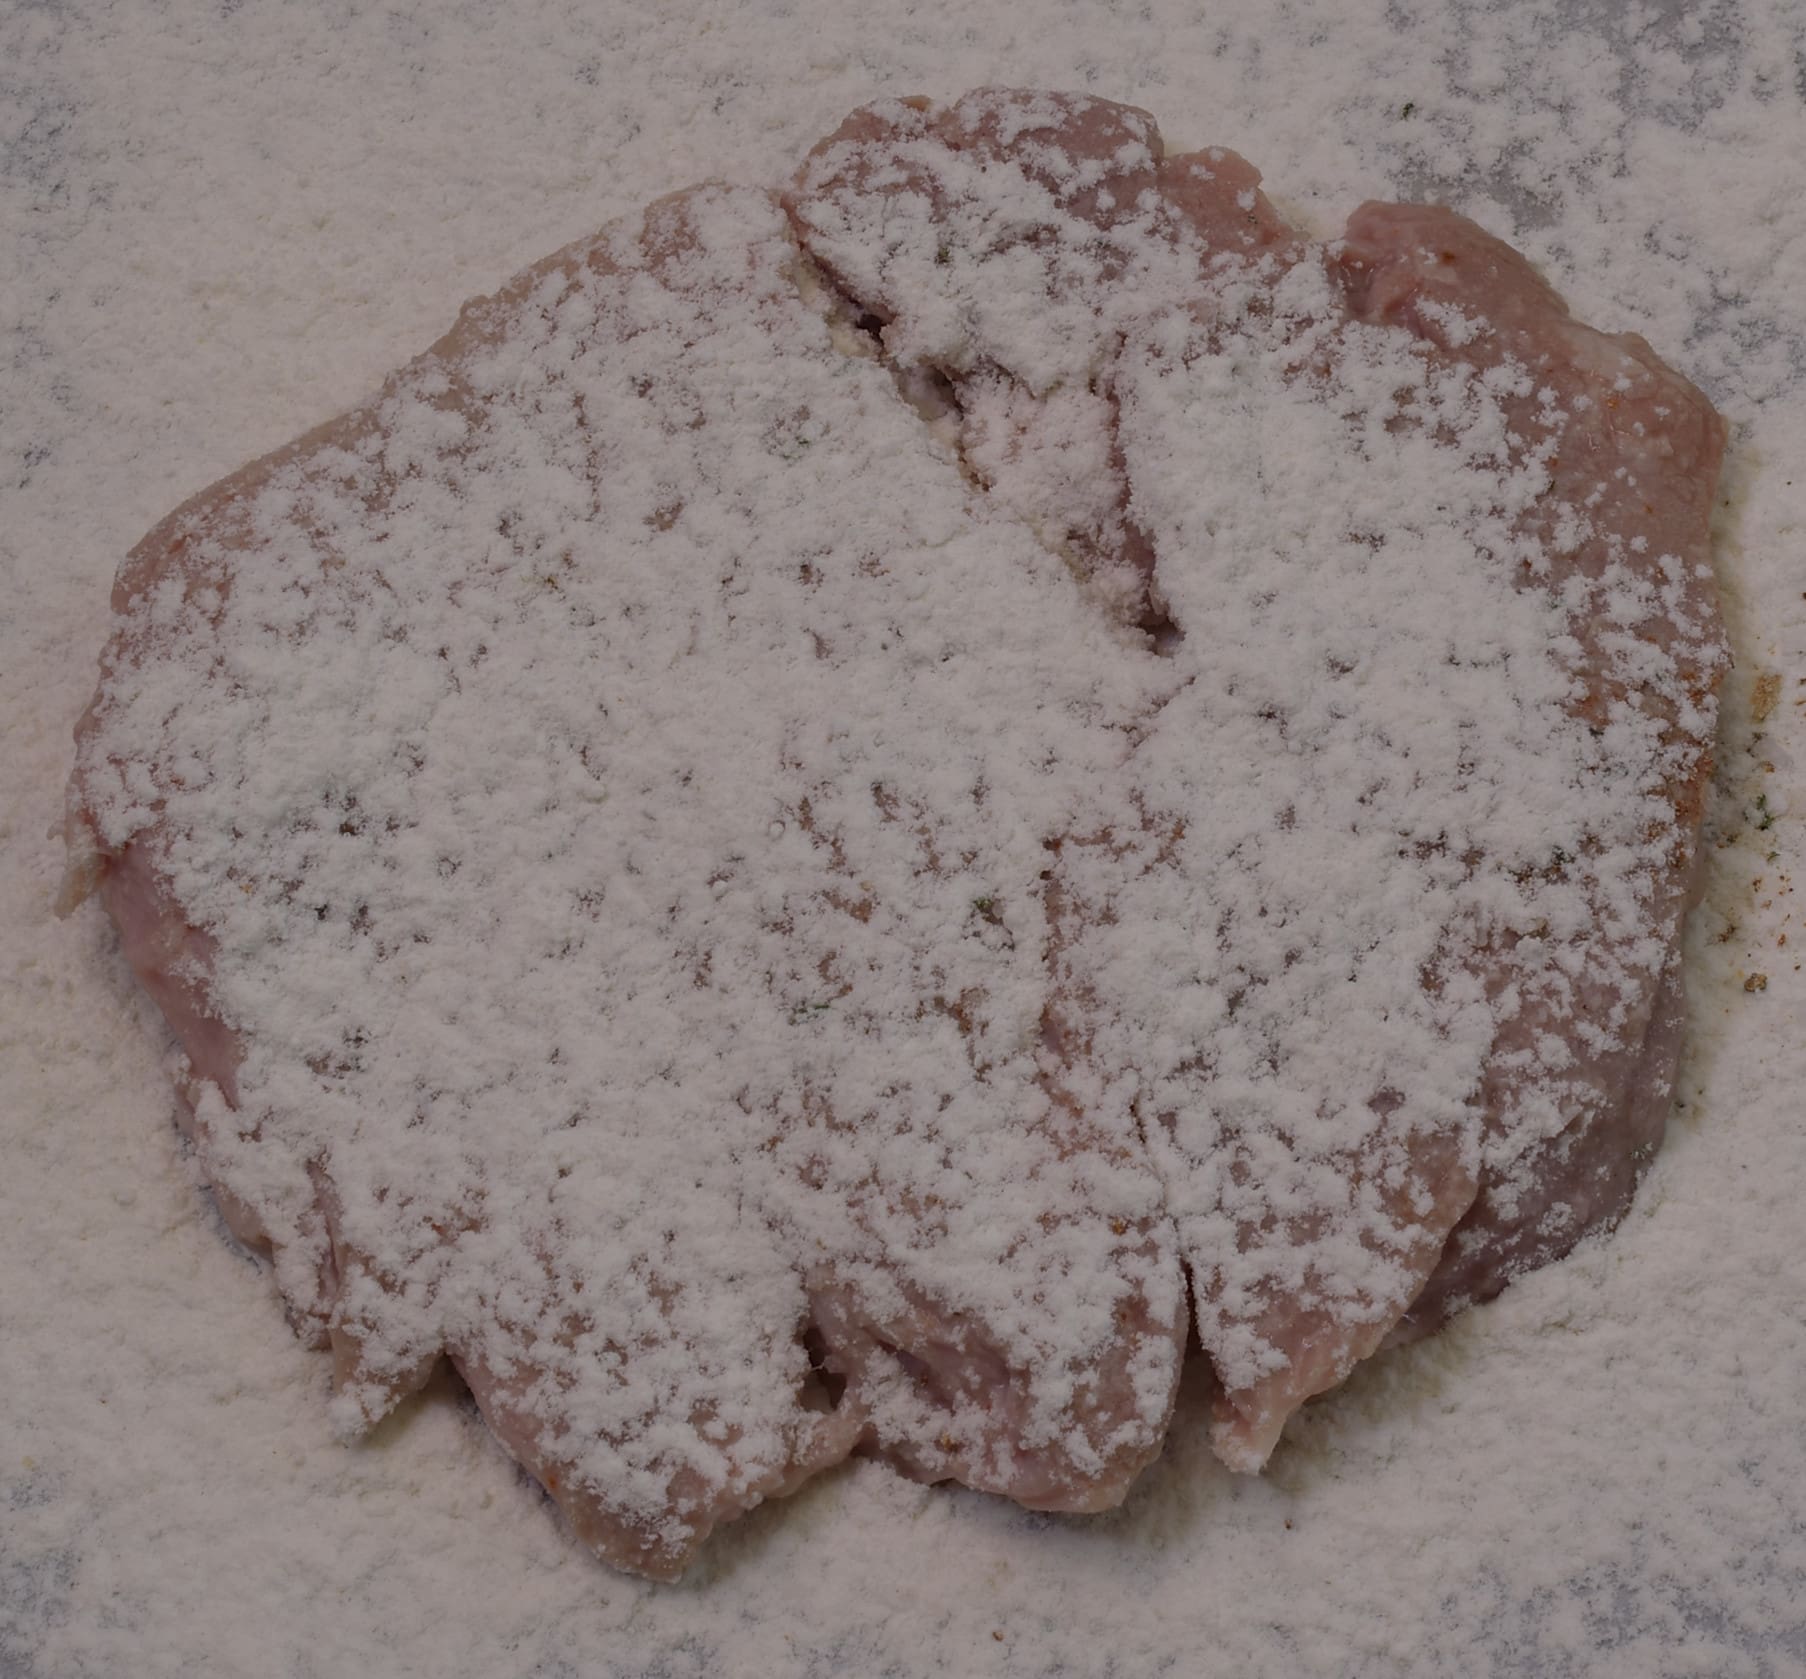
Shake/sift just enough flour on top to dry the surface of the meat.
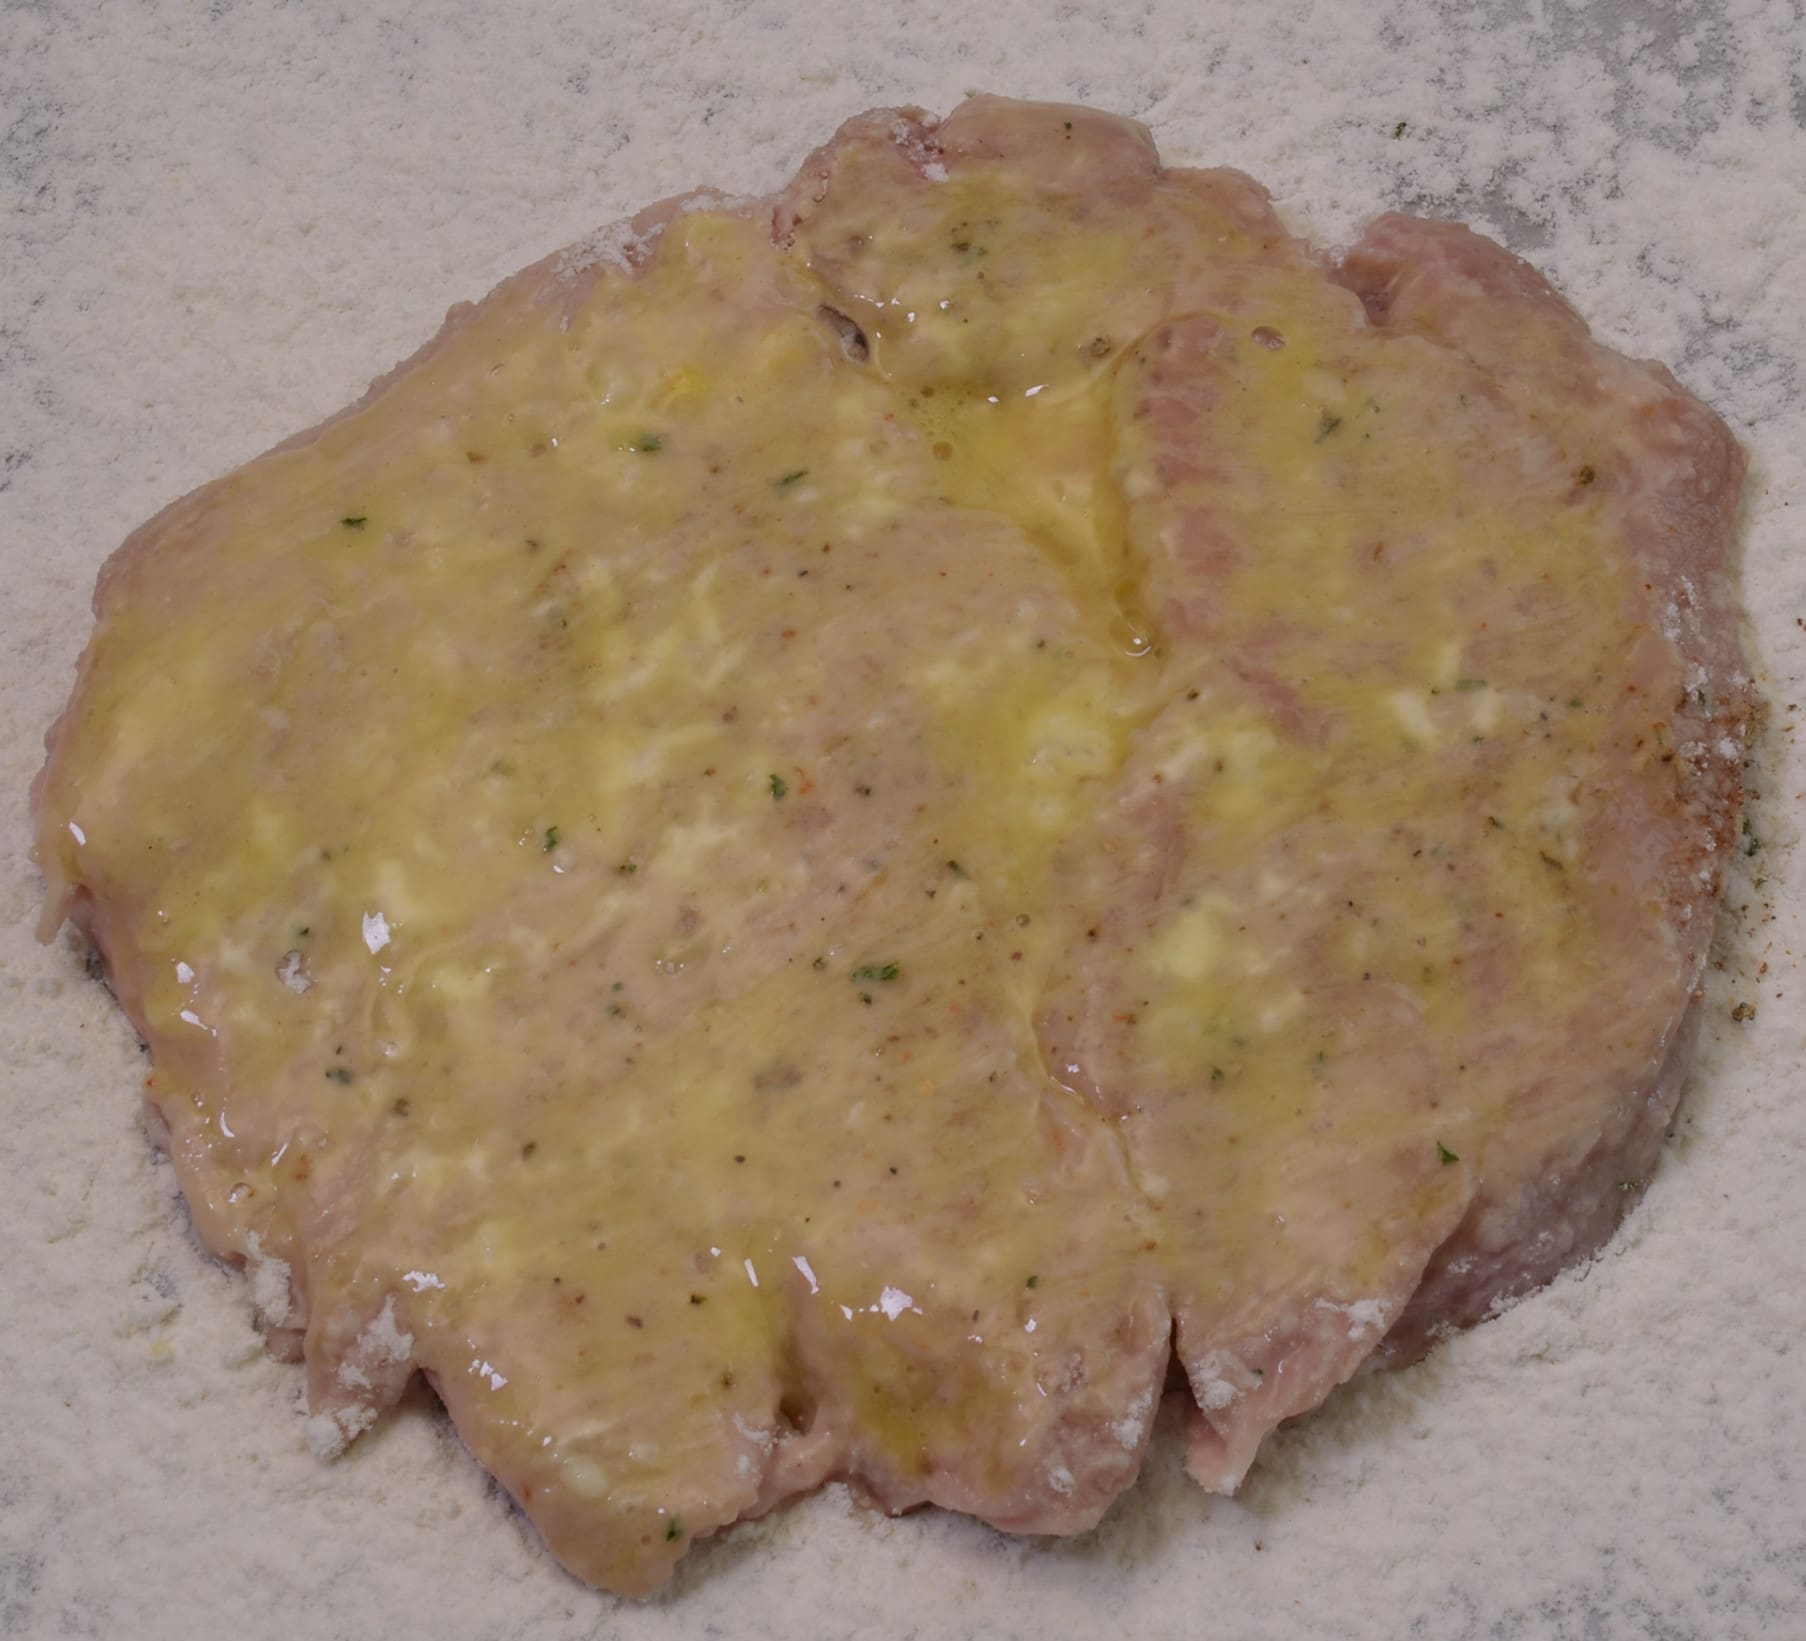
Use the pastry brush to paint the “up” side of the meat.
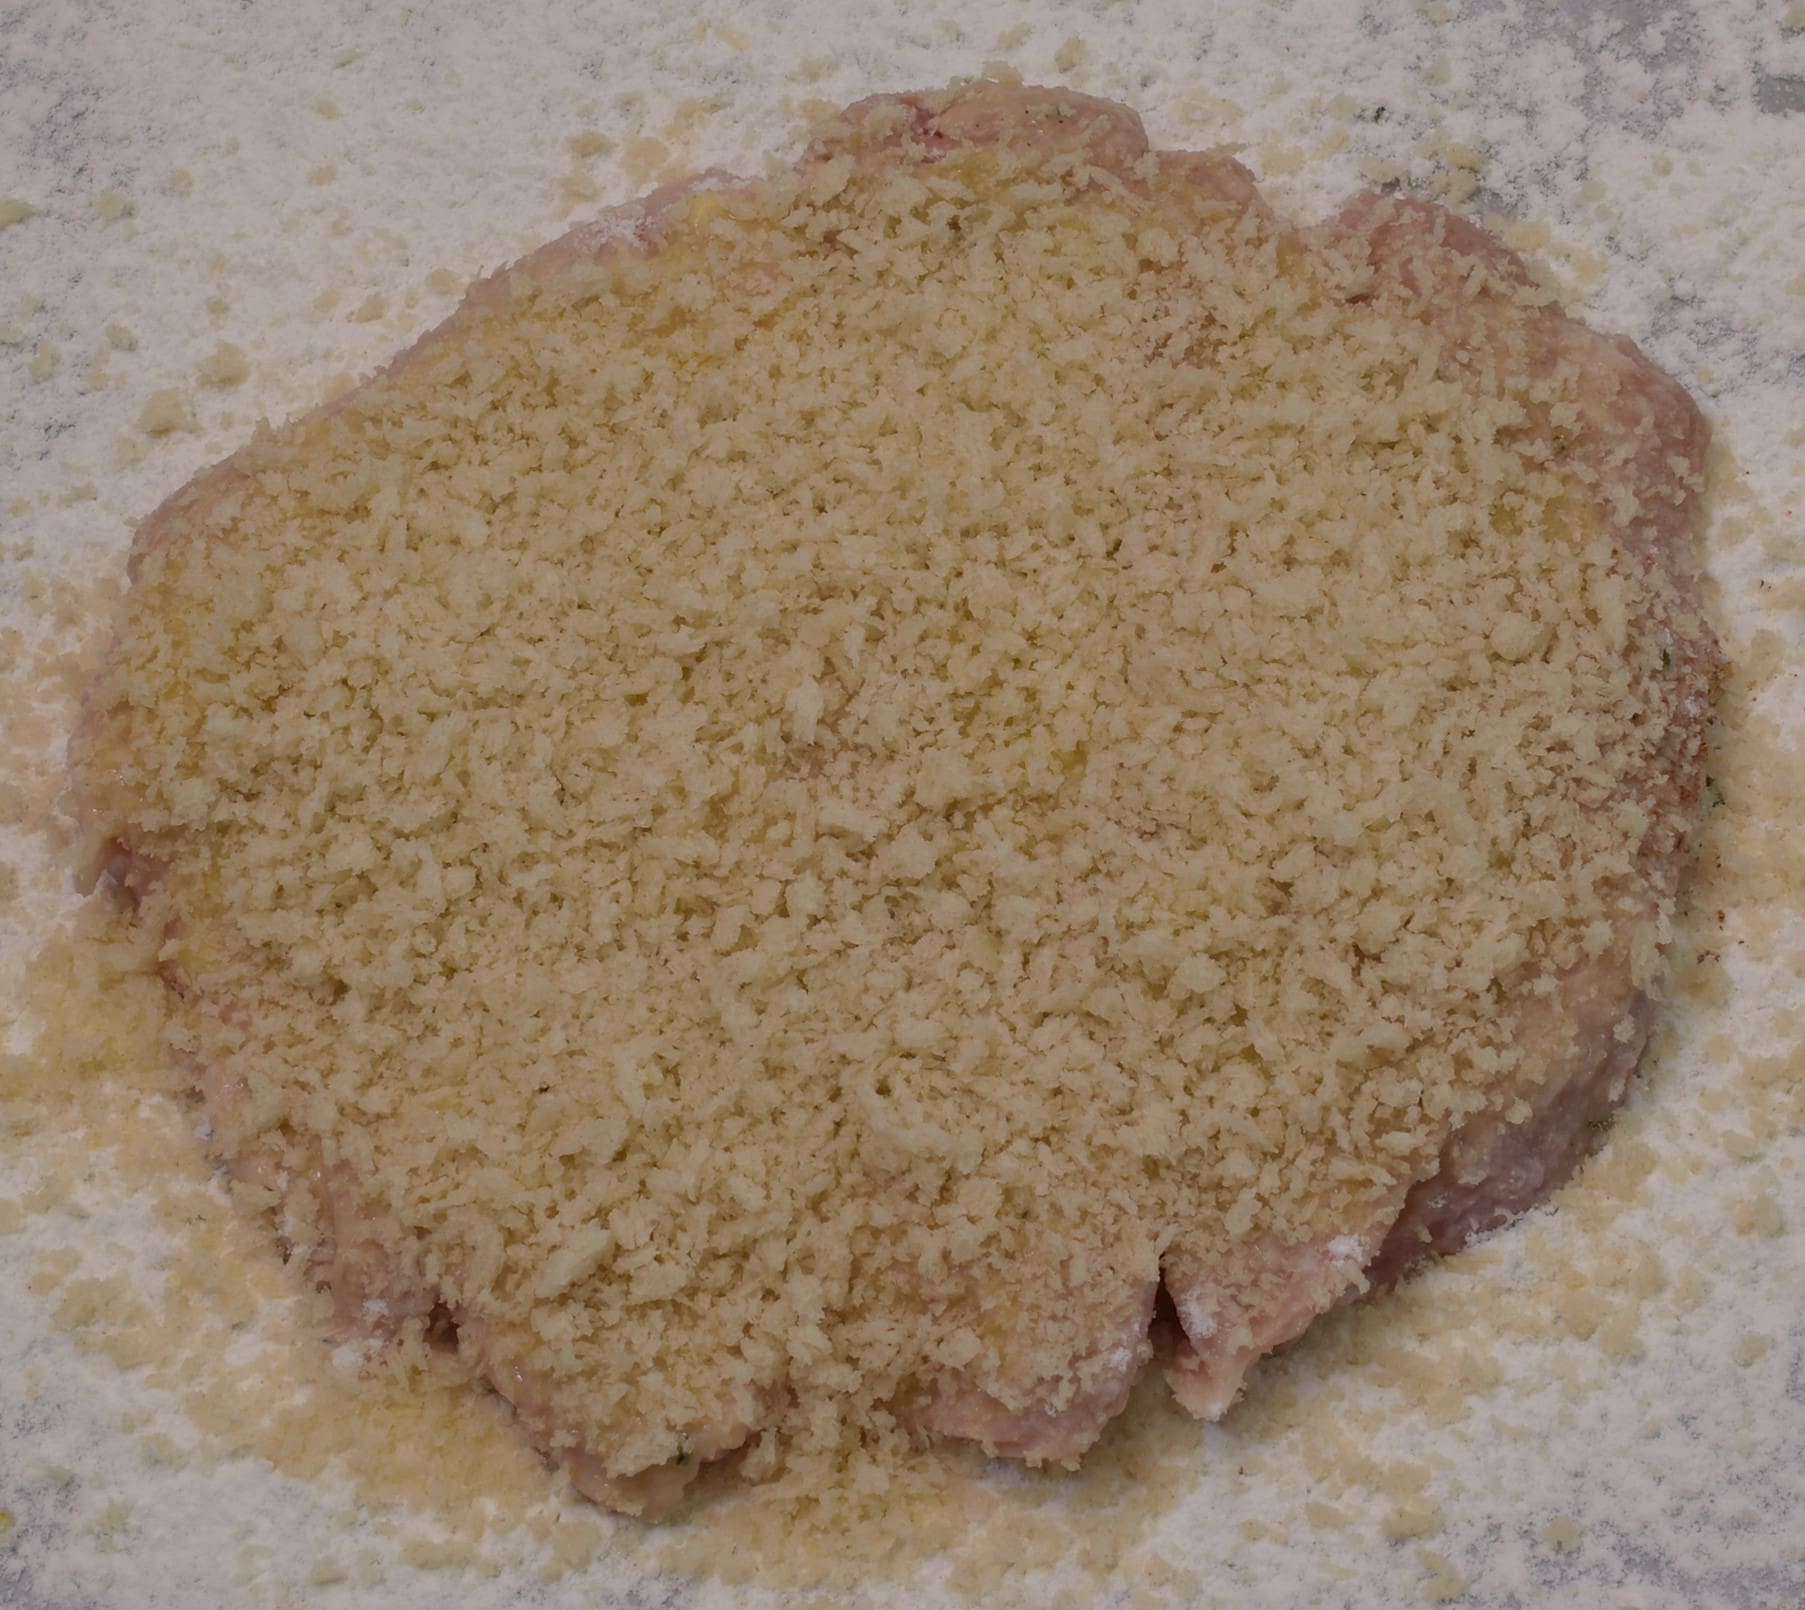
Sprinkle with Panko crumbs.

Turn the cutlet over, make sure the surface is dry from the flour that you sprinkled on the parchment.

paint with the egg wash, and sprinkle with crumbs.
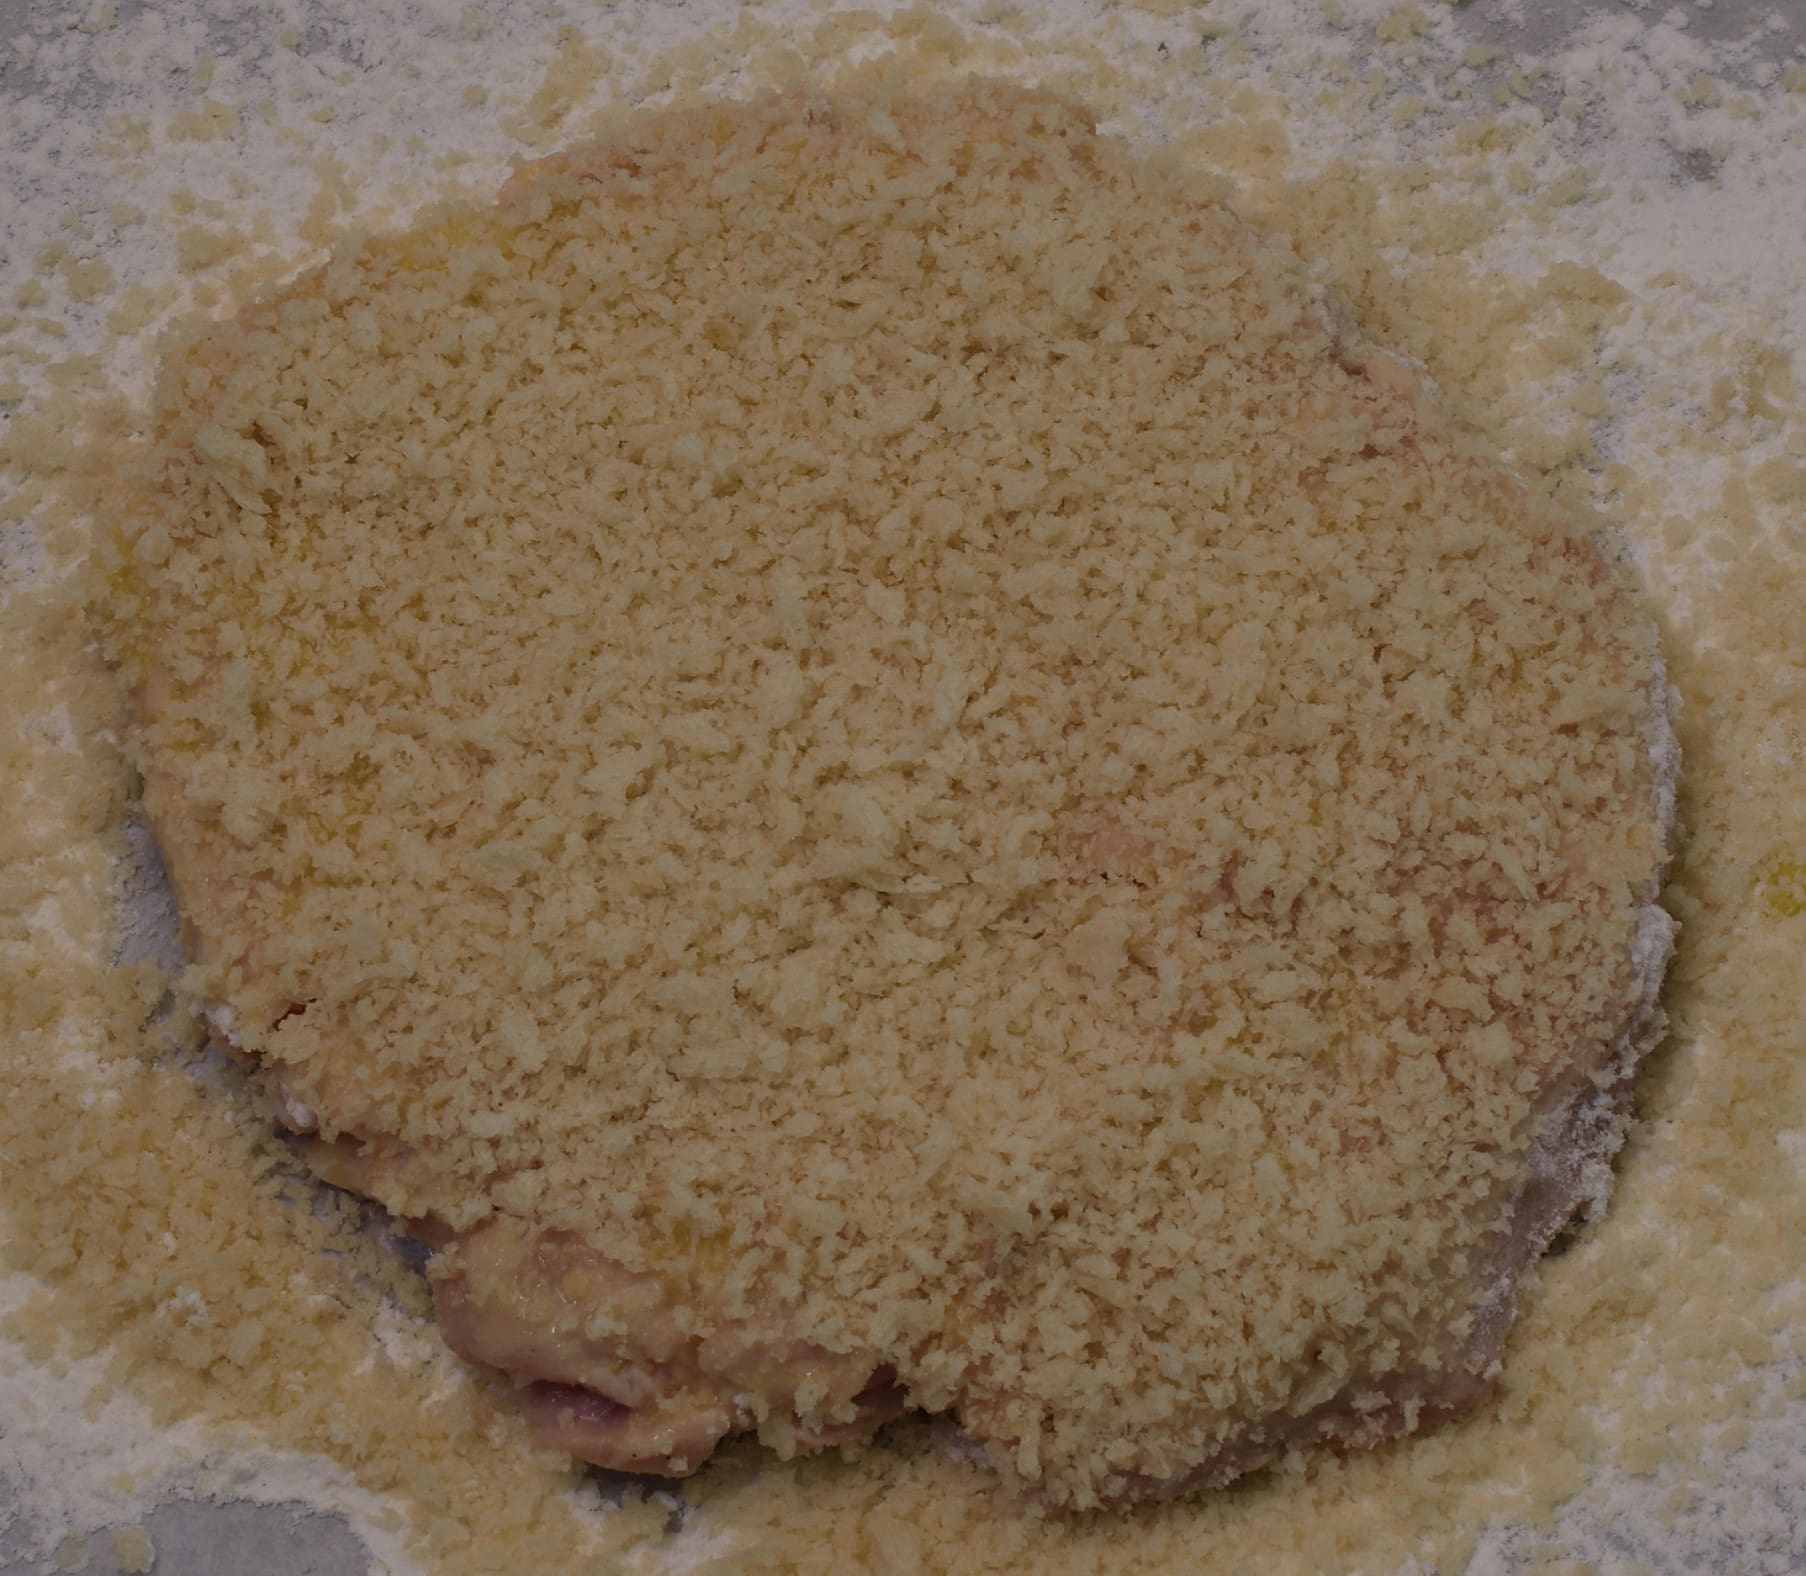
Using the palm of your hand, press lightly on the crumbs so that they cling to the cutlet.
 Tap the breaded cutlet with the mallet a couple of times–this will assure that the crumbs cling well.

Sprinkle crumbs on a plate and stage the breaded cutlet on top of them–this prevents the cutlet from sticking to the plate. Sprinkle more crumbs on top of the cutlet so that it does not stick to the next cutlet in the stack. Little things.
Repeat this process until you have breaded and stacked all the cutlets. Fold up the parchment and discard–this completely eliminates the necessity to clean the work surface!
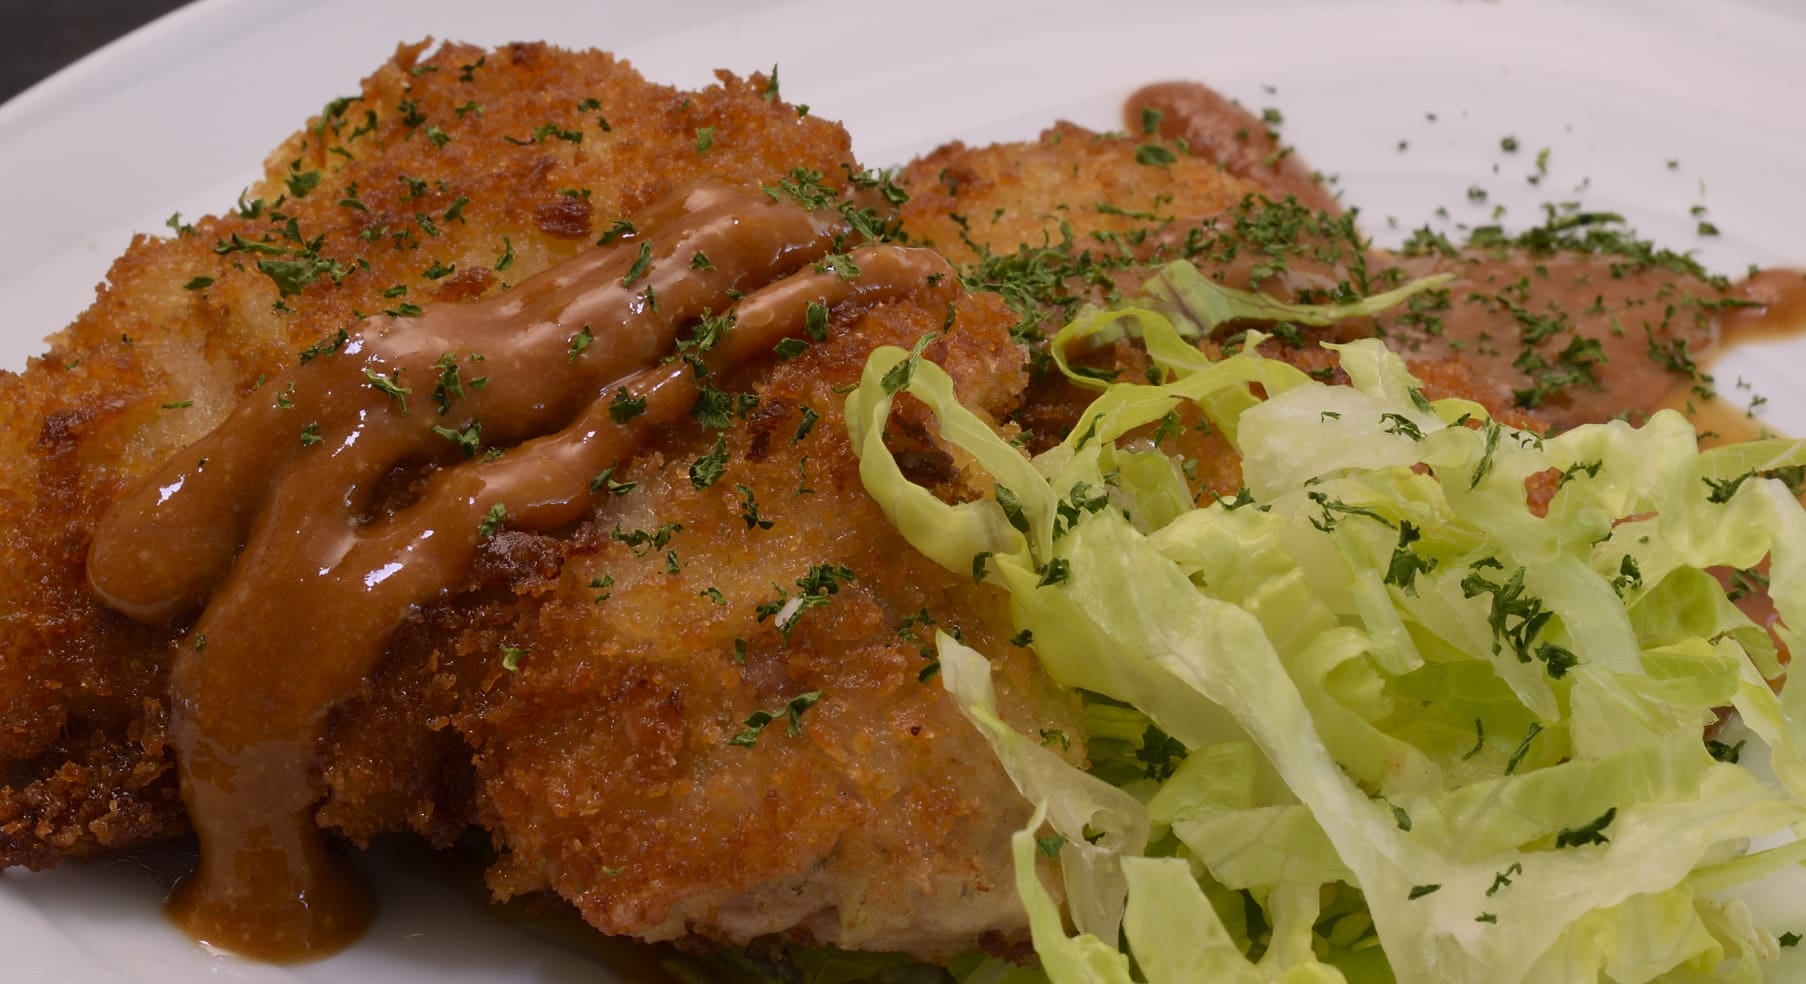
Time to fry

Traditionally, Tonkatsu cutlets are deep fried–but they do not have to be. For the purposes of this demonstration, we pan fried the cutlets in the skillet. But let’s pretend we want to deep fry them. There is a method that helps avoid a lot of the inconveniences of deep frying, and no dedicated deep fryer is required–those things are more trouble than they are worth.
Line a colander with paper towels and place on top of a sauce pot. Set aside. Cover the sheet pan with paper towels and set aside or keep in a warm oven. Add the oil to the skillet, at least 2″/6 cm deep but no more than half way up the side. This will allow for some inevitable foaming. In the deep or in the skillet, heat the oil/surface to 325 F/162 C.
Carefully stage ONE of the cutlets in the hot oil/skillet. Use an infrared thermometer to keep track of the temperature during the frying process. The temperature will go down somewhat. Adjust the heat periodically to prevent the temperature from going below 250 F/120 C. I usually keep the burner on “medium high,” but stoves vary widely in their temperature/setting ratios.
Browning the cutlet will require no more than two minutes, regardless of method. Do not double task now. Once it is brown, remove from the oil and stage onto the paper towel lined sheet pan. Check the temperature of the oil/pan–make sure it is at least 300 F/150 C before adding another cutlet.
Let’s do it again
Repeat this process with each cutlet, one at a time. If you pan fry, wipe out the pan with a dry towel after each cutlet. If you deep fry, watch the oil to see how much debris accumulates in the pan. Do not hesitate to strain the oil in between frying cutlets if necessary–it only takes a minute because you already have the strainer set up. If this is not properly managed the crumb debris in the oil will start to burn, smoke, darken the oil and affect the flavor of the cutlets. It can even catch fire.
Straining also extends the life of your oil. Make sure you wear an apron and long pants–no sandals, either! I speak from experience.
After you have fried the last cutlet, change the paper towels in the colander if necessary and strain the oil right away. This will save you the chore of doing it later after the oil has cooled and thickened. Refrigerating the oil will also extend its shelf life. Oil also hates light and air. Go figure.
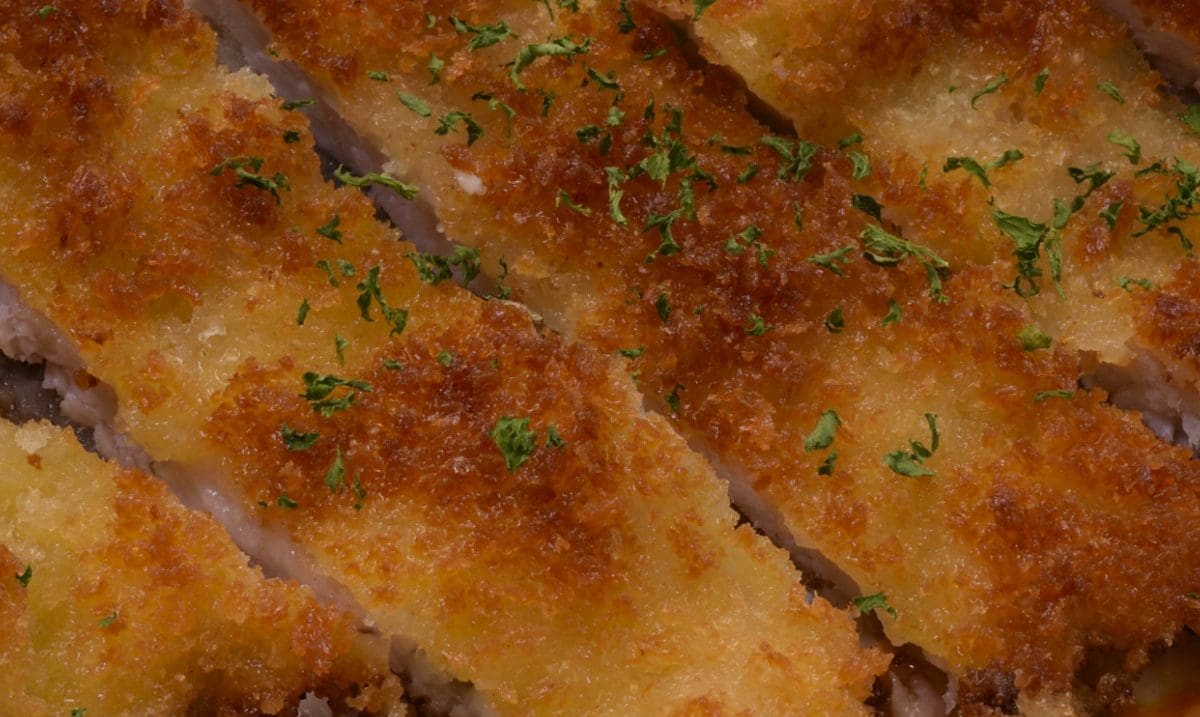
Service

Panko crumbs create a very crisp cutlet.

Sauce below, sauce on top, sauce on the side, it all works.
ハッピーフライ!
(Happy Frying!)
Norm King
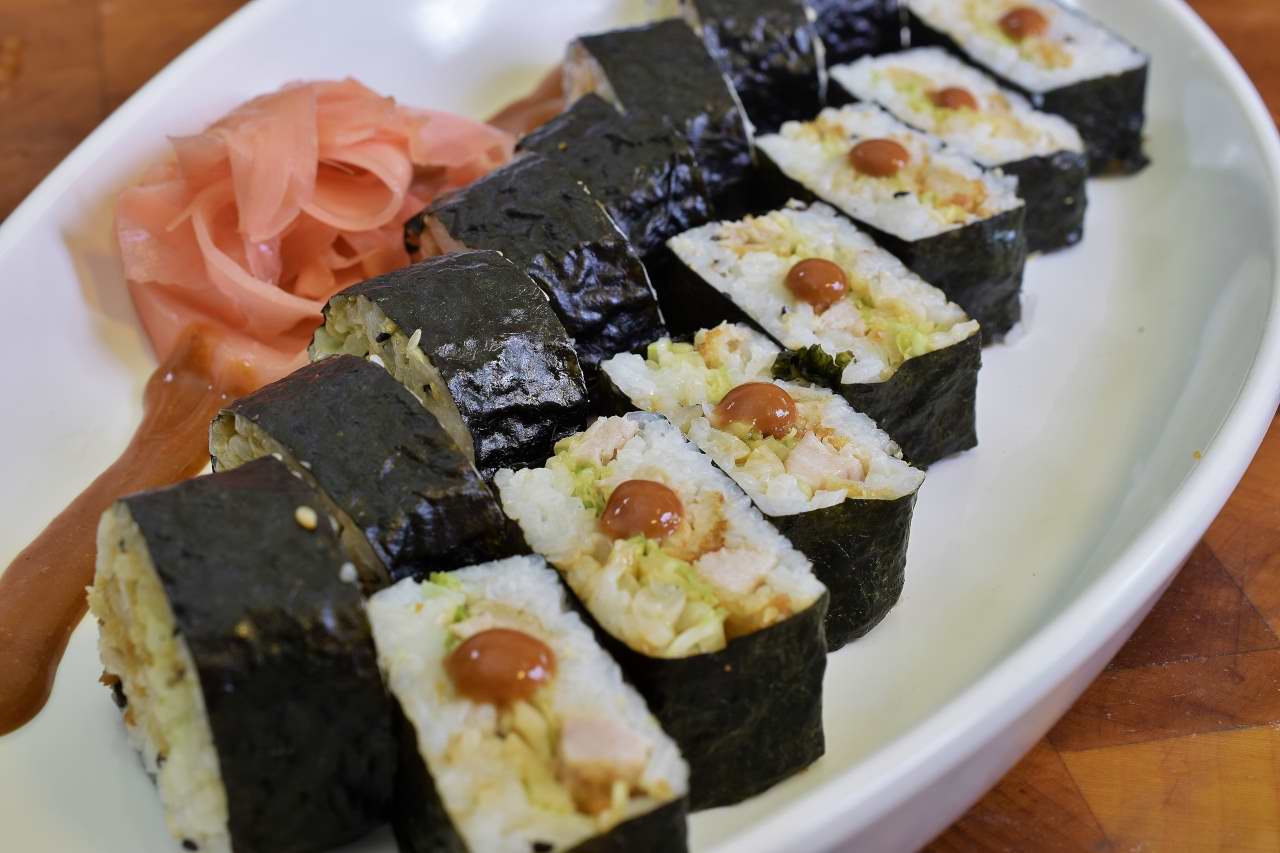
Epilogue: Tonkatsumaki
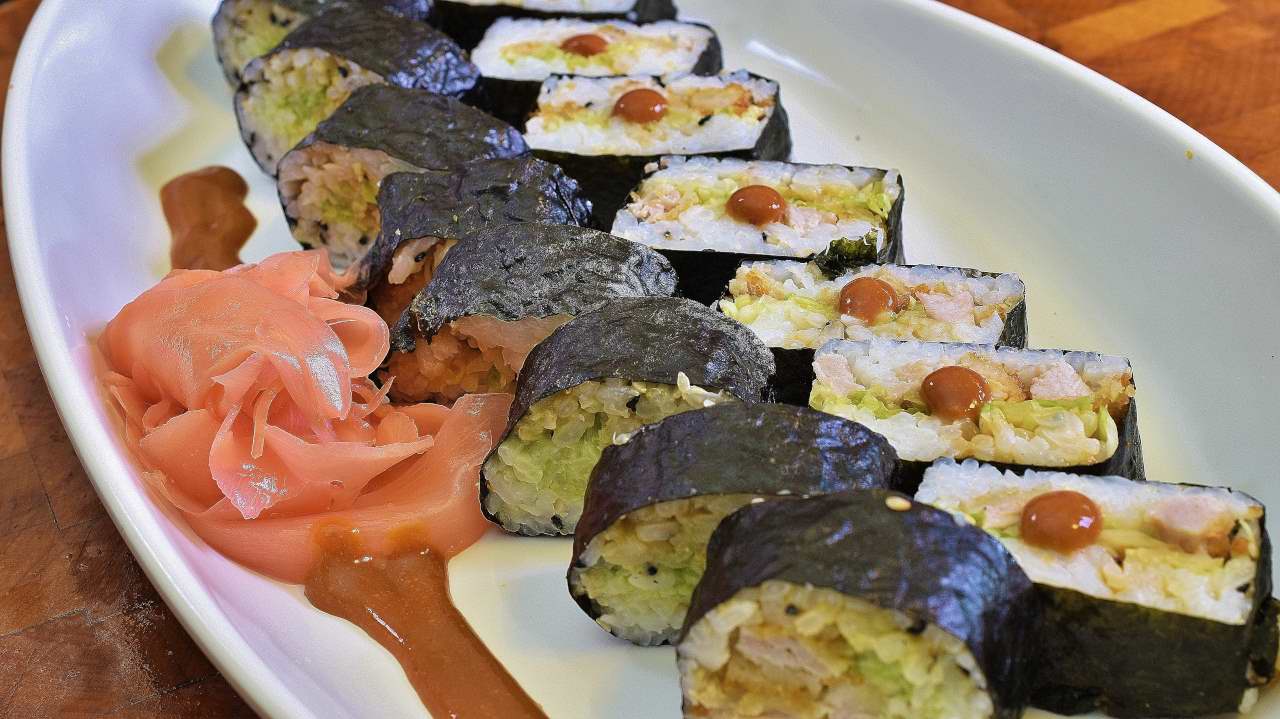
People are intimidated by the idea of making sushi, and a lot of people are a little squeamish about even eating it. They are surprised but suspicious to discover that sushi is not limited to raw fish.
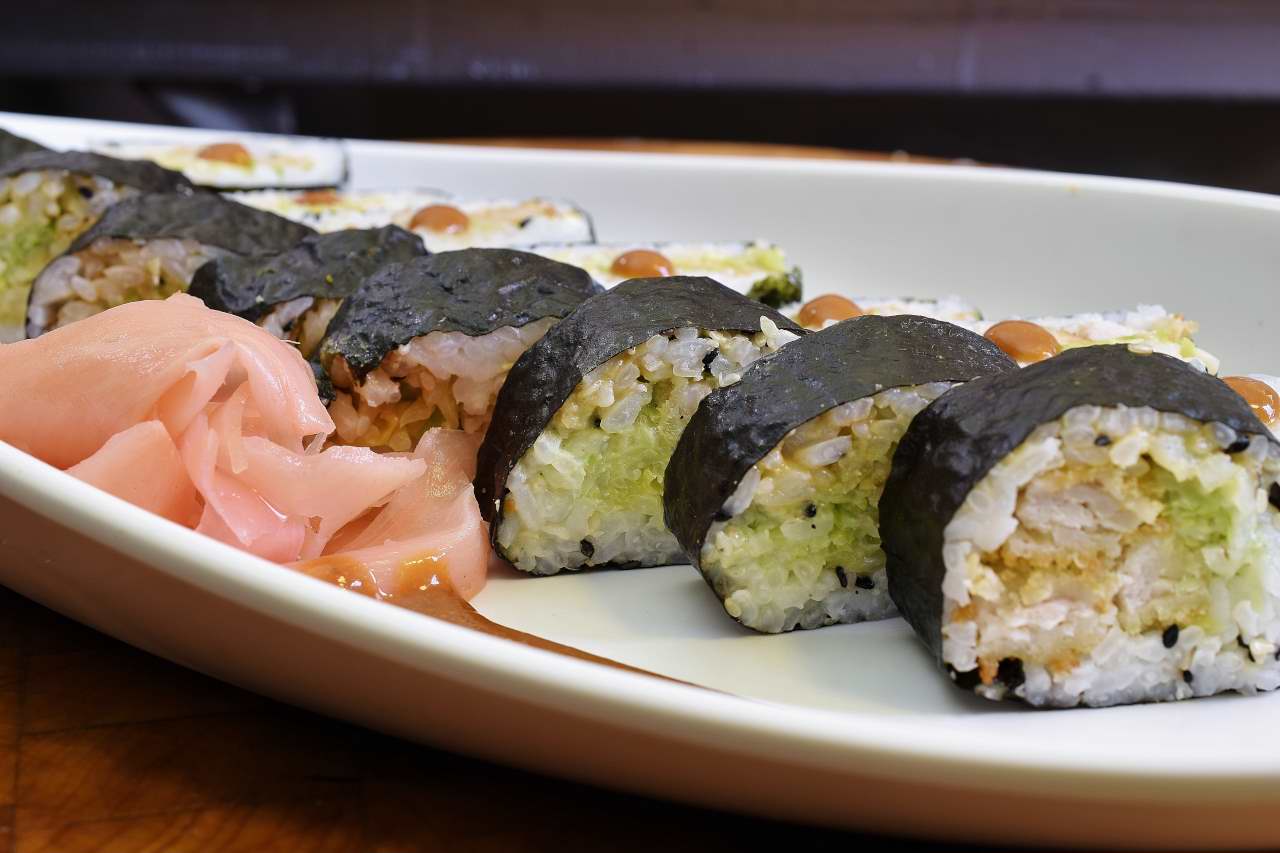
Tonkatsumaki is a good example–the same ingredients as this recipe, with the addition of seaweed, pickled ginger, and not much else. The Japanese use a bamboo mat to make the rolls, but even that is not absolutely necessary if you have ever rolled your own cigarette or whatever.
If you have occasion to visit a Japanese restaurant that serves sushi, pick one where you can watch them putting it together. After a half an hour or so, you will see that the exercise itself is pretty robotic. Like any other task, you have to do a little memorization.

You must be relaxed and you must pay attention to what you are doing–not so different than any other discipline. Easier than, say, photography. MUCH easier.