
Serves 4
Level of difficulty 2.75

Above: Lipavi C10 container, N10 polycarbonate rack. Lipavi C10L lid.
Procedure:
Preheat the sous vide bath to
135 F/58 C
Vacuum seal the individual pieces of chicken in separate bags. One piece per bag makes it easier to cold shock them later and easier to organize and store in the refrigerator. It also allows you to choose just how much chicken is needed for a particular situation without exposing all the other pieces to the elements.
You can use all the chicken at once or you can prepare just one piece at a time. Sealed packages of processed proteins like chicken are pasteurized, so as long as they stay sealed, they will have an extended shelf life–up to two weeks. Once the packaging is opened, one should use the product within four days.
Process the chicken at 135 F/57 C for a minimum of 4 hours and as long as 8 hours, whatever is more convenient for you! Because of the precise temperatures used in sous vide, the chicken cannot overcook.
After processing, shock the bags in iced water until they reach 70 F/21 C. Refrigerate at 40 F/4 C until use. Now you can execute your favorite recipe at your convenience without devoting an entire day to preparing it.
Day of service:
Peel and chop the onion and garlic, set aside.
Submerge the refrigerated packages of chicken in hot water for five minutes to fully melt the gel. You can use hot tap water (125 F/52 C) or the sous vide bath if you are processing something simultaneously. Remove the chicken from the packaging.
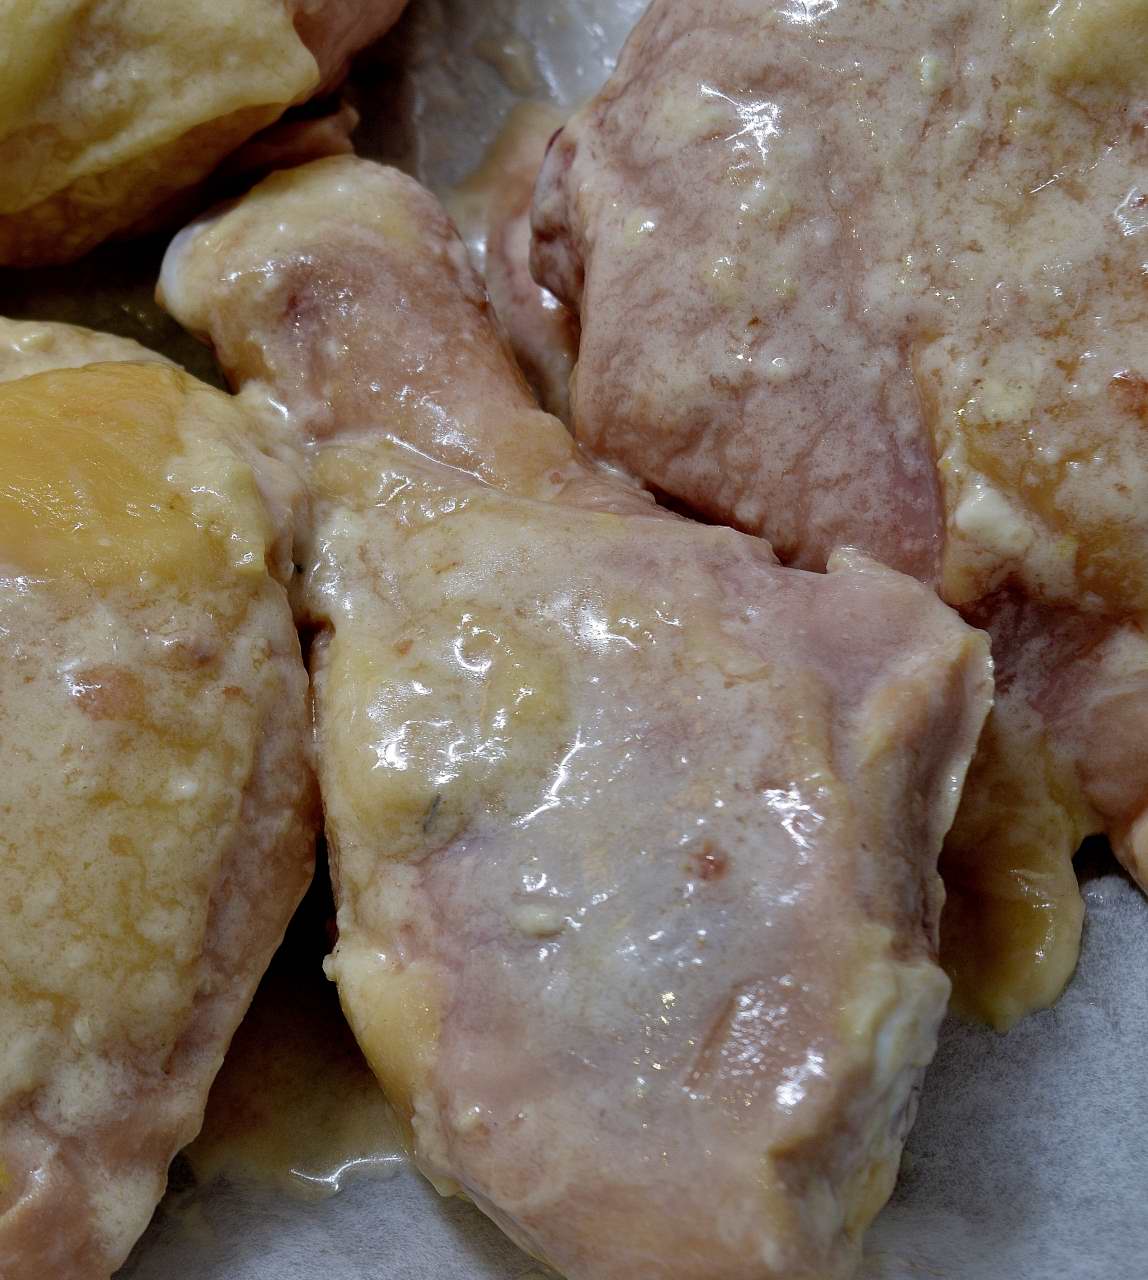
Put the legs and thighs in a large bowl with the two egg whites, the flour and the kosher salt. Mix well. Lay the chicken out on a sheet pan lined with parchment or butcher paper, skin side up.

Use the shaker/sifter to dust the surface of the chicken on both sides. Heat the skillet to 225 F/107 C. Add enough vegetable oil to cover the pan–about 0.5 cups/120 ml. Put the chicken in the pan, leaving ample room between the pieces.
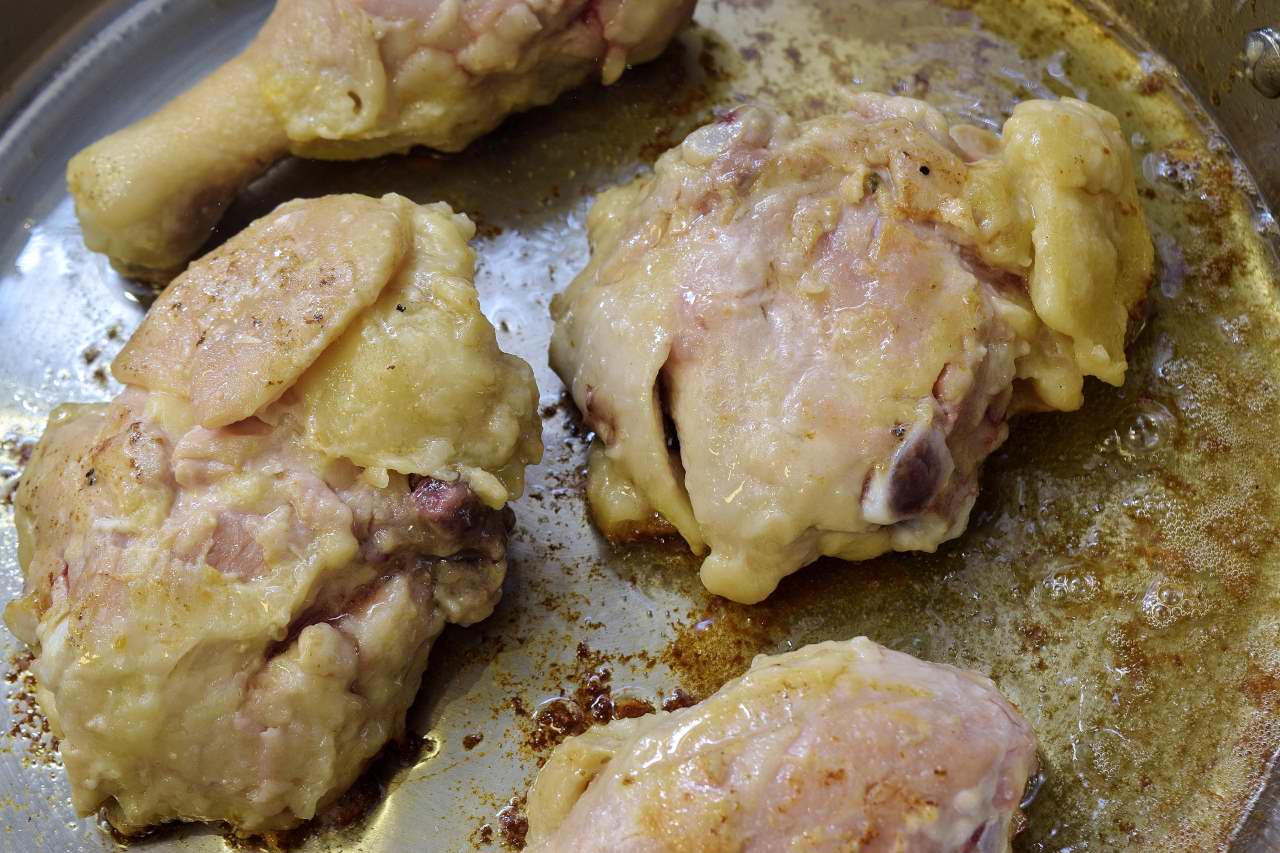
There should be enough oil in the pan to prevent the chicken from sticking–the excess oil will be removed later. We want to hear sizzling–if you hear a hissing/steaming sound, turn the heat up. If you hear a popping sound, turn the heat down. Brown the chicken well–this step is the most important, and it is also the step that most cooks rush through. This is the difference between a well rendered skin and surface and a rubbery, gooey texture.
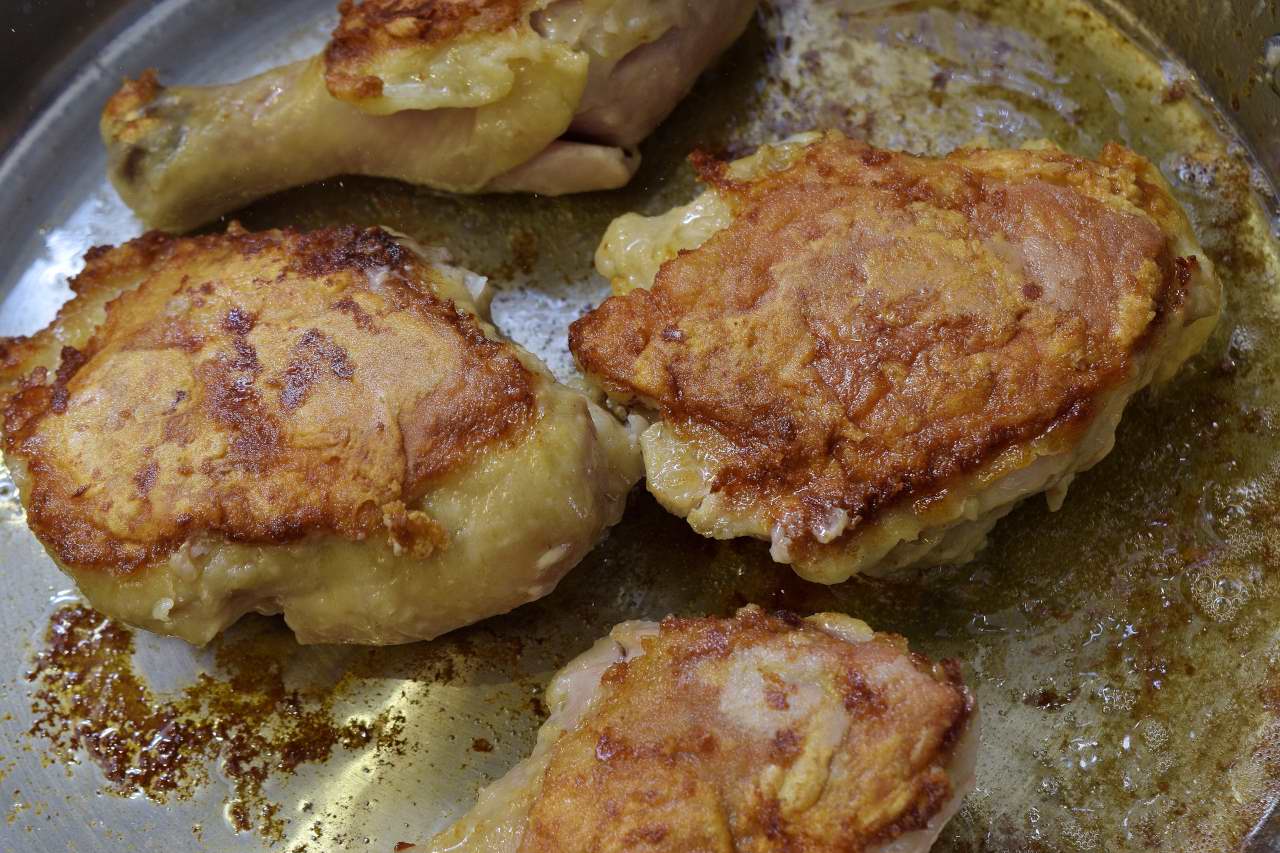
Brown not only on both sides, but stand the pieces up by leaning them against the edge of the pan. This assures that the skin and fat are fully rendered.
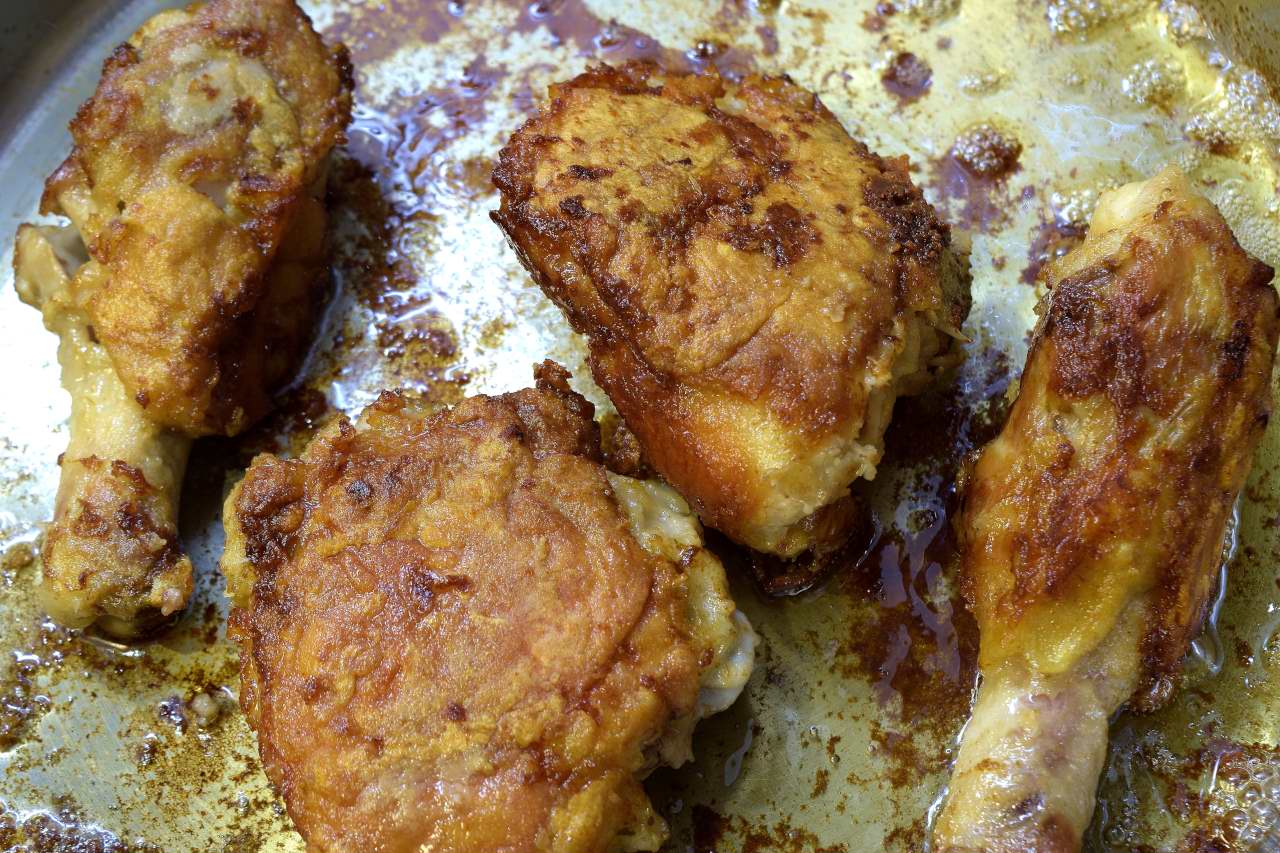
Remove the chicken from the pan. There will be more oil in the pan than you started with–that is a good sign. Better in the pan than on the chicken. Keep the chicken warm on the back of the stove or in an oven set on low or warm–approximately 170 F/77 C.
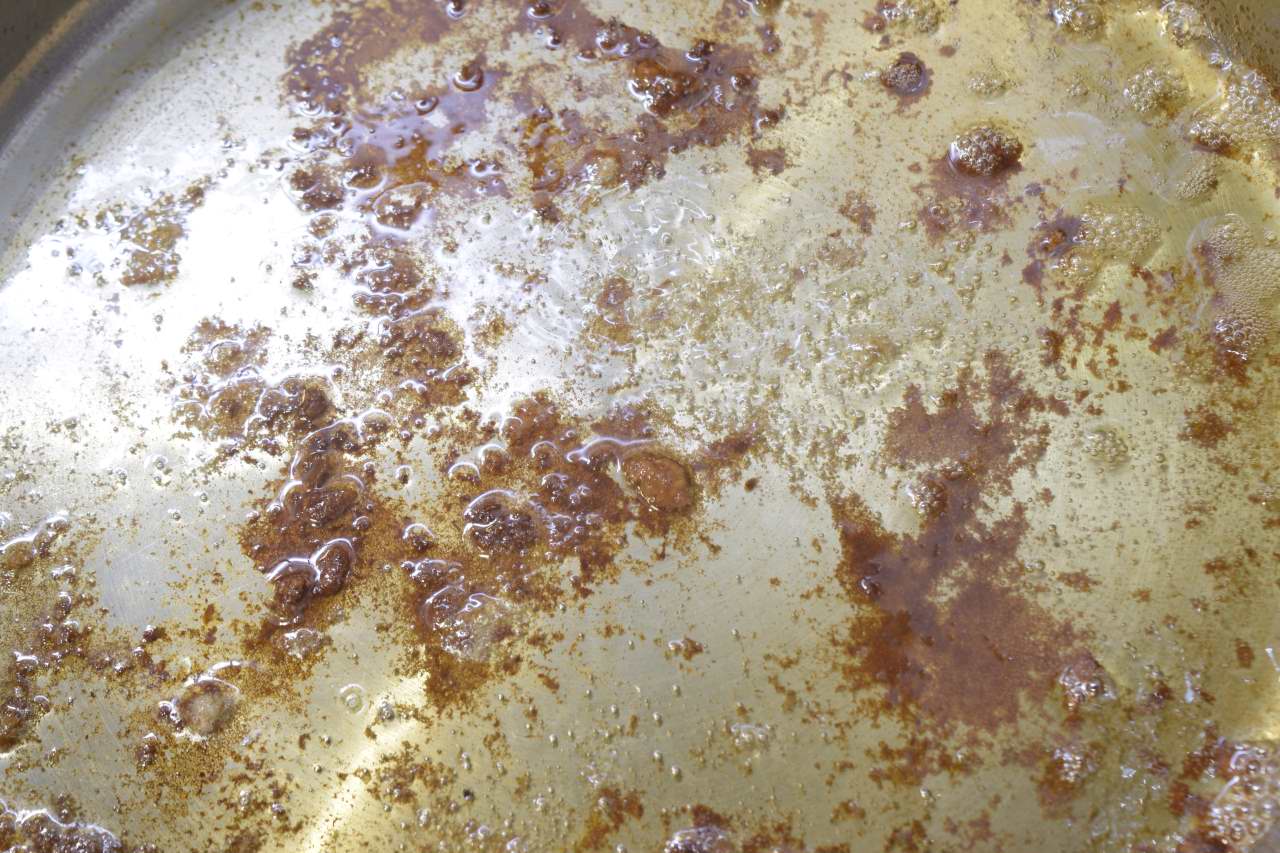
Many recipes tell you to pour the excess oil out of the pan, but that can be cumbersome and even dangerous if the pan is properly heavy. Fold two paper towels in half and lay in the pan.
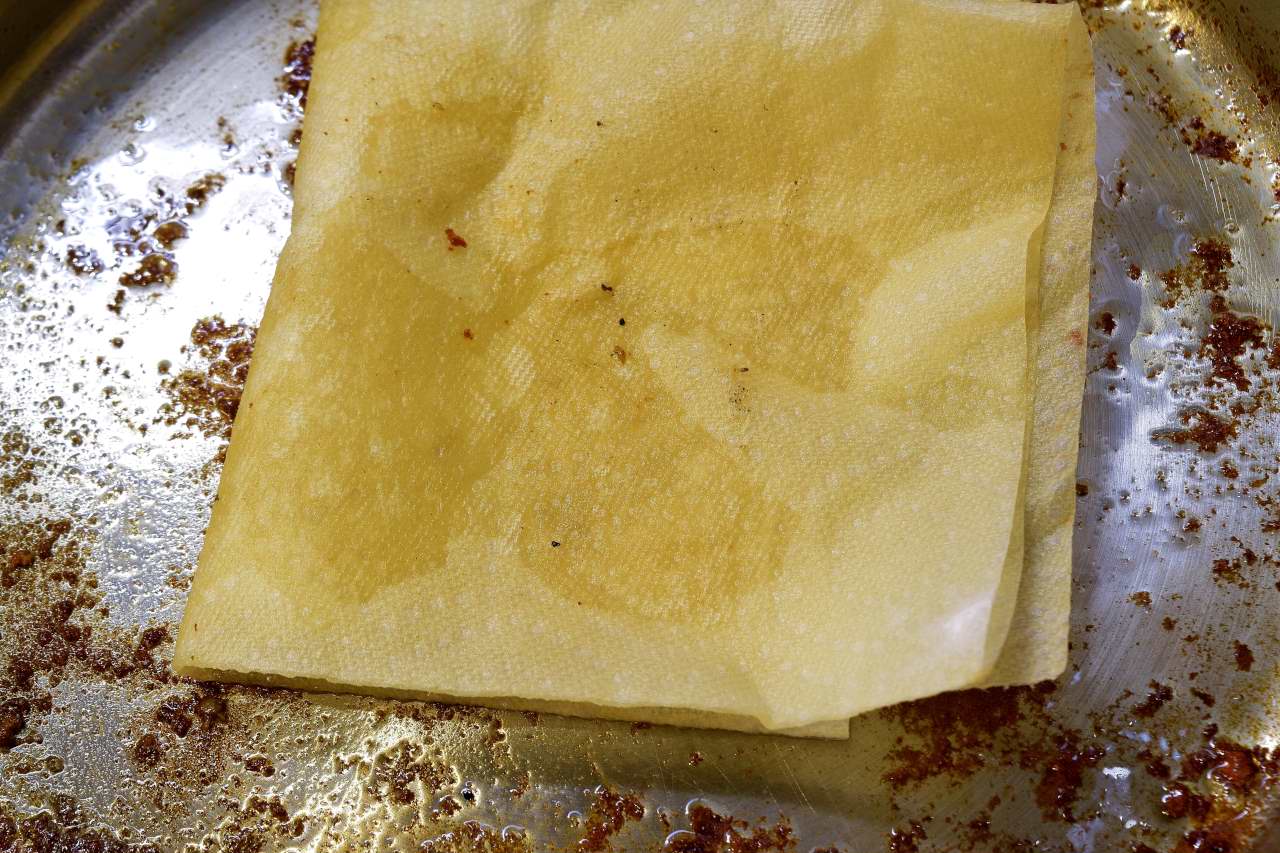
This will absorb all the oil. Use the tongs to remove the paper towels and discard.
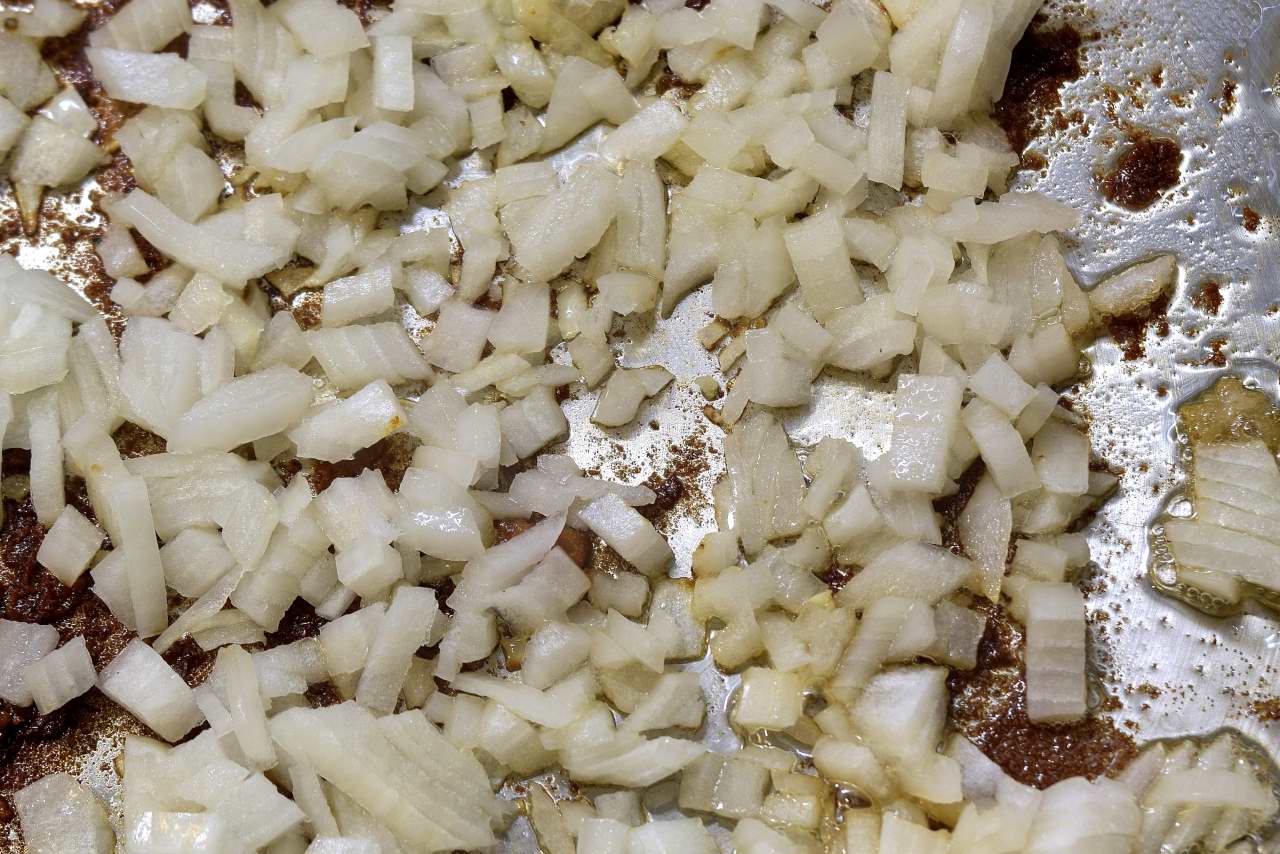
Add the onions and fry for 1 minute.
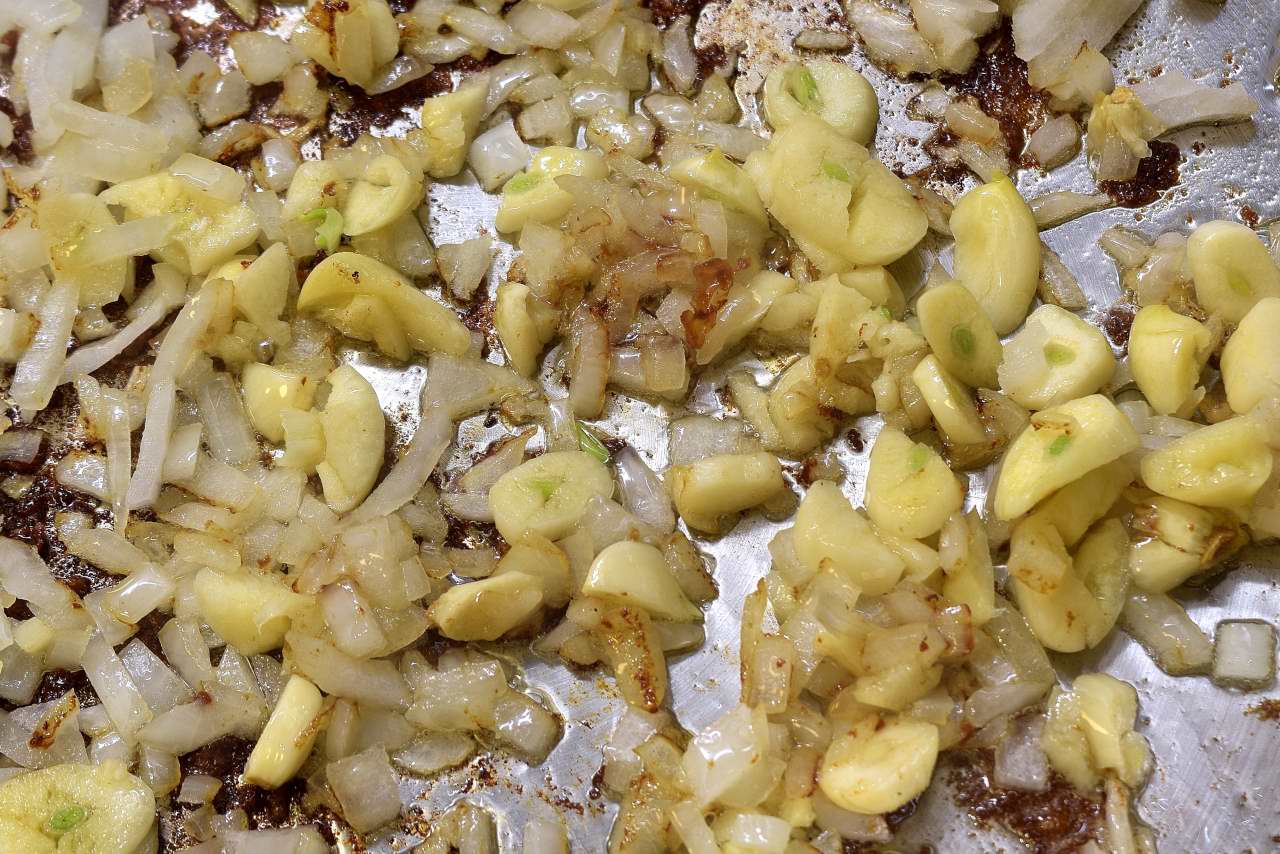
Add the garlic and continue frying, but do not brown.
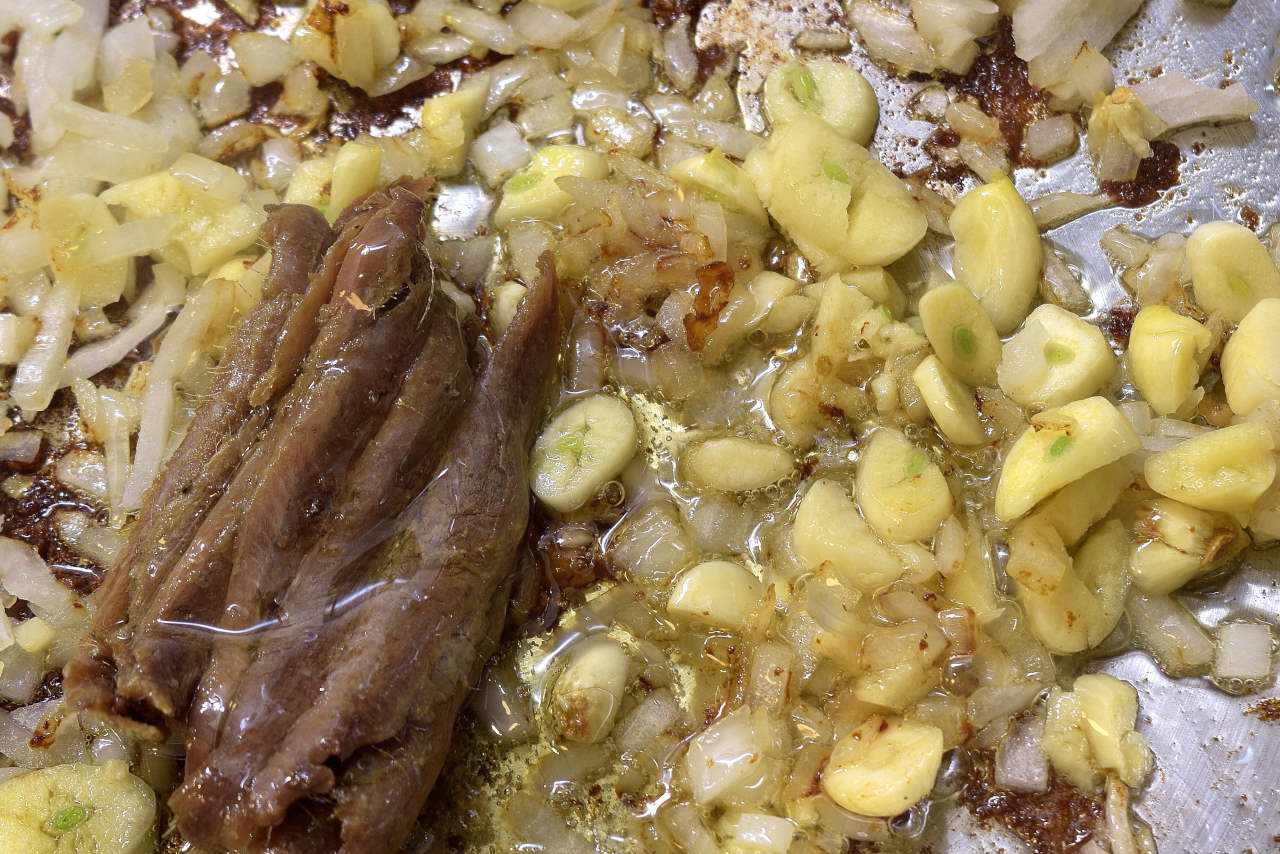
Add the anchovies and stir. Americans tend to resist the idea of combining seafood with chicken and other meats, but other cultures think nothing of it. Any time you put a dash of Worcestershire sauce in something, you are adding fermented anchovies, among other things.
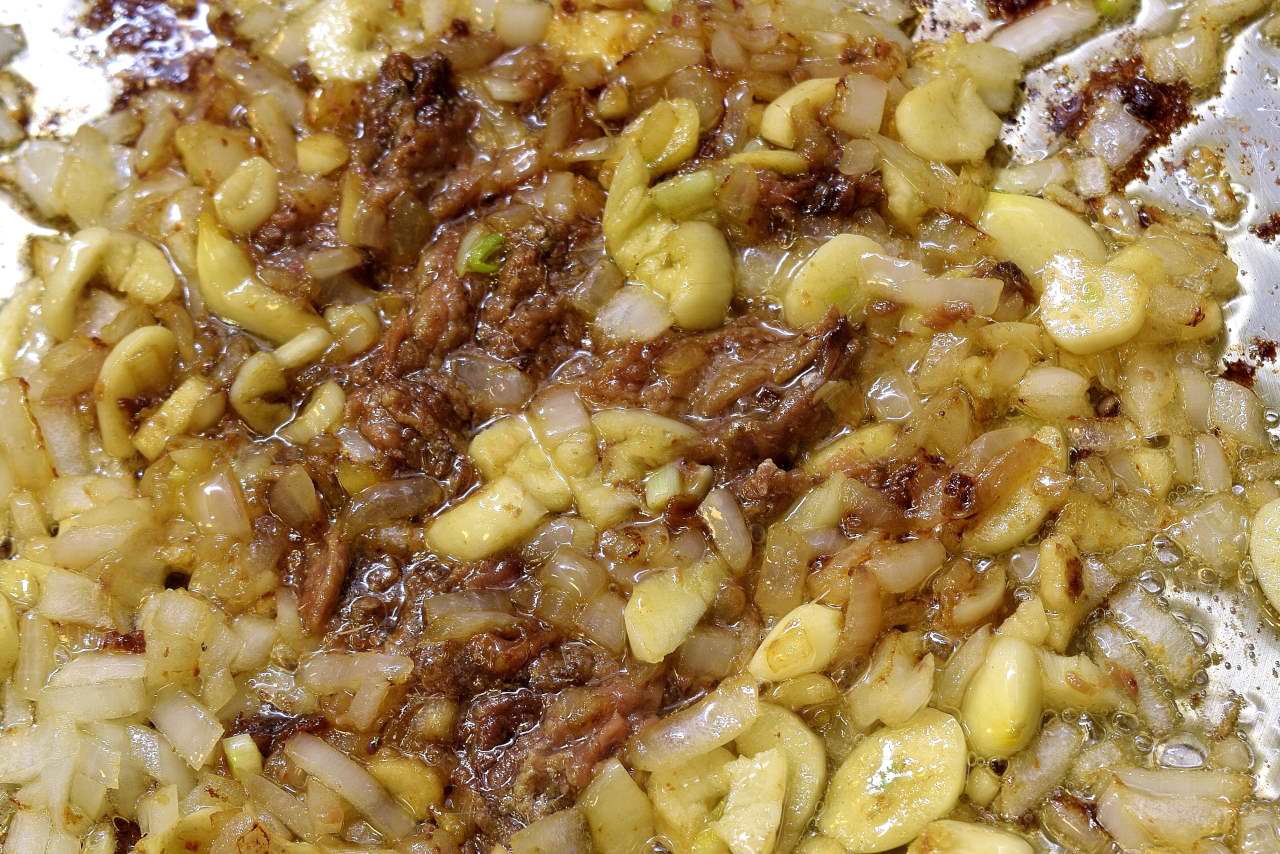
The anchovies will dissolve.
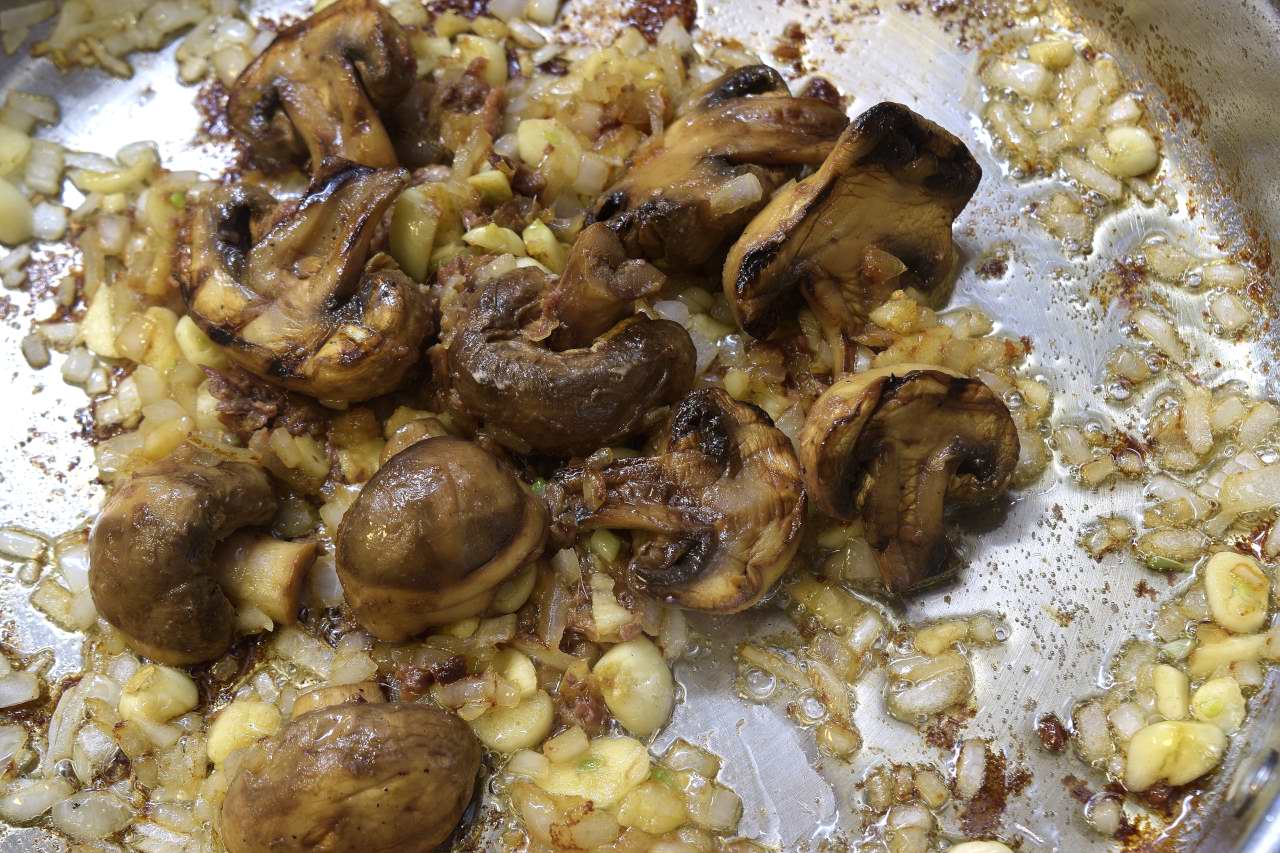
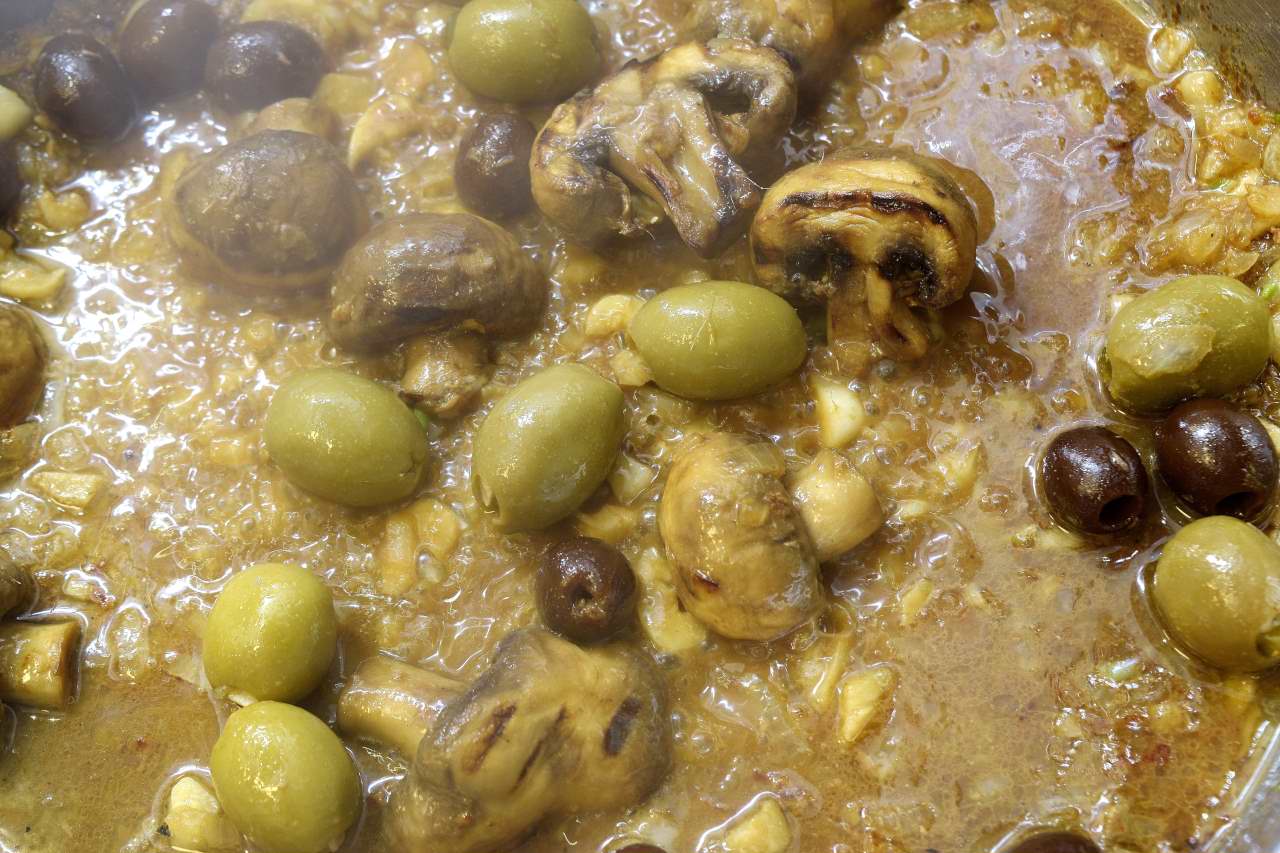
Add the mushrooms and fry until they wilt.

Deglaze the pan with the stock and stir with the tongs or a spatula to remove the drippings from the bottom of the pan. Reduce the stock to almost nothing, add the olives.
Add the whole tomatoes, leave the puree in the can behind for now.

Break the tomatoes apart, but not completely–this sauce should not be “smooth.”
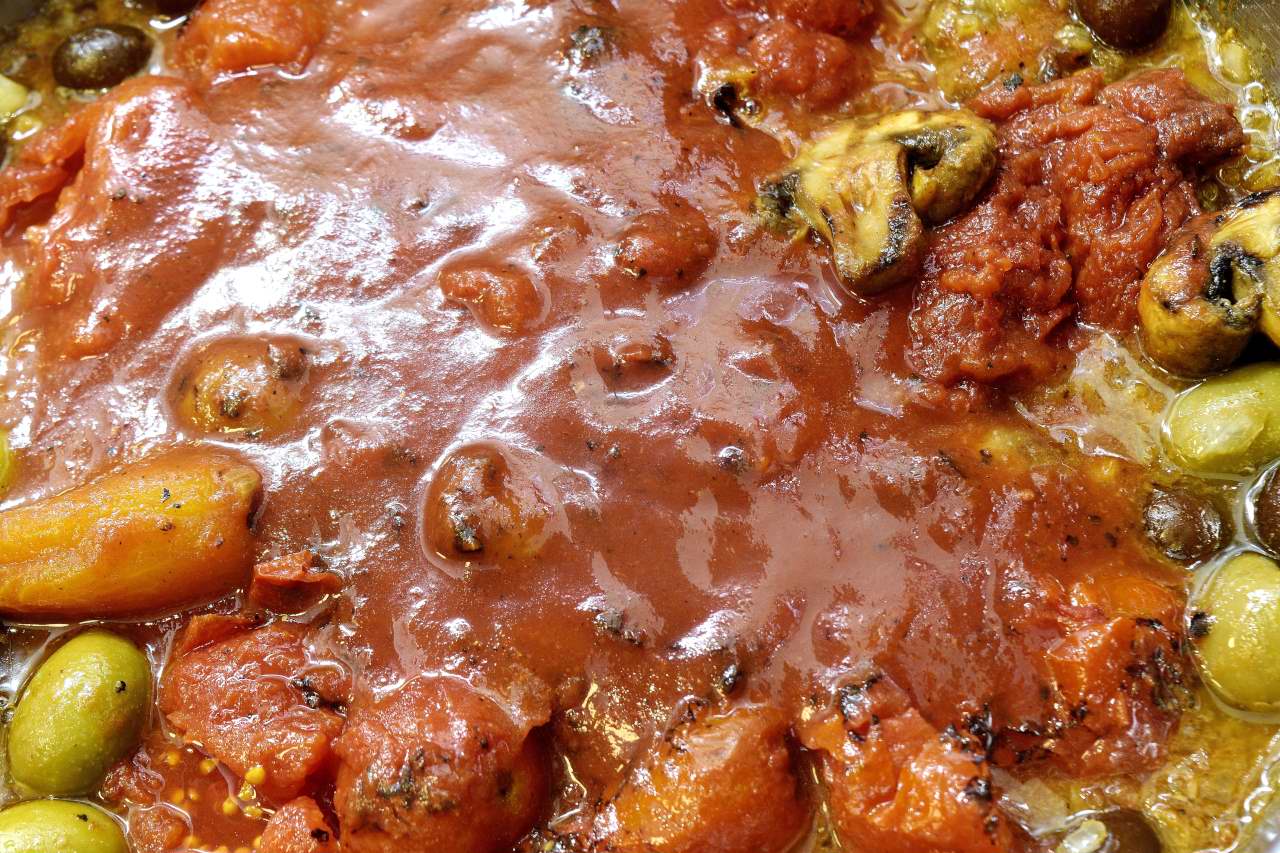
Add the sauce from the can.
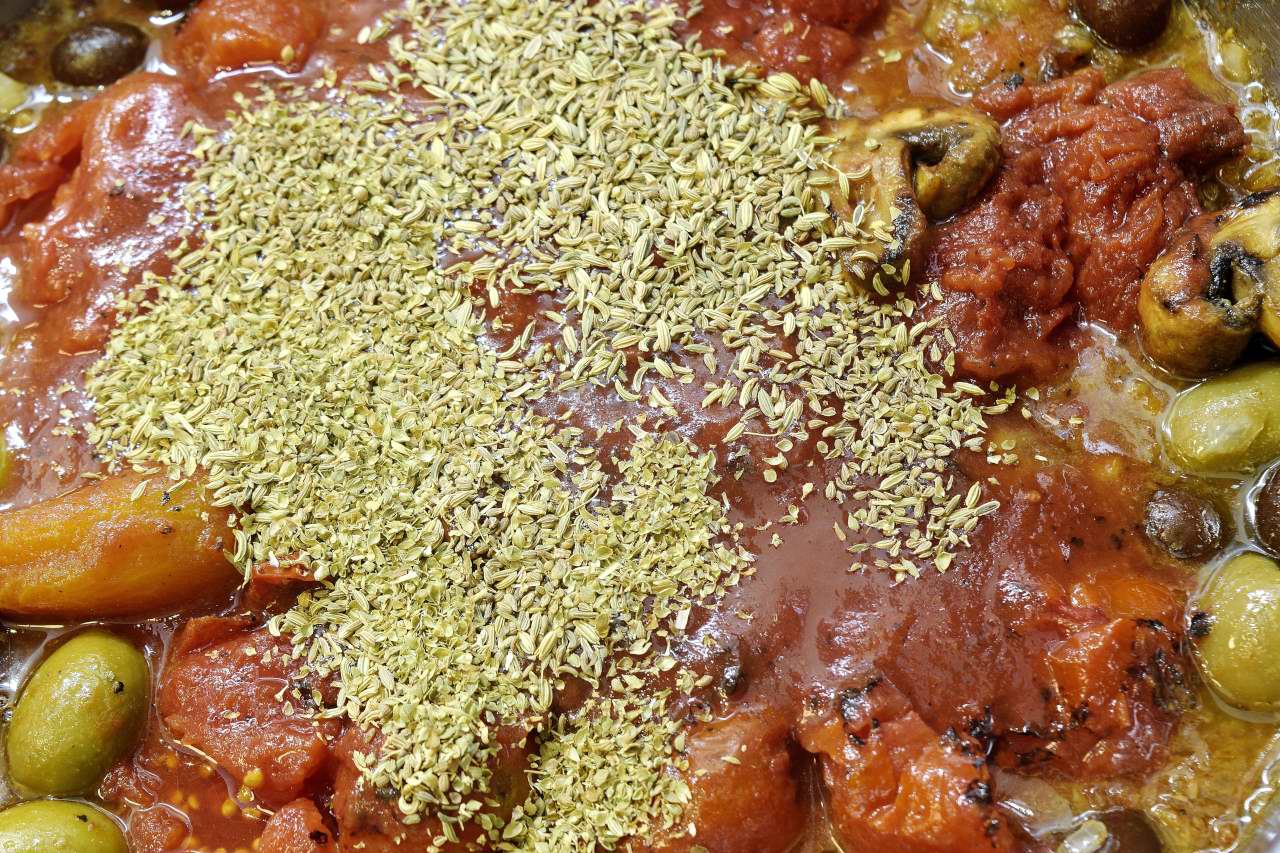
Add the fennel seed, the oregano, and the saffron (optional).
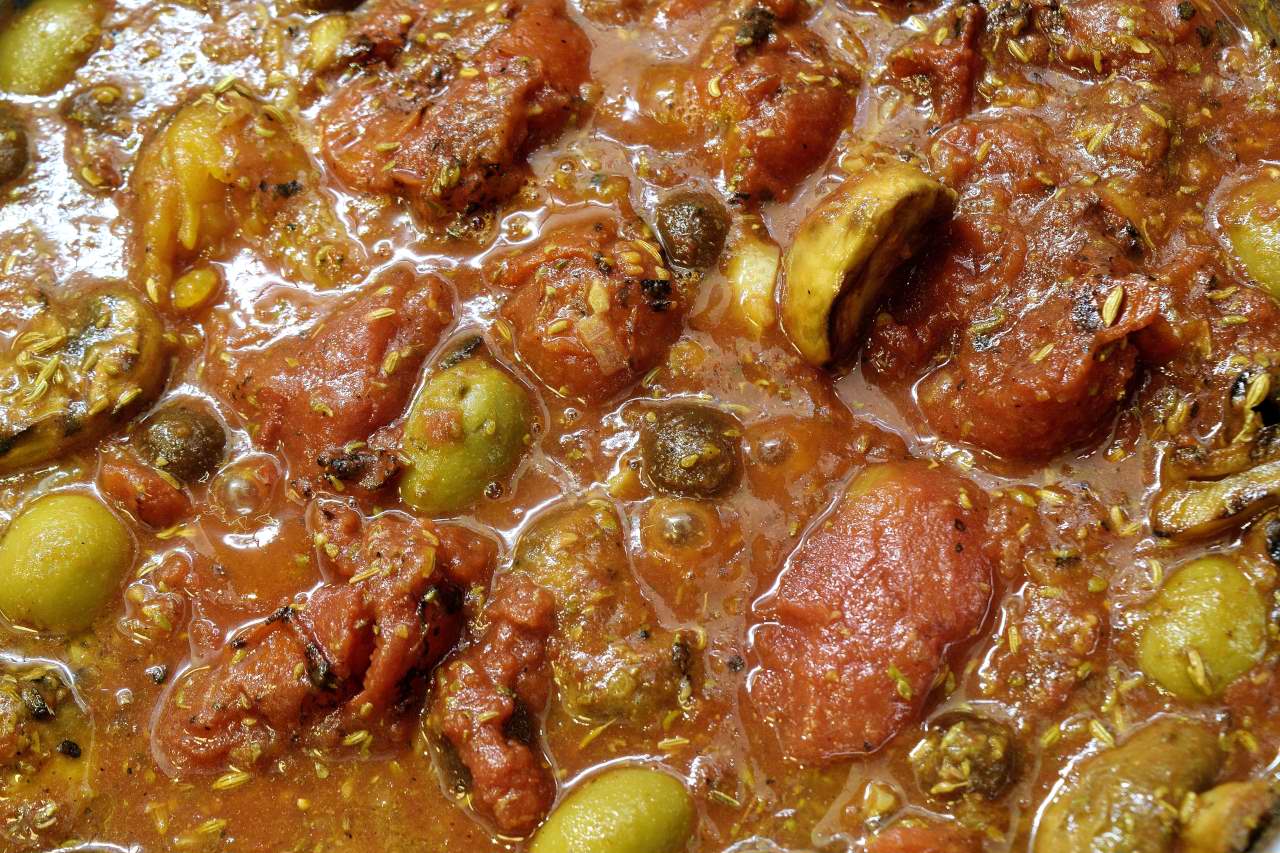
Bring the sauce to a simmer and taste for salt. The anchovies bring some salt with them, but you will probably need another two teaspoons or thereabouts–to your liking. Cover and set aside.
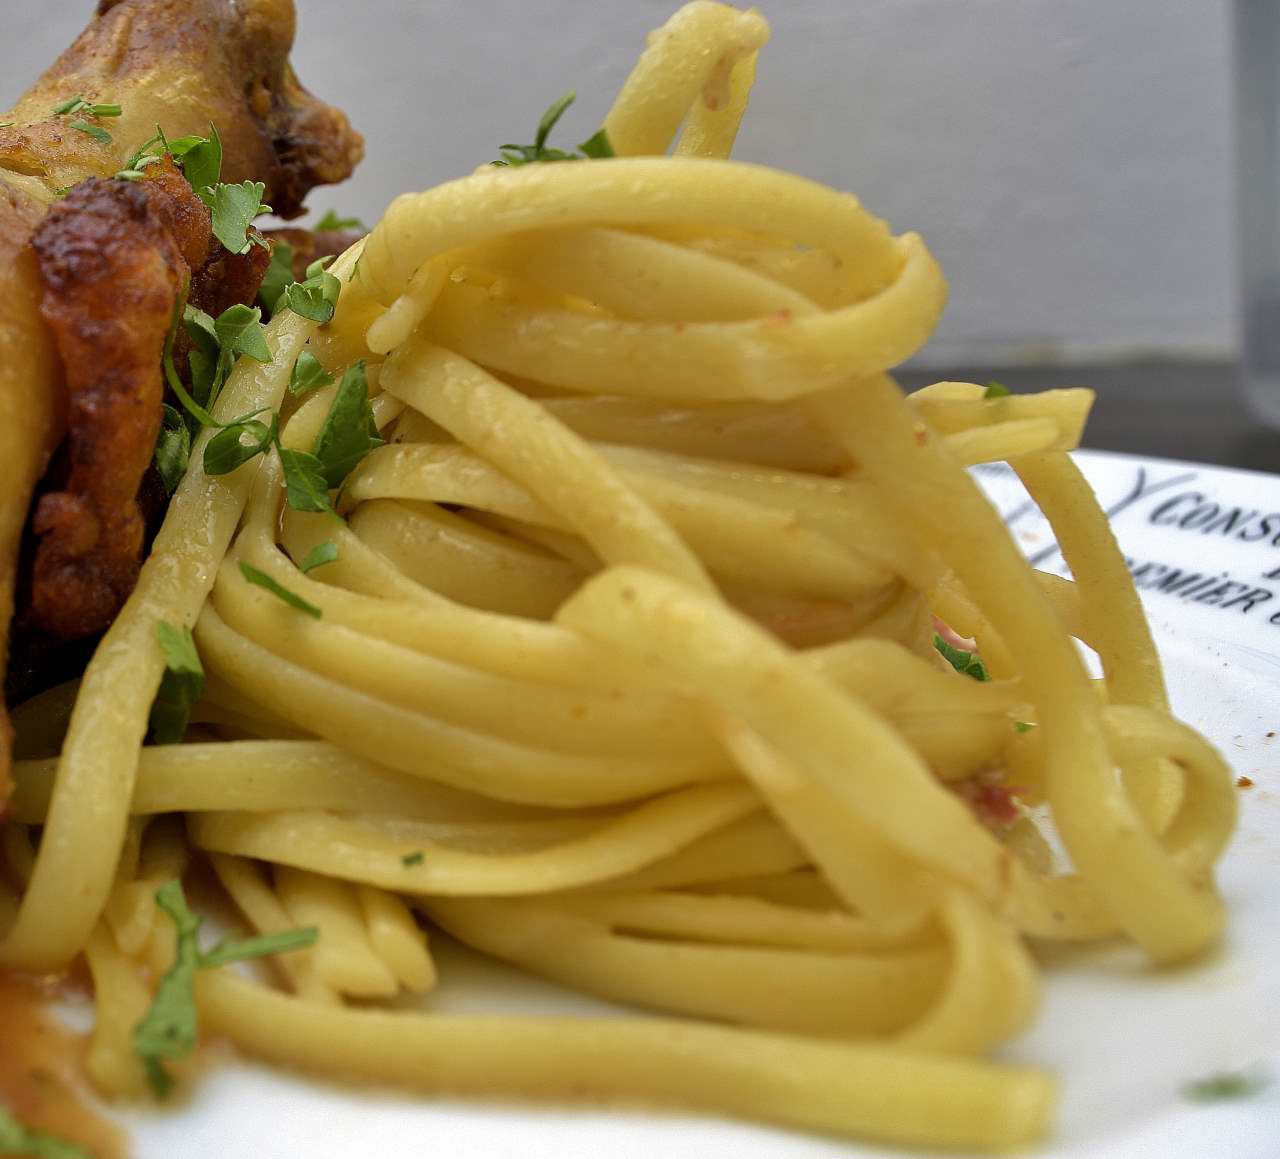
Cook the linguine as per the instructions on the package. When it is done, drain well, add the butter and a pinch of salt. Put a large spoon under the linguine. Insert a fork through the pasta from above and into the spoon. Rotate the fork and it will create a coil of pasta. Lift the fork and the spoon together, transfer to a plate, just off center. Remove the spoon first, and then lift the fork straight up so the coil remains.
Add the chicken to the sauce to coat it, but do not boil the sauce again. The chicken is done, the sauce is done–neither will benefit from being boiled again.
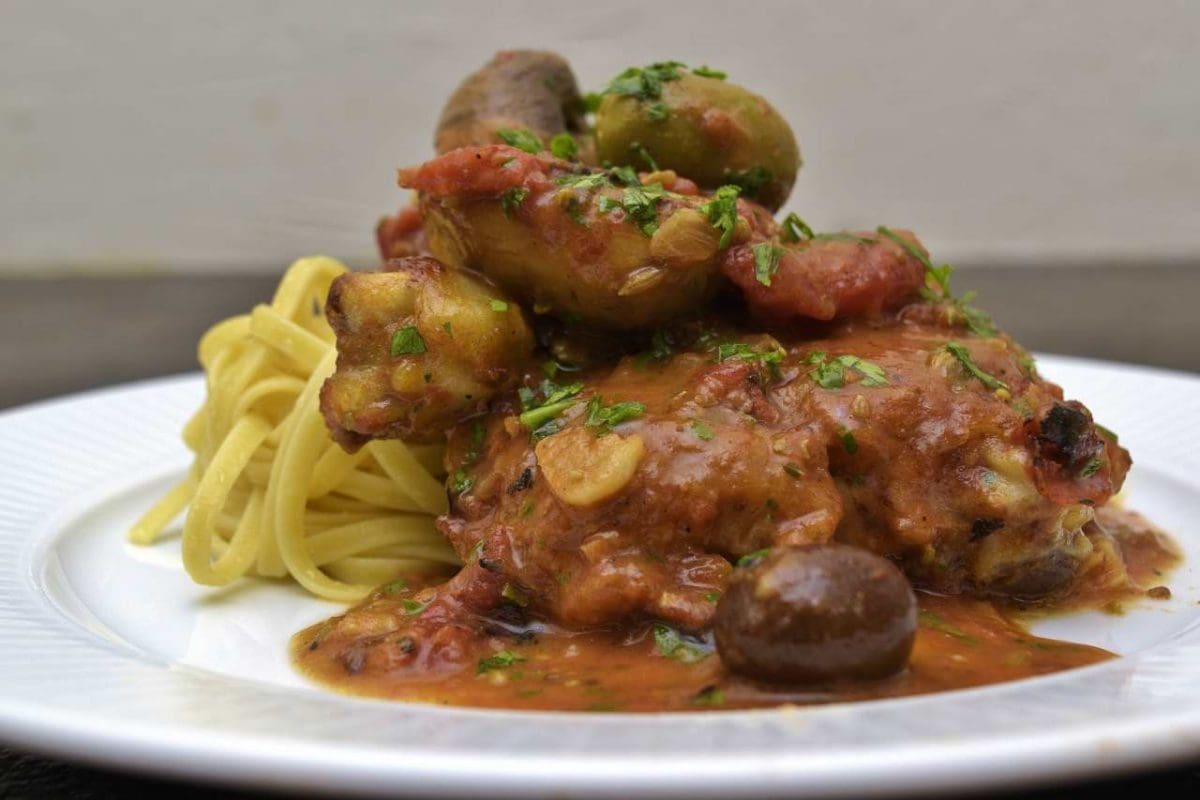
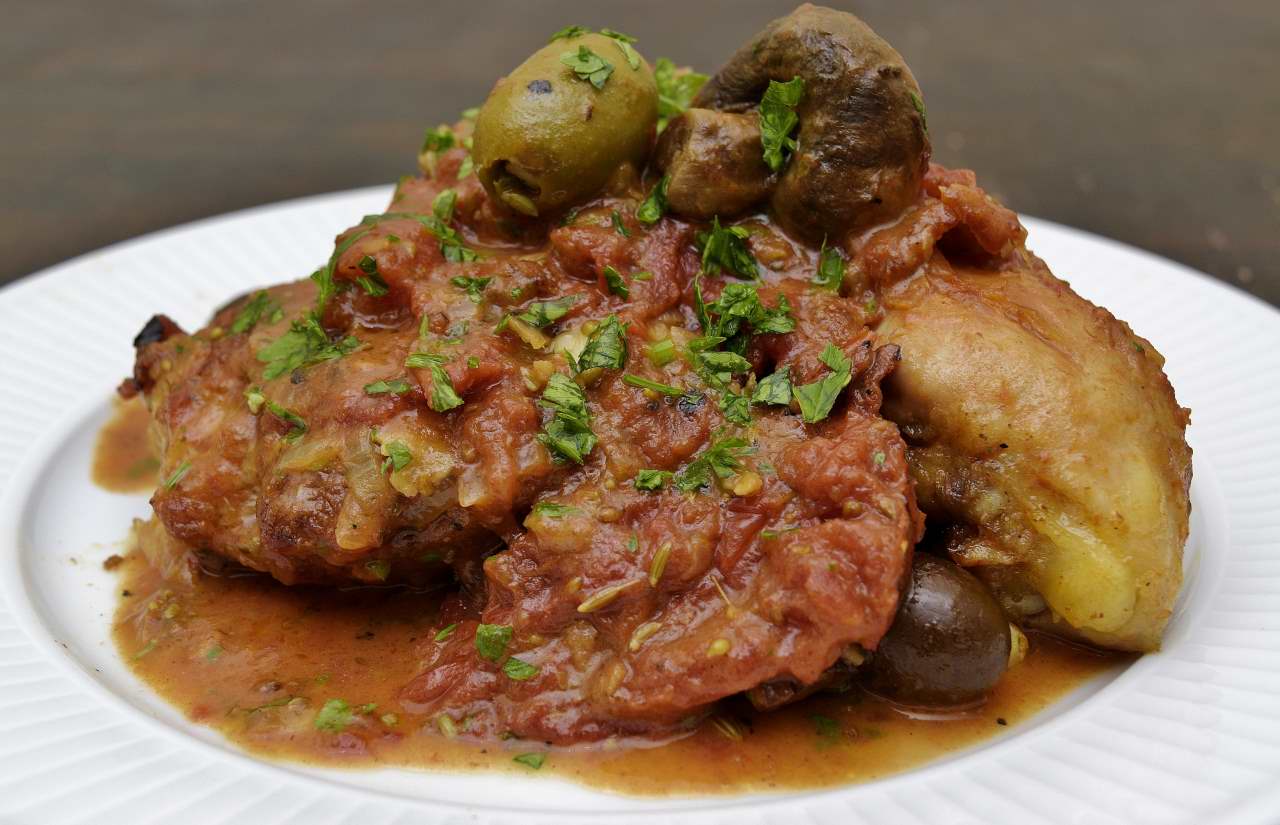
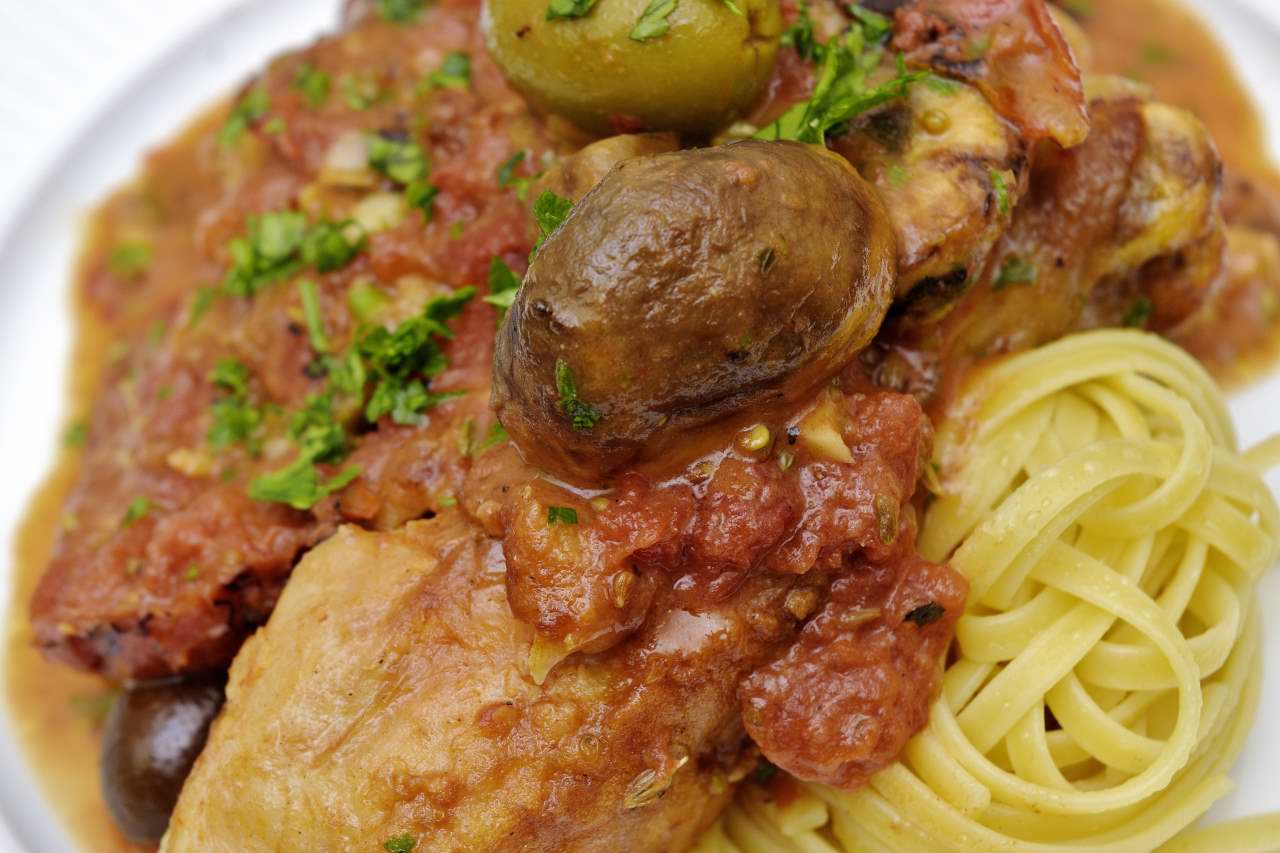
Place the thigh on the bottom and stand the leg up against it. Carefully spoon some sauce over the top, and arrange an olive and a mushroom on top. Sprinkle with a little chopped parsley.
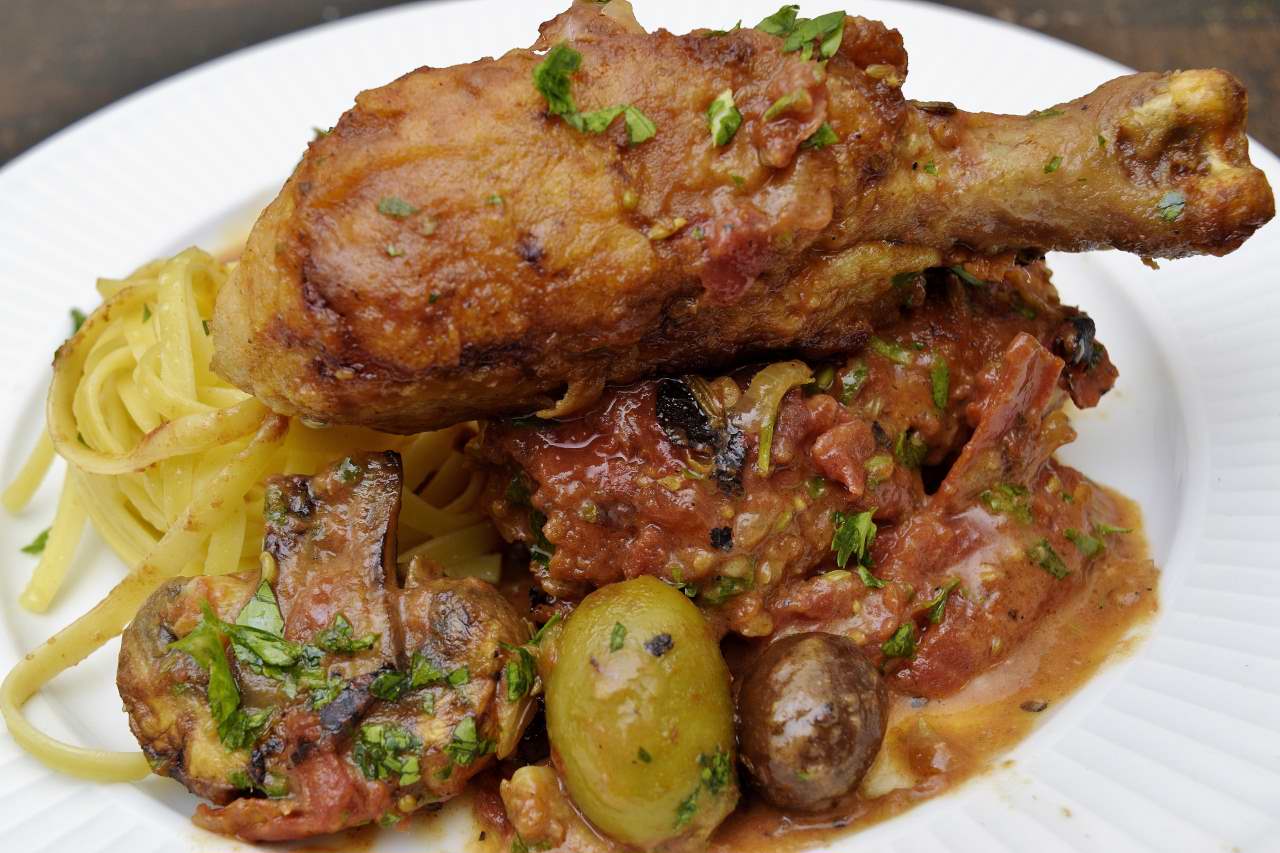
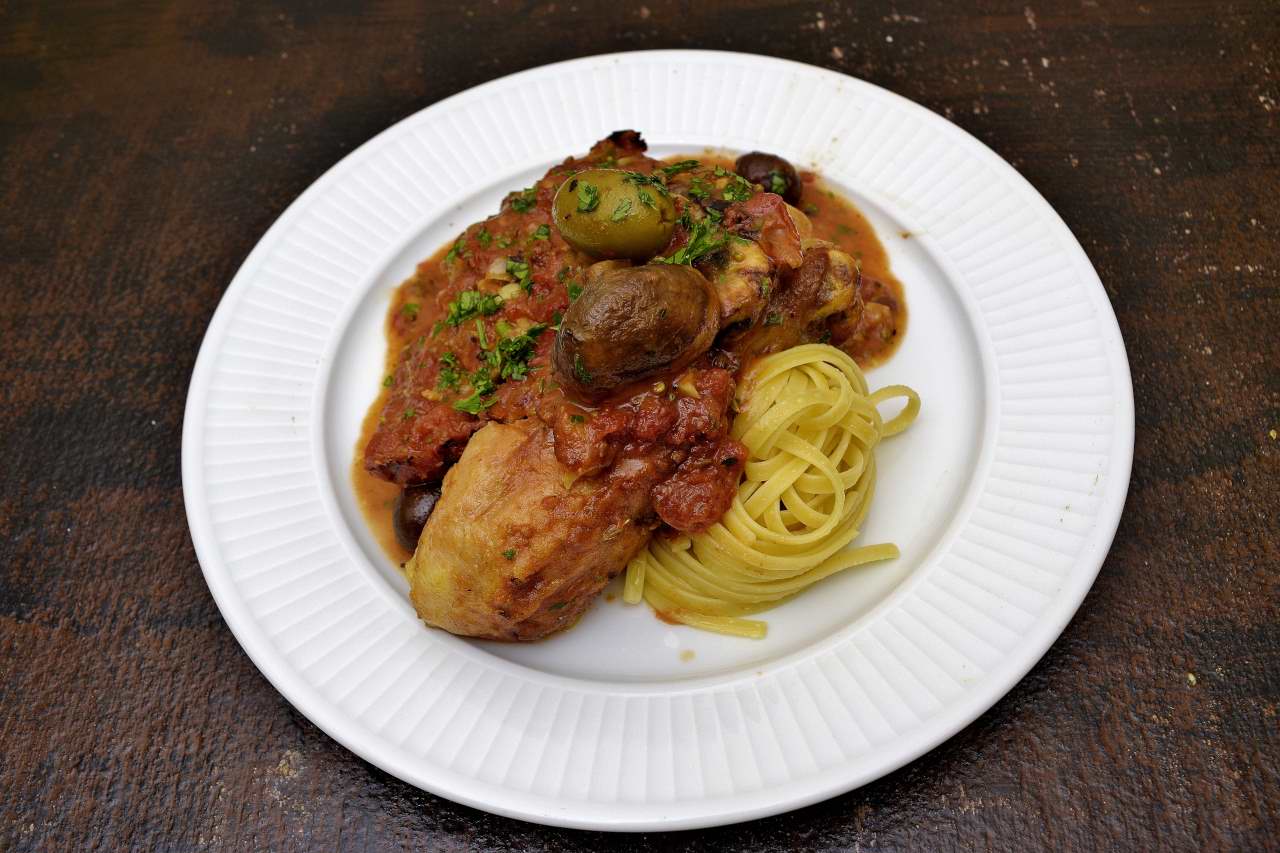
Here is an alternate presentation, which the chicken arranged on top of the sauce.
Since the chicken has been coated with the sauce, it will no longer be as crisp as it was when you fully rendered it in the pan. This is why cooks always want to rush through the browning step–they think it doesn’t matter because the chicken is going to be covered with sauce anyway. But crispness was never the intention.
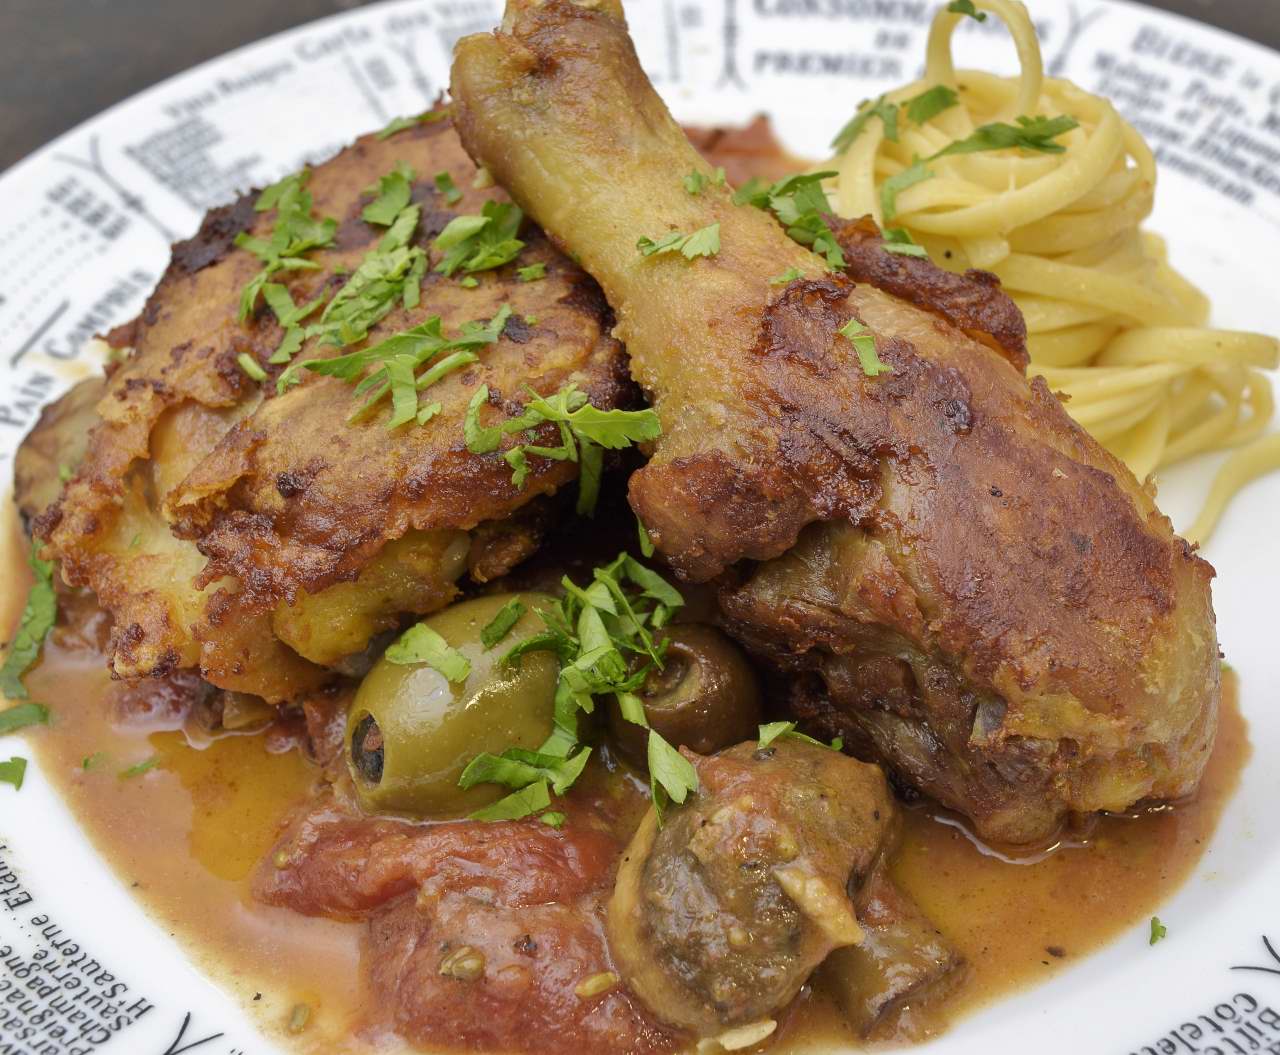
If you want to serve the chicken crisp, you can serve the sauce on the side.
 The intention of the browning process is to remove as much fat from the surface of the chicken as possible. This requires heat high enough to caramelize (and Maillardize) the surface. Then, at service, rather than having the all too familiar “rubbery” texture, the skin will be practically undetectable.
The saffron adds a golden glow to the otherwise dark red hue of the tomatoes. This is also evident in other Mediterranean dishes like Bouillabase.
Norm King